Power Kite Forum

My buggy build

van - 2-11-2010 at 05:54 PM

Ok.. so I got too much time on my hand even with the all the backyard projects my wife been giving me. I decided to design my own buggy and hopefully build it in the next 2 weeks so I can have it ready for DBBB. It's a very enthusiastic goal considering I haven't thought about how I will engineer the steering yet.

Criteria:

1) Must be unique ( single swing arm fork ) :singing:
2) Must use easy to obtain parts -- minimum fabrication
3) off the shelf tires and rims ( from ATV and gokarts)
4) super cheap!!
5) suspension -- optional , will add if I have time

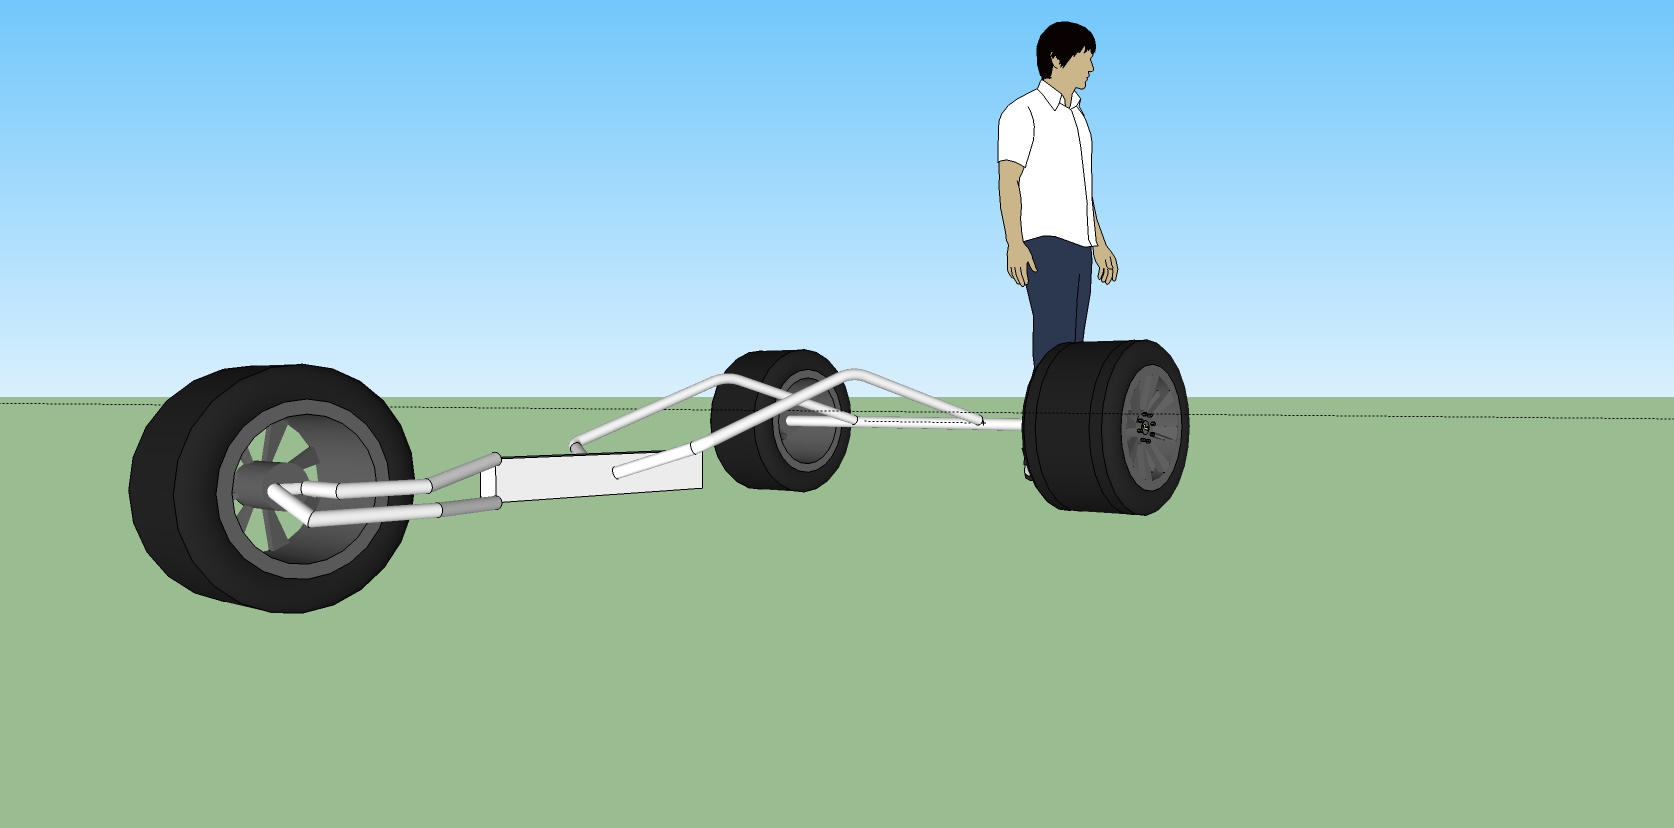
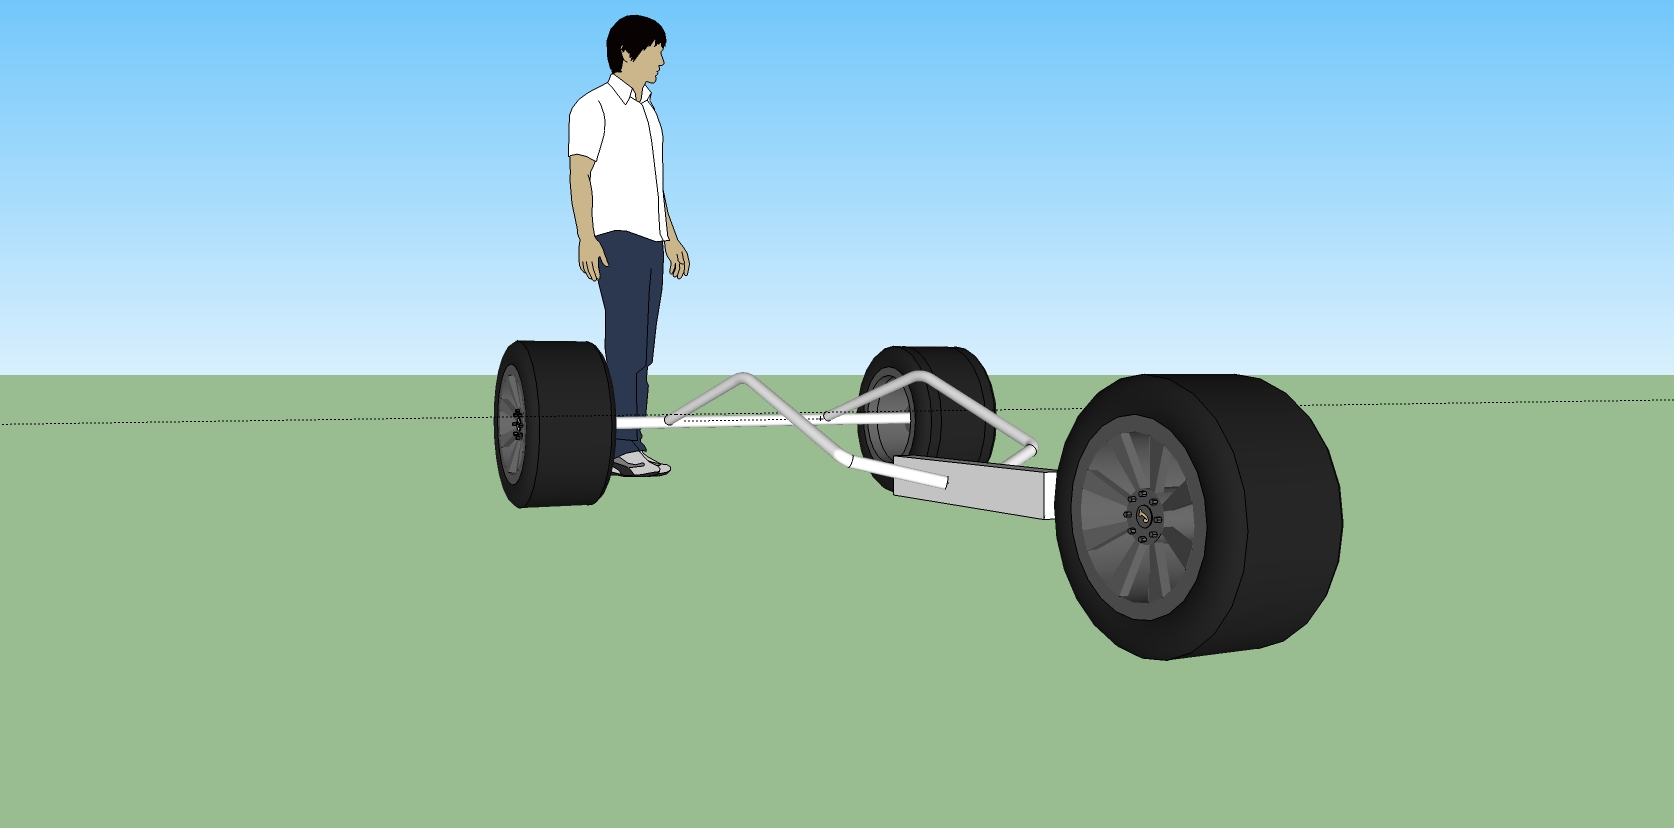
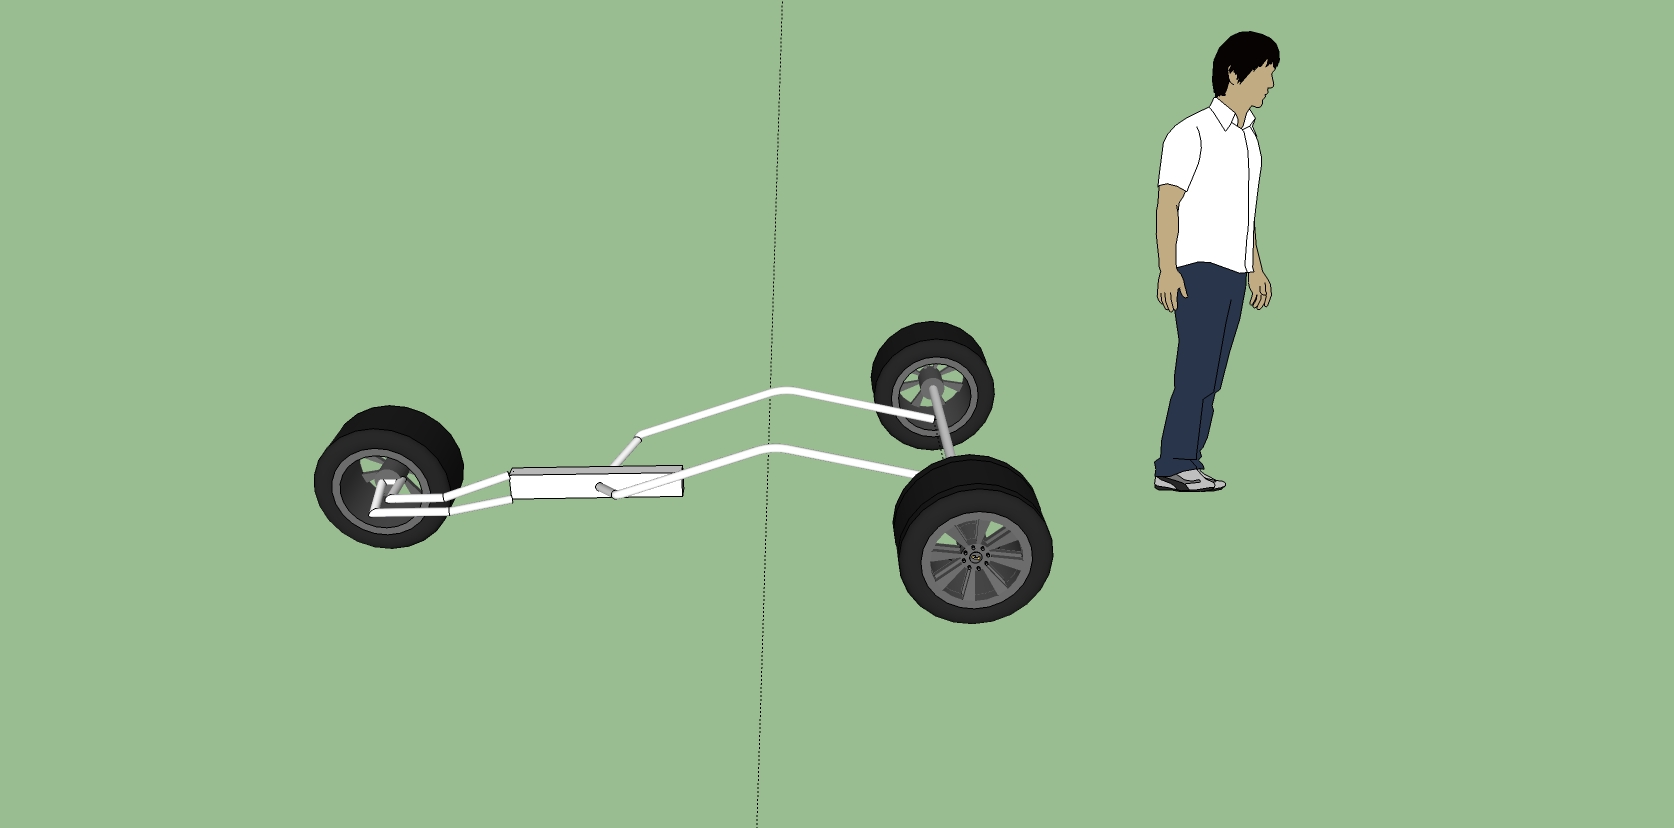
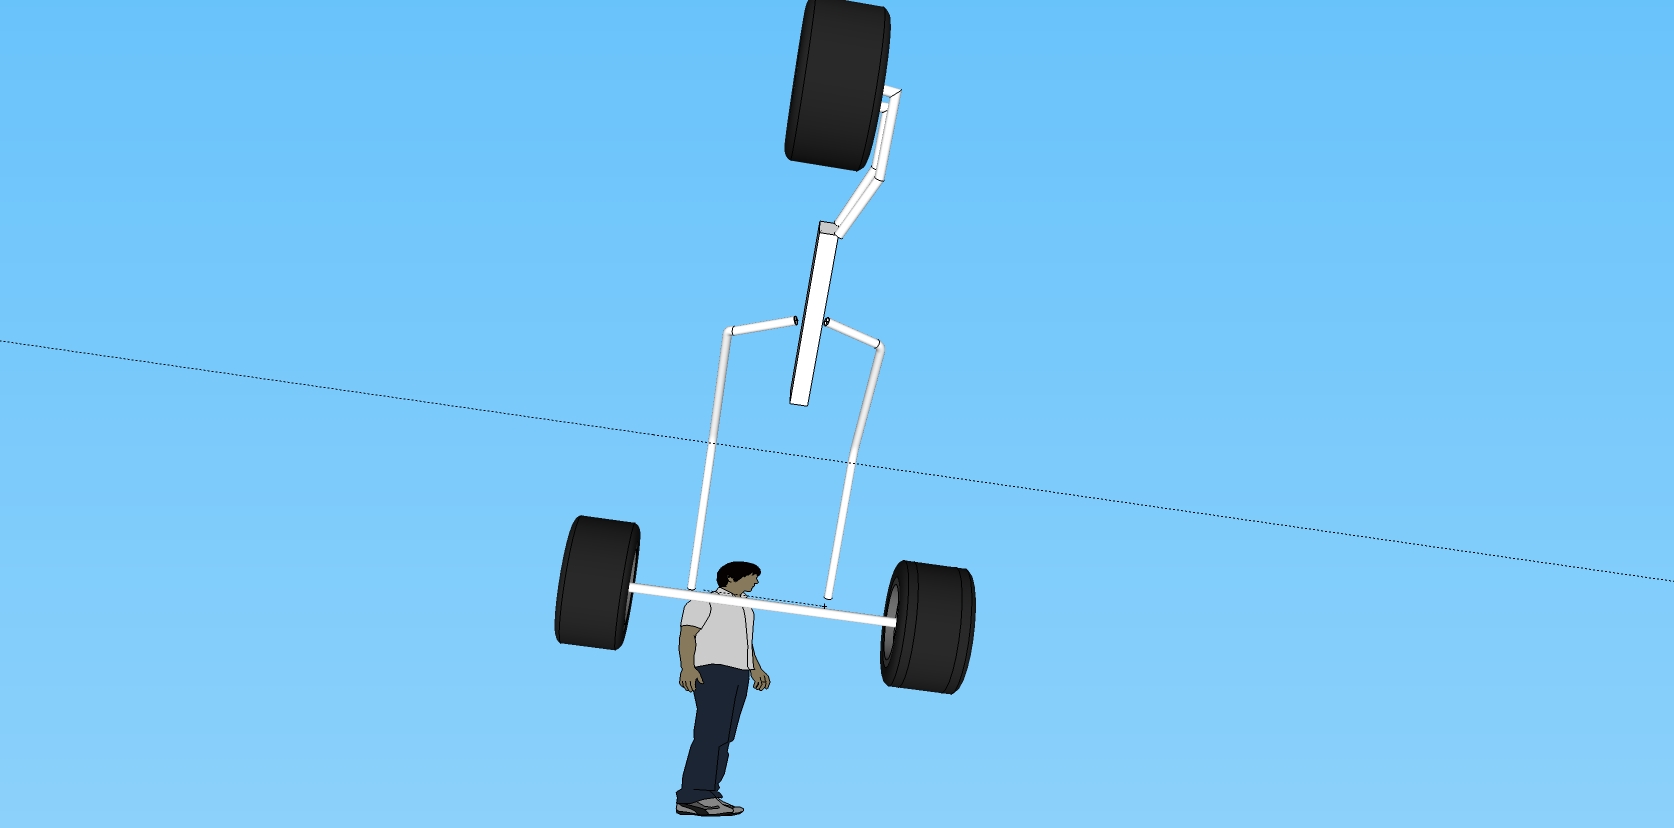
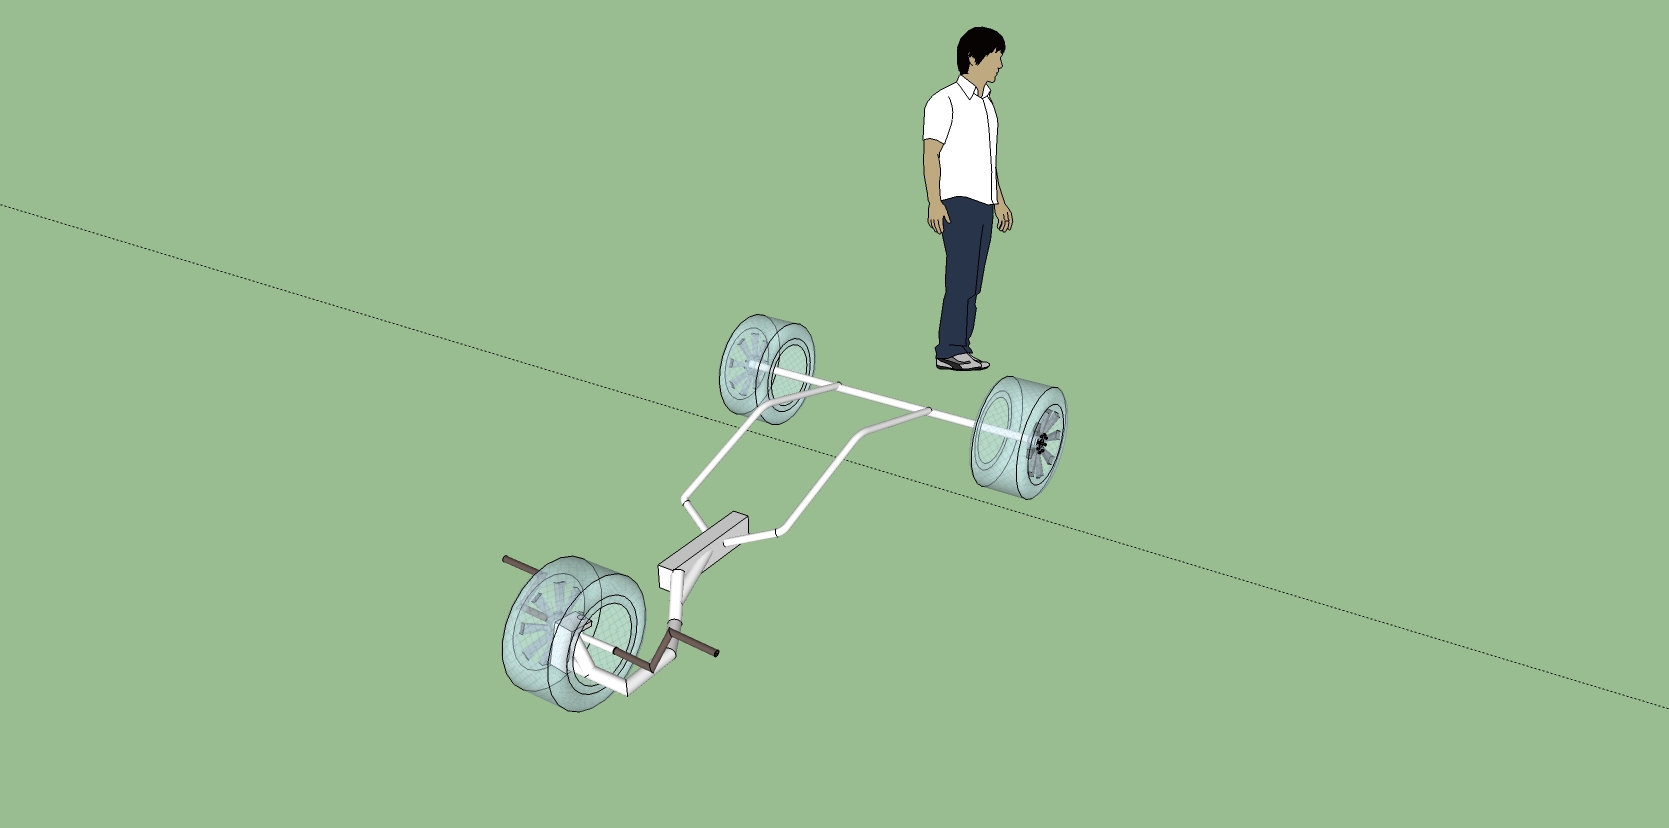
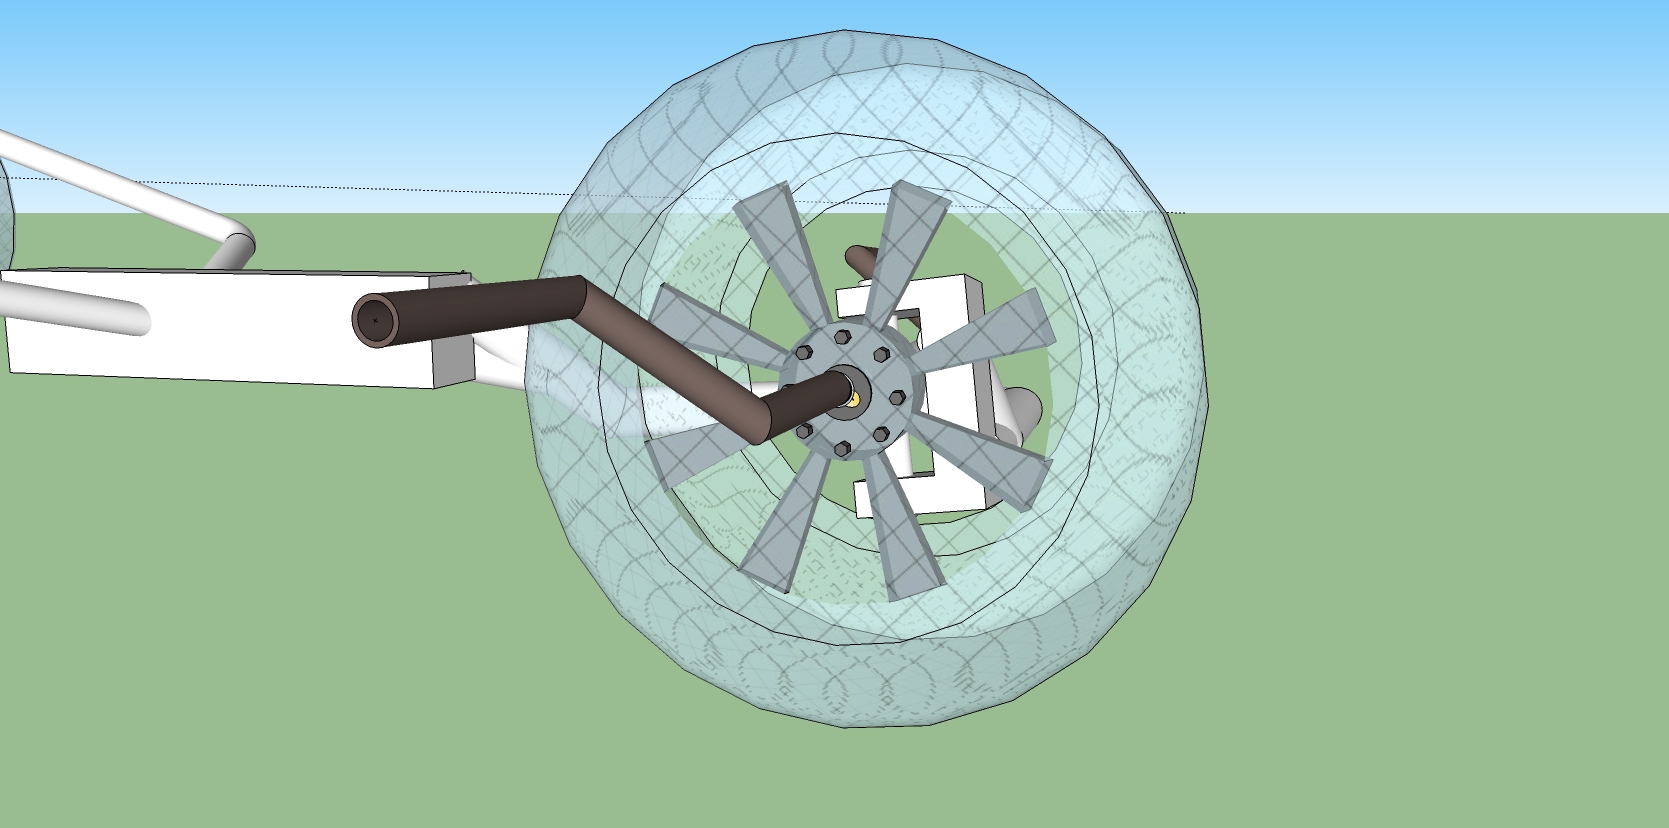
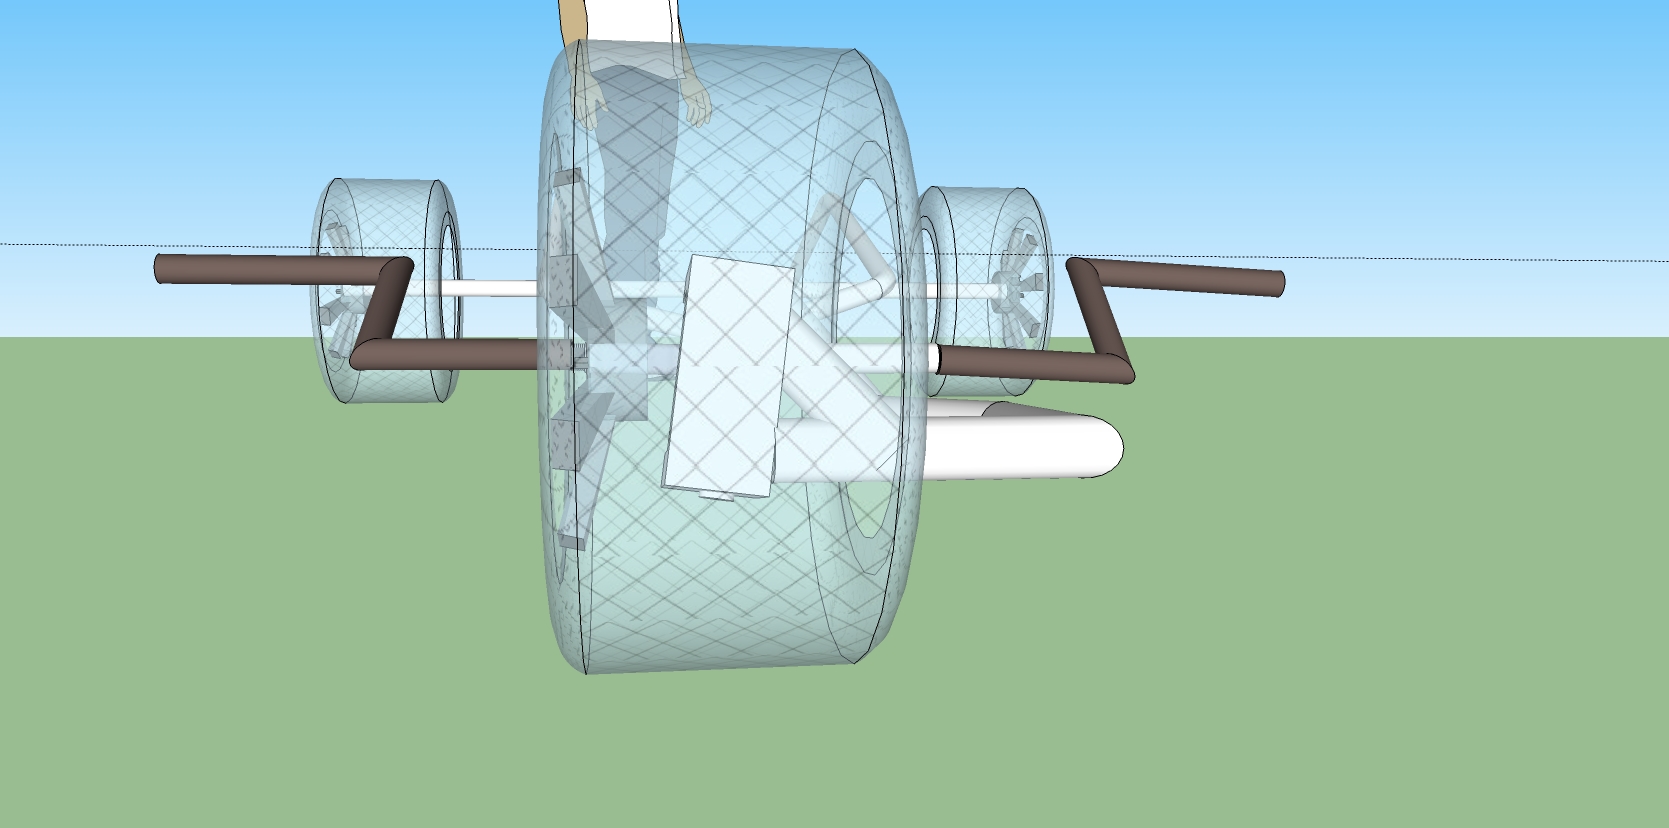
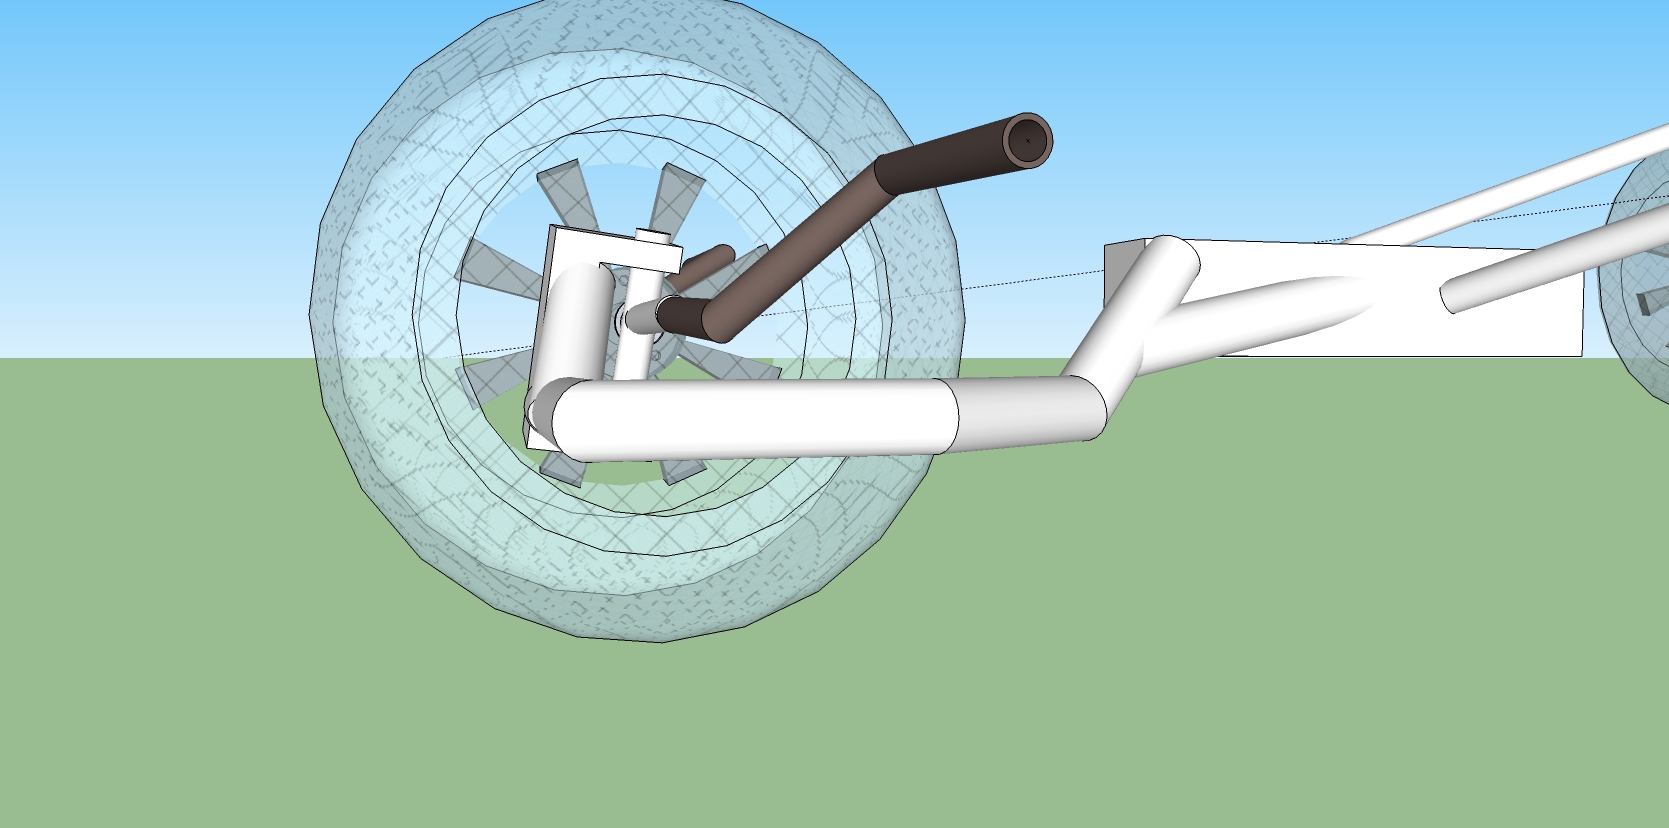
Here's a quick sketch I made tonight.


So far, I've ordered:

1) bigfoot tires -Nanco 22x12x8
2) 8"x8" ATV rims with 4 on 4 bolt pattern
3) hubs to match rims
4) gokart spindle kit
5) steel tubings

things to figure out : seats

Since I am using a one piece rim , can I get away with not using inner tubes on my bigfoot tires???

DAKITEZ - 2-11-2010 at 07:06 PM

looks cool, but how do you steer it?

van - 2-11-2010 at 07:23 PM

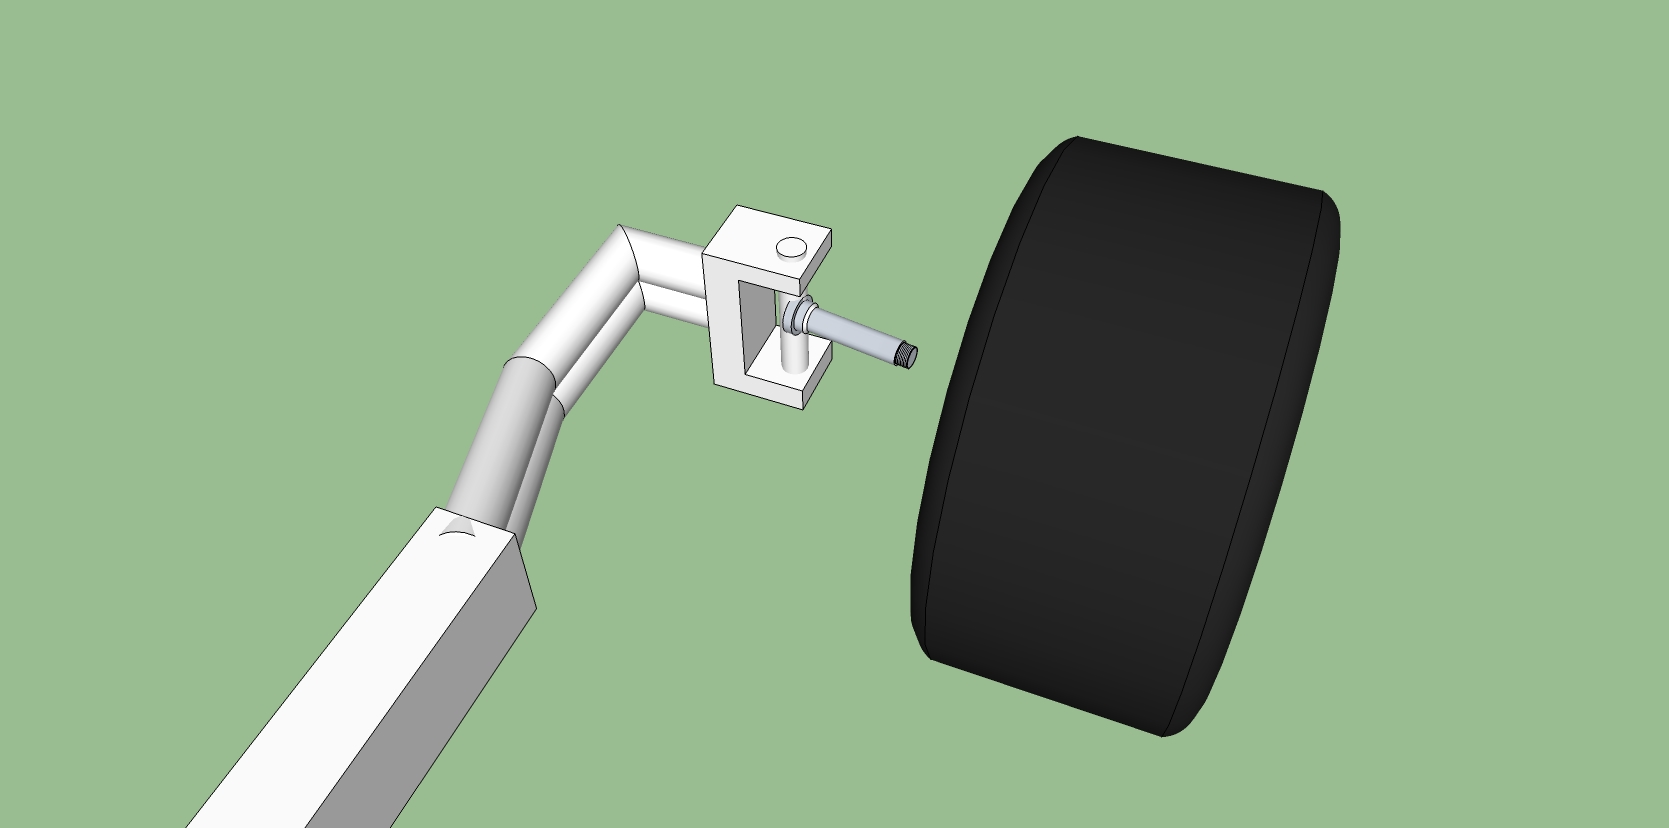
haha.. still trying to figure that out. I guess I need to somehow rig up foot pegs that will connect tothe backside of the hub and wrap it around the other side. The idea is to still keep it functioning the same as a regular buggy. Since the hub is design with regular bearings that will allow a bolt all the way through, I can always go back to regular forks.

DAKITEZ - 2-11-2010 at 07:30 PM

bummer ... I thought you had some trick idea how to make the single side swing arm work.

van - 2-11-2010 at 07:40 PM

One option I thought about doing is keep the front fixed and have the back wheel turn!! It wouldnt' be too hard to accomplish with some linkage. Basically take a reverse trike with front wheel steering and turn it 180 degrees.

van - 2-11-2010 at 08:49 PM

I will have a spindle in the front to allow the front wheel to turn. Just need to figure how to attach a foot peg system to control it.


indigo_wolf - 2-11-2010 at 09:02 PM

Not to be a wet blanket, but the reverse trike could have some issues:

"Rear wheel steering can tend to be unstable because in turns the steering geometry tends to decrease the turn radius (oversteer), rather than increase it (understeer). A rear wheel steered automobile exhibits non-minimum phase behavior. It turns in the direction opposite of how it is initially steered. A rapid steering input will cause two accelerations, first in the direction that the wheel is steered, and then in the opposite direction: a "reverse response." This makes it harder to steer a rear wheel steered vehicle at high speed than a front wheel steered vehicle." (Wikipedia entry for "Steering")

Another concern is that you would have two spinning wheels.... possibly spinning very quickly. This would be happening just behind your line of sight in some cases. The possibilty of a body part or other obstruction coming into the path of rotation is too easy to imagine.

ATB,
Sam

van - 2-11-2010 at 09:41 PM

Thanks for the info. I figure there's some good engineering mind out there. I guess it's back to front steering then!! I was thinking maybe a pedal right behind the front wheel that has a linkage to the steering arm off the spindle.

rocfighter - 3-11-2010 at 05:02 AM

One foot peg option is to have a cap nut fasten onto the end of the spindle coming out of the hub and attach a foot peg to it. You will need to alimanate the dust cap and use a dust seal instead. This is the only downside I can see.
Of course this only helps with the right side peg. You still need to have a peg on the left where your steering spindle will be.
Move away from the problem for a short time and focus on something else. Then it will hit you like a ton of bricks and you'll wonder why you didn't think of it sooner.
Best of luck with the build.

van - 3-11-2010 at 05:54 AM

Why didn't I think of that!! I actually already know how I'm gonna do the left side. I will have a bracket attached to the spindle itself like on a gokart and then attach a foot peg to that. On the right side, I forgot that the axle bolt goes all the way through. The hub has 5/8" bearings to accept a bolt so I can get pretty much any length. The way the hub is designed, you can use regular forks. The reason I want to make this design work is because it does not limit the tire width.

snowspider - 3-11-2010 at 06:13 AM

Take a look at blowkart steering , you might find a solution there.

van - 3-11-2010 at 07:46 AM

I thouht blowkart steering is with the hands? It looks like they just lean the front wheel instead of actually turning it base on the angle of rake. I've never seen one in person so not really sure if you could apply their steering technology to such a wide tire like a bigfoot.

rocfighter - 3-11-2010 at 07:48 AM

Spider most blowcarts are hand steer. But some may be foot steer.

van - 3-11-2010 at 07:56 AM

I just talked to a buddy at work and we came up with an idea to extend the spindle/front axle so it protrudes to the left. I will need to turn the spindle bracket so it faces backward. I will also need to lower the front arms so that it is lower to clear the pegs. On the right side, an attachment to the bolt with some kind of extension nut like Rocfighter suggested. I will draw it up when I get home tonight. If this works, this will be a cool looking buggy!!

shehatesmyhobbies - 3-11-2010 at 10:10 AM

The Manta land sailer does have foot steering that may come in handy for you. google a pic of it and see what you think! The foot pads are mounted on a single bolt through the frame then has linkage that goes up to the fork! Looks relatively easy to duplicate!

popeyethewelder - 3-11-2010 at 11:10 AM

Arrrh I knew I had one somewhere

Third from last photo....I think this is what you are trying to do

van - 3-11-2010 at 12:40 PM

ptw,

the foot peg in that picture was close to what I wanted to do but it seems like every previous build have been to take the easy way out and have the pivot point behind the front wheel or use a rake angle that would cause the front wheel to lean over instead of actually turning. I want to keep the front wheel turning on teh same axis as it would with a regular fork setup.

van - 3-11-2010 at 02:29 PM

well I found out the technical term of what I've been trying to describe. Implementing it is another story.

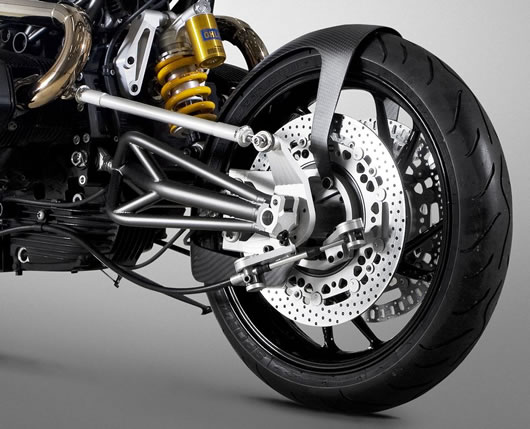
It's called Hub-center steering. It's use on some of the motorcycles out there. It can be use on single or dual side arms.


here's a little read up on it for you geeks out there.

http://en.wikipedia.org/wiki/Hub-center_steering

indigo_wolf - 3-11-2010 at 07:06 PM

James Parker RADD.... Yahama Morpho..... thanks for the trip down memory lane....sigh.

ATB,
Sam

Morrie Williams - 3-11-2010 at 07:14 PM

Here's some shots of some of Peter Lynn's early buggy steering systems:

100_0542_800.JPG - 212kB

Morrie Williams - 3-11-2010 at 07:19 PM

Here's the other photo:

100_0541_800.JPG - 181kB

van - 3-11-2010 at 07:38 PM

Morrie,

I can see why they went away from that. Doesn't look like it would work very well with the pivot point so far behind the wheel. Glad to know Peter Lynn was so creative back then. I know trying to do what I'm doing is crazy but you gotta try!! :singing:

flexiblade - 3-11-2010 at 07:44 PM

I tried something similar to this a while back. The biggest problem you will run into is literally when running into things. Direct contact with something at even marginal speed can end in catastrophic results. This can happen in a variety of ways: running into what looked like a shallow gully, trying to ride up a bank that was a lot steeper than you first thought.


The fork design that has the pivot point right near the wheel could cause serious ankle injury as the impact forces quickly sheer the turning point sending the energy to the point of least resistance - your ankle. Along with that if the support structure is on a horizontal plane the wheel will contact the support structure every time you want to turn right.


This is the problem that I ran into - I had the monofork go to a headtube above the tire like most buggy forks- so that I could turn the front wheel on an axis above the wheel - giving the wheel a good rake angle in which to turn on. When I smashed my front end into a sand berm that I thought I could go over, all the stress from the impact went into the weak part of the fork - where the axle was welded to the fork support. Instantly the tire was bent back and rubbing against my down tube.


Here's a picture of it before I ruined it - it worked fine for about 6 or so outings - but 1 bad decision and my day was ruined.


If you only have a few weeks until you need the buggy - try not to be too flashy and tricky - just make something that works well - In the end it's all about how it feels, not how it looks. I would go with a traditional fork system and save yourself the frustration and hastle, besides building a regular fork isn't as easy as it seems. Good luck with the build - keep us updated with pics and ideas.

van - 3-11-2010 at 07:53 PM

Flex,

Thanks for the insight. My pivot would actually be in the center of the hub. The hub has an offset so the pivot is slightly to the left of the centerline of the rim. I plan to have a slight camber to give it a kingpin angle that will create a turning point on the ground right in the center of the tire. I did wonder what would happen if you turn the wheel too much to one side.

I actually already have a ride.. just wanted to make one ready for DBBB to do show and tell...hahaa... Advice well taken on the regular fork. I have actually already planned for a regular fork as a backup and am already starting the welding on it. I figure this crazy fork will make my build more interesting.

flexiblade - 3-11-2010 at 08:11 PM

As long as your down tube comes into a clamp and isn't welded to the frame - you can swap out any front end you build pretty easy. And yes the crazy fork will make your build more interesting.

van - 3-11-2010 at 09:22 PM

OK.. Just got in from cutting and grinding in the garage so thought I make some buggy porn with Google Sketchup.

feel free to drool... :roll:


snowspider - 4-11-2010 at 05:43 AM

For the blokart type steering just move the handles down to where they become feetles.
Yea the steering radius may be a bit wide and its not intended for fat flat tires but it does satisfy the "KSS" rule. No insult intended. Building one myself right now. Good luck have fun!

van - 4-11-2010 at 06:54 AM

No insult taken.. I'm an engineer myself so do understand the KISS principle. That's why I'm building a regular fork as a backup ;-)

indigo_wolf - 4-11-2010 at 06:58 AM

With such a straight shot, wouldn't the front wheel turn anything that's on the beach into a seafood buffet for the pilot? Whatever you come up with a shield/mudguard will have to be factored into the swappable front end.

ATB,
Sam

Todd - 4-11-2010 at 07:00 AM

Very sweet idea going with the mono.

van - 4-11-2010 at 08:33 AM

sam,

I actually was just imaging that.. does that seafood come with ketchup?? :roll:

I will definitely need some kind of a cool looking shield. Since there is no fork in the way, I can get real creative.

silvereaglekiter - 4-11-2010 at 09:22 AM

this is getting interesting :thumbup::thumbup:

indigo_wolf - 4-11-2010 at 10:01 AM

Quote:

Originally posted by van
I actually was just imaging that.. does that seafood come with ketchup??


Depending on what you run over, there is certainly the chance of something red and sticky.... possibly some other colors too.

Whether it was ketchup would depend on whether the pedestrians you just ran over were returning from a burger run. :o

I think someone mentioned running over some jellyfish last year that had died on the beach and were well into the decomposition stages...... ewwwwww :megan:

Shield would definitely be cool, but would need to be factored in with what contortions would be required of your knees/ankles.

ATB,
Sam

bobalooie57 - 4-11-2010 at 10:16 AM

I get that with driftwood sometimes, I'm thinking, oh I got clearance, then OUCH!

indigo_wolf - 4-11-2010 at 12:02 PM

That was one of the first things I thought of when they showed the picture of the new Peter Lynn buggy with the downtube inverted. Ground clearance at that one point seemed to be reduced to almost nothing. Maybe fine on pancake beaches, but....

ATB,
Sam

rocfighter - 4-11-2010 at 06:12 PM

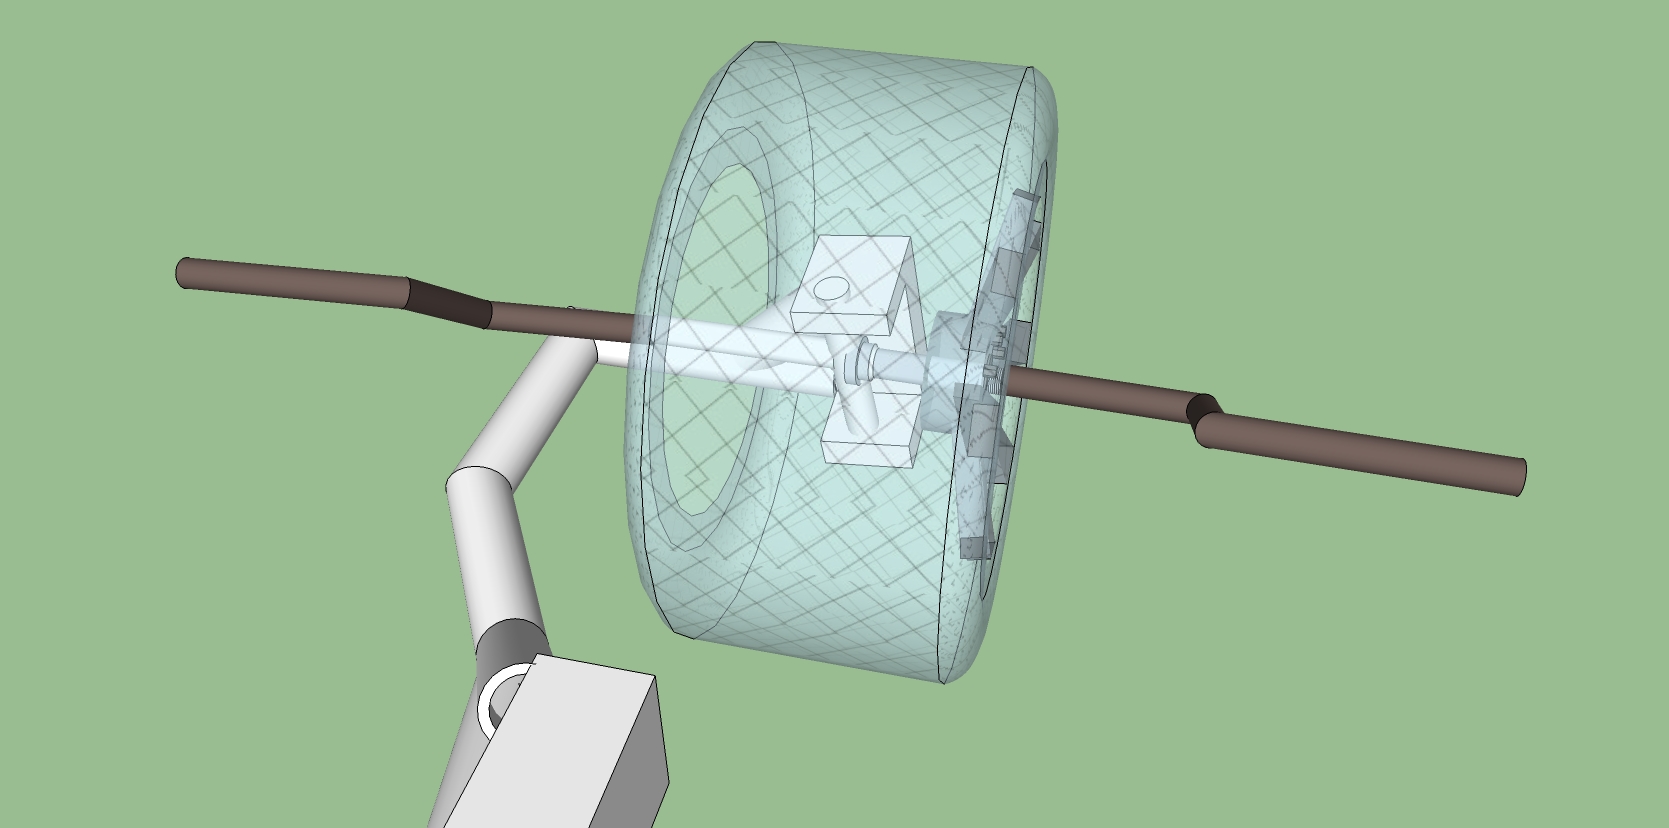
The only thing I see wrong with this is in the sketch. And I know it's just a sketch. But with the stearing system in the wheel you will have very little turnig radius before the inside of the rim hits the mono rail that the knuckle is mounted to.

van - 4-11-2010 at 06:42 PM

Yeah.. I saw that too. I keep drawing the knuckle at different angles to try clearing but it seem the only way is to face it toward front or rear in order to extend the foot pegs out. To better clear the wheels, the knuckles need to come straight out. I have a couple ideas to do that and still have the foot pegs come straight out but still working on the design. I was gonna go back to original idea of 2 parallel tube as the monorail and have the foot peg sit between the 2 tubes. Might have to draw that out to see how it would work.

van - 5-11-2010 at 05:44 PM

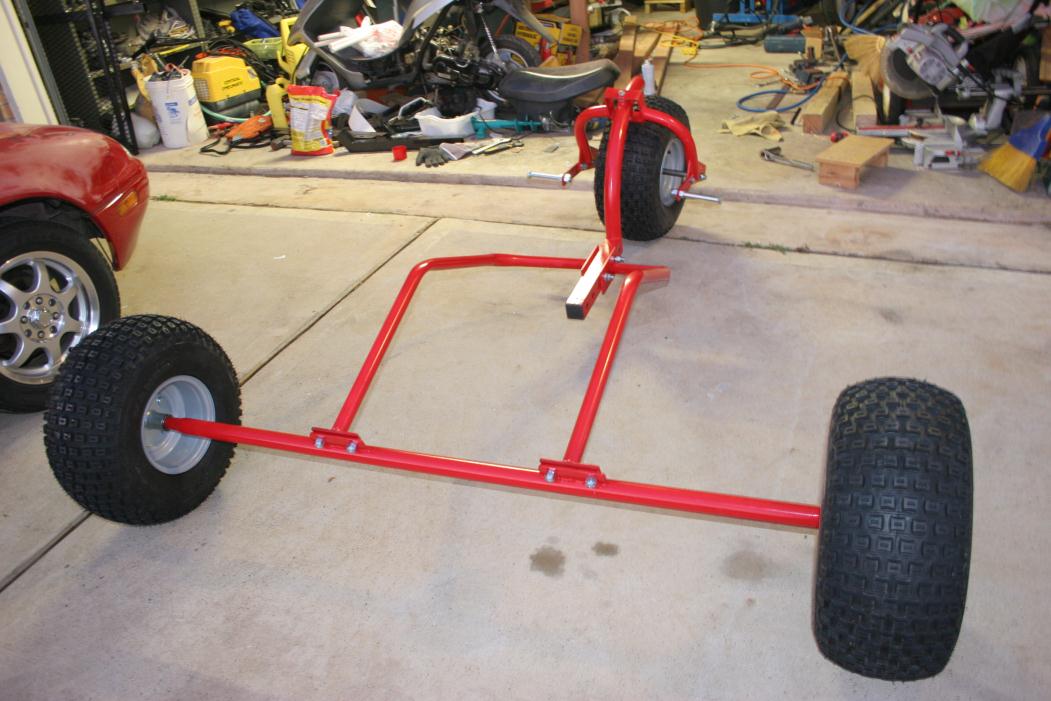
Squeeze in a little cutting, bending , and welding today. I only had a 1 1/2" die for my bender so the 1 1/4" tube didn't bend too well. The bend got a little flatten but still usable. I figure I can always weld extra support near the bend to strenghten it later. Going out of town for a week so was trying to get as much done today as possible. I should be done with the frame next weekend and can start on the seat. I will most likely just finish up the standard fork for now and work on the mono fork after the holidays.


BeamerBob - 5-11-2010 at 05:49 PM

Nice work so far. This isn't looking like someones first buggy! Keep us posted.

flexiblade - 5-11-2010 at 08:21 PM

Looking great van. Good to see that you've already put in some time and have a great start. What size will the axles be (the part that contacts the bearings)? 5/8", 3/4" or 20mm? I am always curious at how folks put together their wheel and bearing assemblies and why. I am running a 3/4" axle with hub adapters going to a 4 bolt golf cart rim. The hub adapters I am using are terrible - all wobbly - need to find replacements - anyone know of one - u2u me or email - don't want to mess up this thread. I wish I had gotten a good set of rims and hub adapter from the get go - would have made life a lot easier.

Keep up the good work.

van - 5-11-2010 at 10:28 PM

flexi,

I originally was gonna go for 3/4" but then I noticed that there wasn't that many options in bearings and hub choices for that size. I went with 5/8" because it look like it would be plenty strong and there are alot of bearings wtih 5/8" ID. I got some cheap gokart hubs for like $15 each so I hope it would be ok. I figure I can always upgrade. My hubs have 4 on 4" bolt circle. I might later get the 4x110 since there seems like alot more rims in that size.

Bob,

This is my first buggy build and my second buggy that I own. My first buggy I got from Dylanj423. I've outgrown it so sold it to a local fellow here so he can get into the sport. He is having a blast with that buggy. Although my background is computer engineering, I've always love to tinker. So far, my projects includes things like CNC router , Lamborghini Diablo replica, outdoor kitchen with concrete countertop, koi ponds, custom arcade (MAME) machines, tandem bicycles ( weld 2 mountain bikes together :embarrased: ) and built in entertainment center ( wife wants this done soon :evil: )

I like to post my builds so others can contribute ideas and also I can contribute back to other builders. If anyone is interested in a CNc router project , I have my build diary here http://www.cnczone.com/forums/cnc_wood_router_project_log/99...

popeyethewelder - 6-11-2010 at 01:50 AM

One clever chap for sure....great work

rocfighter - 6-11-2010 at 10:08 AM

I like your garage. I'll have to show that pic to Sandy. And she'll see I'm not the only one who thinks there for projects and not parking!!

van - 8-11-2010 at 02:52 PM

haaha .. my garage looks alot better than what it used to be. I had to climb over stuff to get through there when I had the Lamborghini diablo replica build in there.

Here's some pic of it in my garage ... right before my WIFE made me sell it... :dunno:

http://www.kitcentral.com/index.php?set_albumName=Van-ADL-Ro...

van - 12-11-2010 at 10:24 PM

Just got back into town this afternoon and found 3 boxes from UPS!! My rims, tires, and miscellaneous parts arrived today.
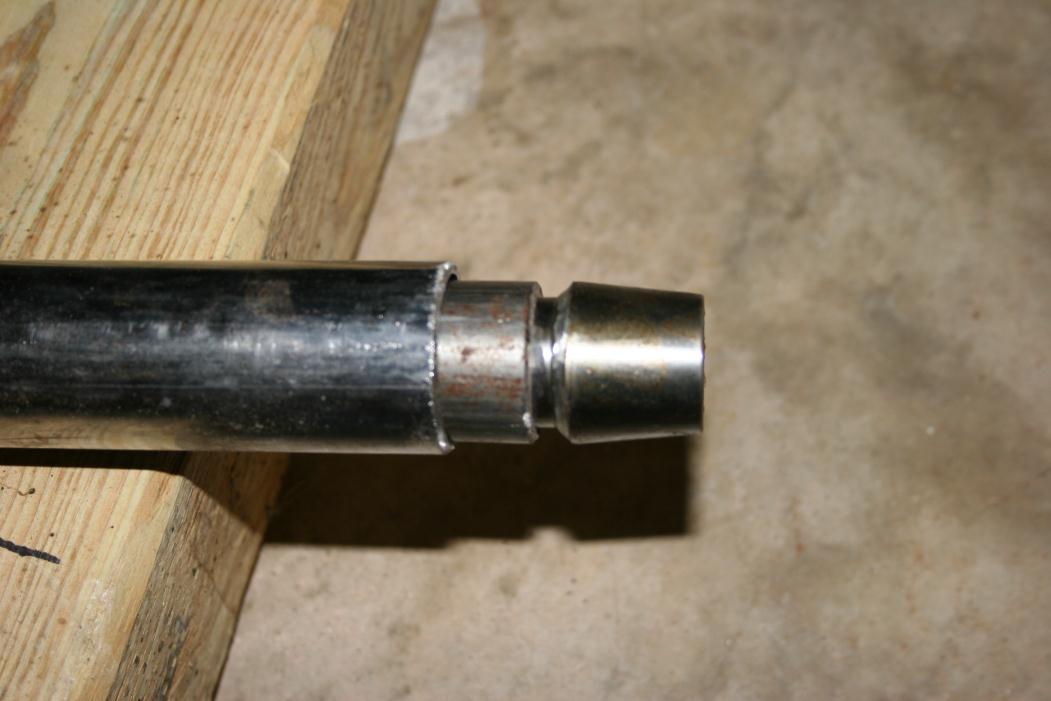
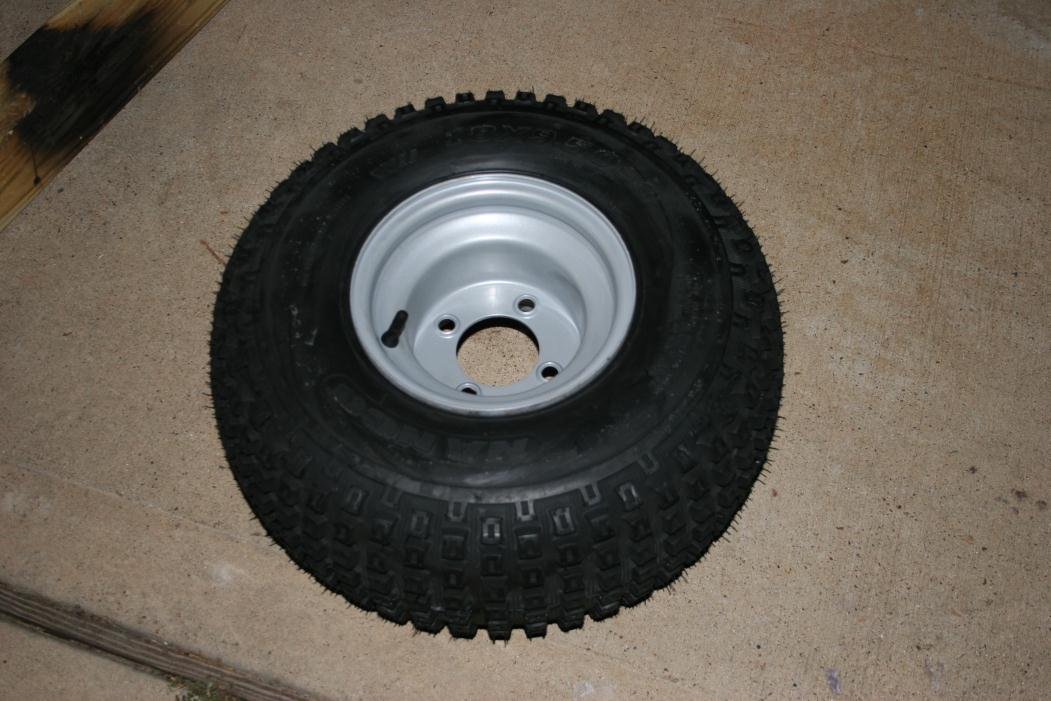
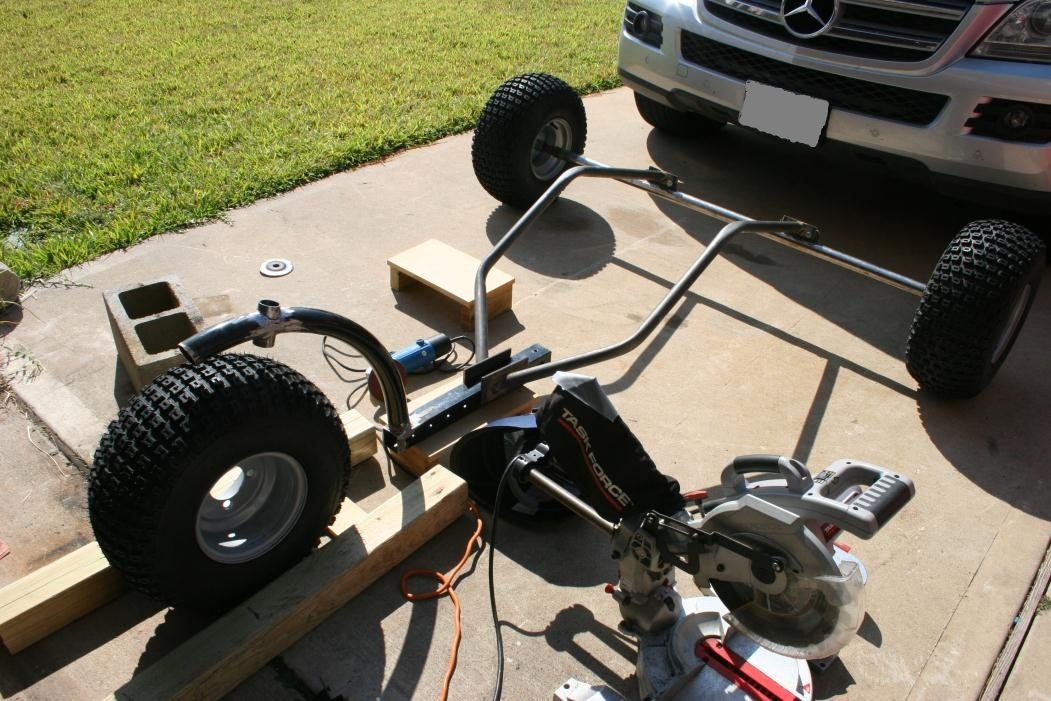
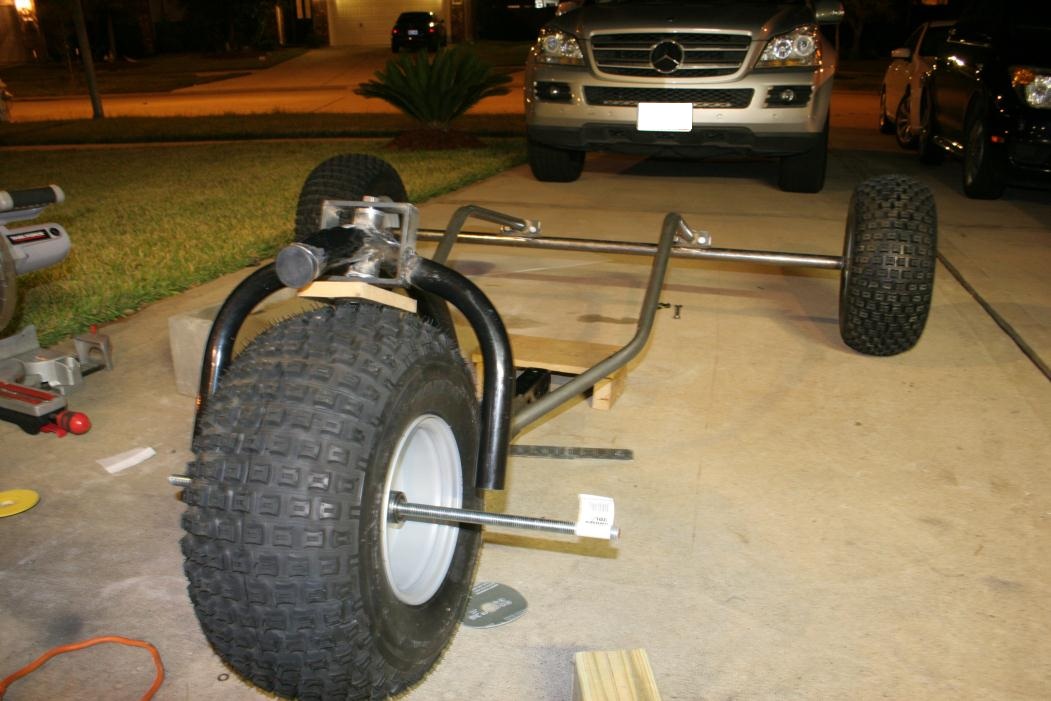
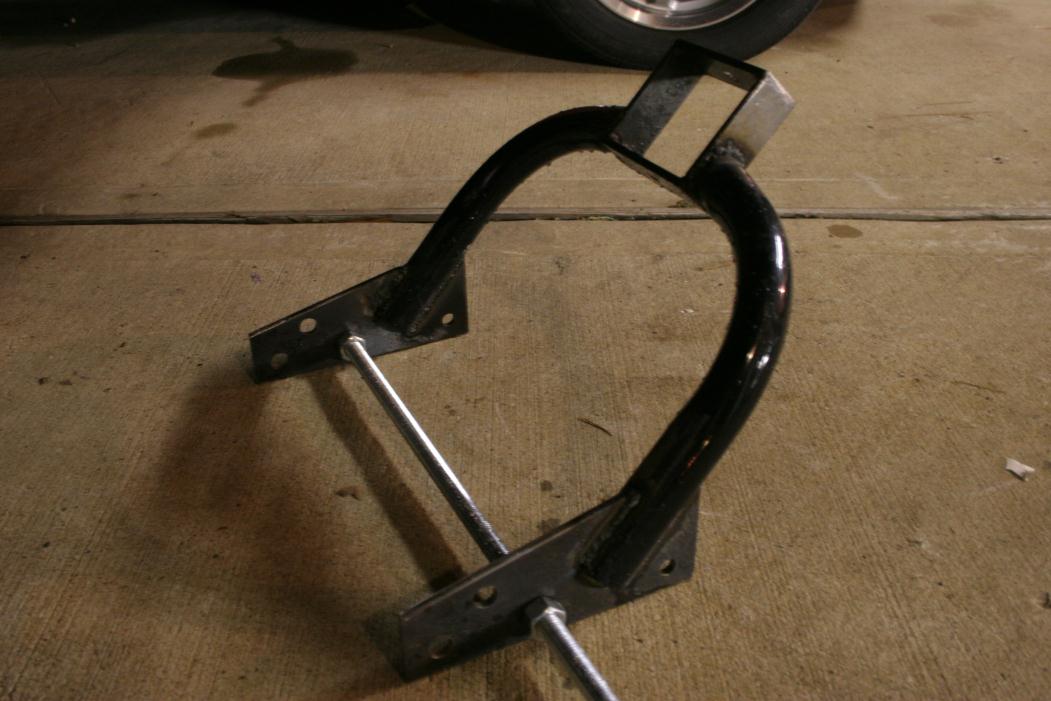
I started welding the boss onto the axle and got the tires mounted to the rims.

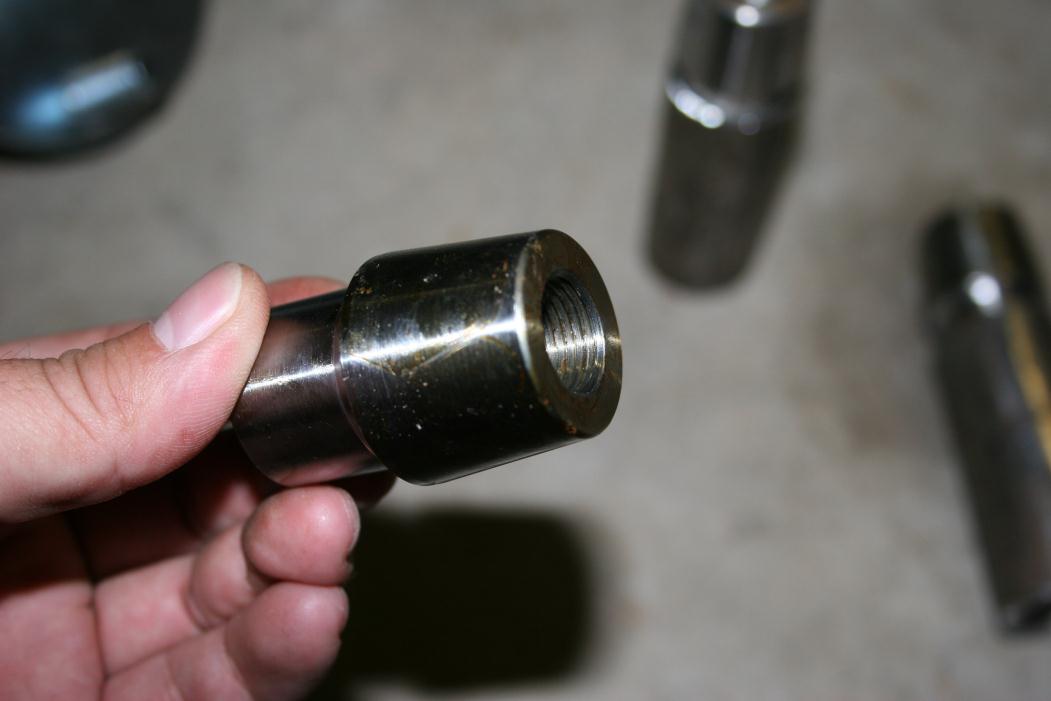
These are the threaded weld nuts I got from McMaster Carr.


I had to add a short piece of tube to increase the size on the weld nut so it would fit in the axle.


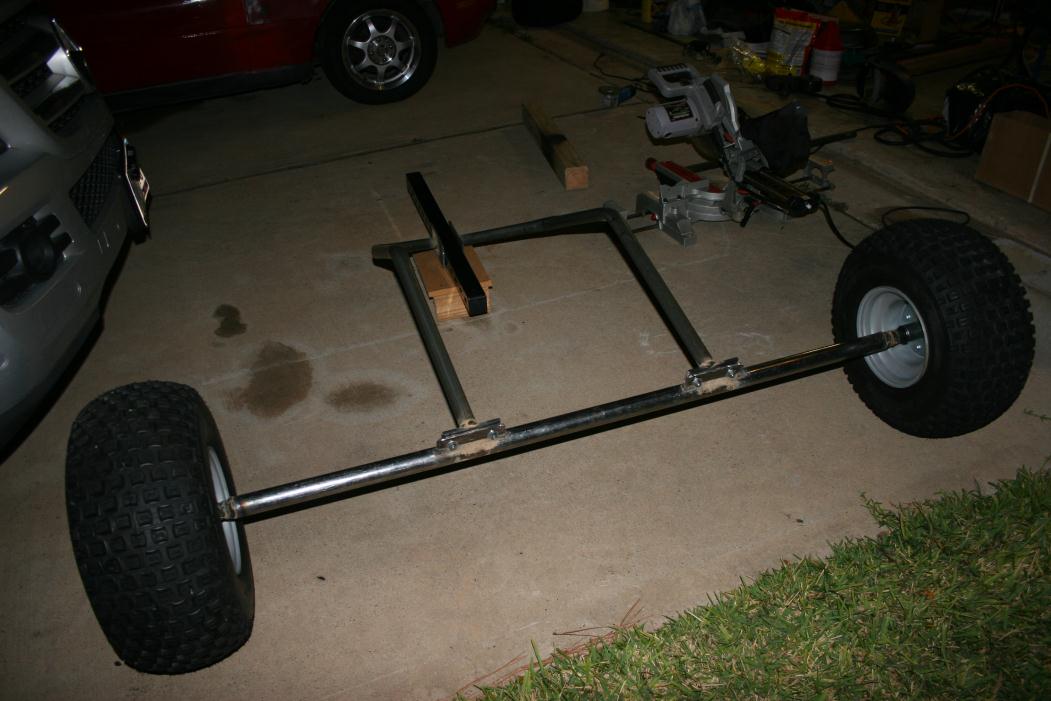
Got the tires mounted and bolted to the axle. Looking good.. :)


I started to look for scrap pipes to use for my regular fork and mono fork.
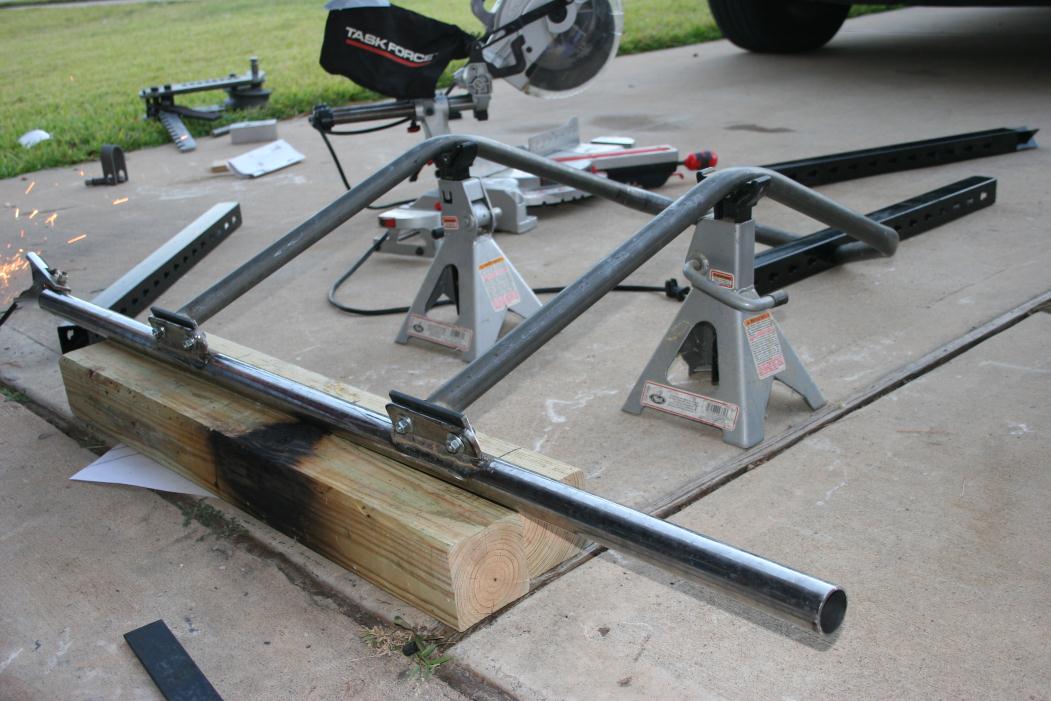
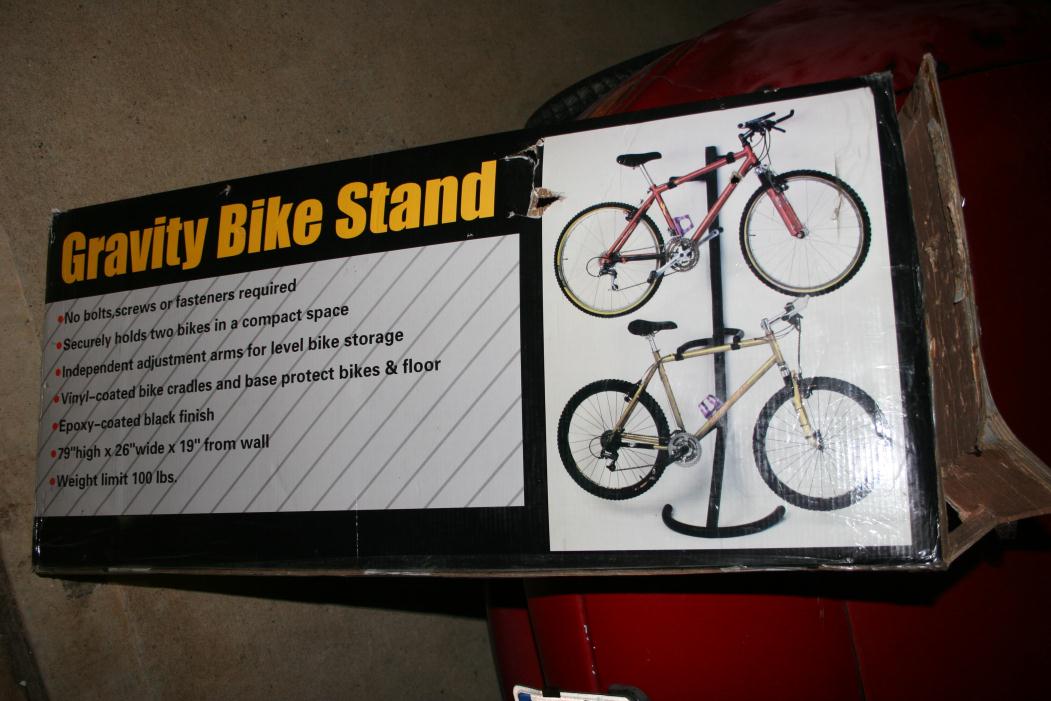
I found a couple of bike racks thats got the right pieces .. recycle!!


The vertical piece could be used as the horizontal piece of the swan neck since it has holes drilled in already.


This would work for the swan neck.


These could be welded together to make a fork.


popeyethewelder - 13-11-2010 at 04:34 AM

I notice you have gone to a lot of trouble getting the thread inside the axle, I used to go down that route a few years ago, now I have a much simpler way to get any size thread I want inside any size axle.

Basically....I used 1 1/2"sched 10 for my axles, 1600mm long

I have some stainless dics laser cut about 8mm-10mm thick, that will either be the same size as the tube or so it can fit inside the axle.

When they are laser cut, I have a 18mm hole cut in the middle, I then TIG weld a 20mm stainless nut over the hole, once cooled down, I then run a 20m tap through the nut, until it cuts a new thread on the 18mm hole...I now have a thread approx 25mm long....I chamfer the edge of the discs (to allow for a good weld) then screw a longish piece of stud bar into the thread and align it all up and weld to the axle tube.

Much much cheaper and a very easy way to get around an problem that some people have problems with..

van - 13-11-2010 at 08:06 PM

PTW,

That's a great and simple way to do it. Wish I knew that before. I was following ideas from your 'race buggy build'. I really do appreciate all the ideas that you have given me with your website.

I got a little work done on it after lunch today ...

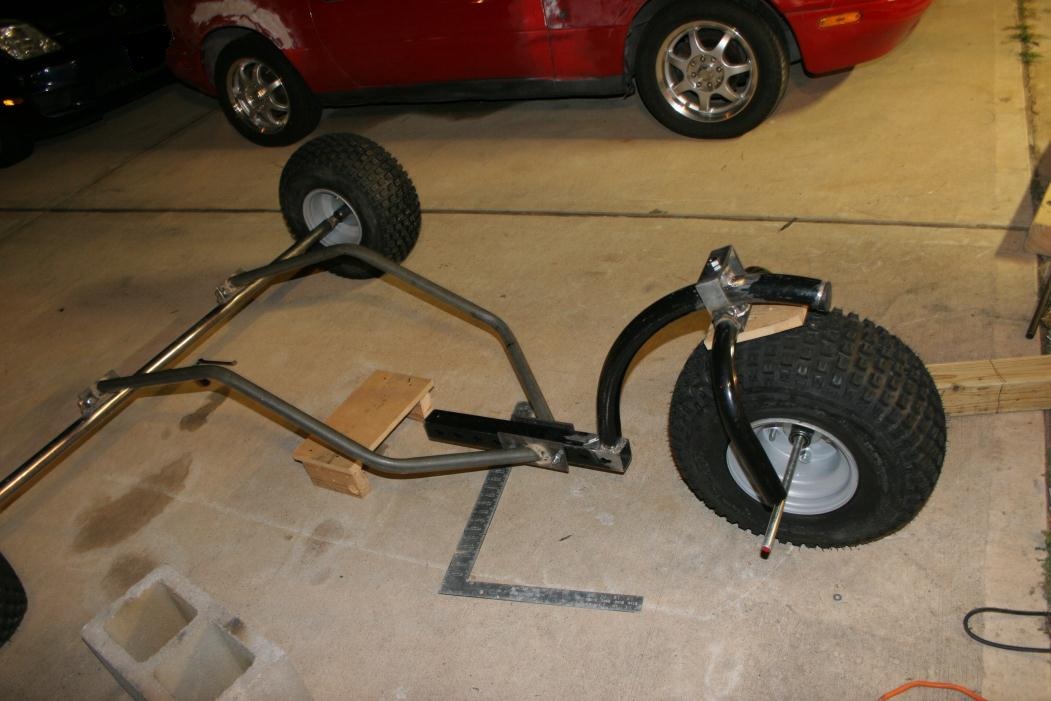
Got the rake figured out .. I think...


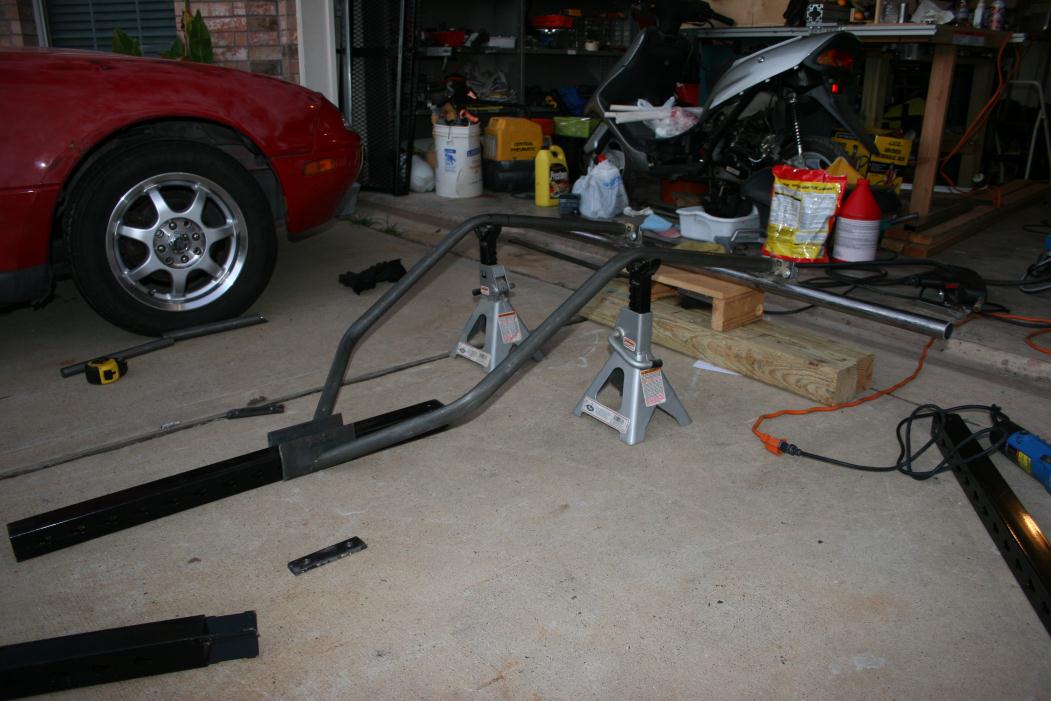
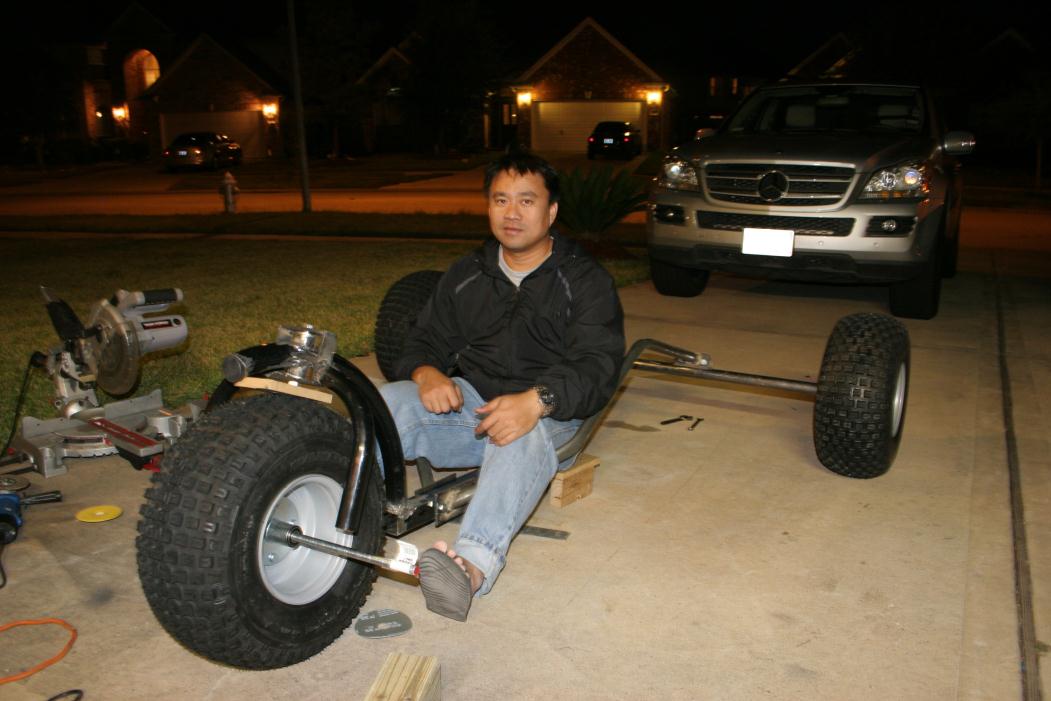
Got fork and such welded on ... all recycle from my bike rack.


Notice the custom wood seat... latest fashion.


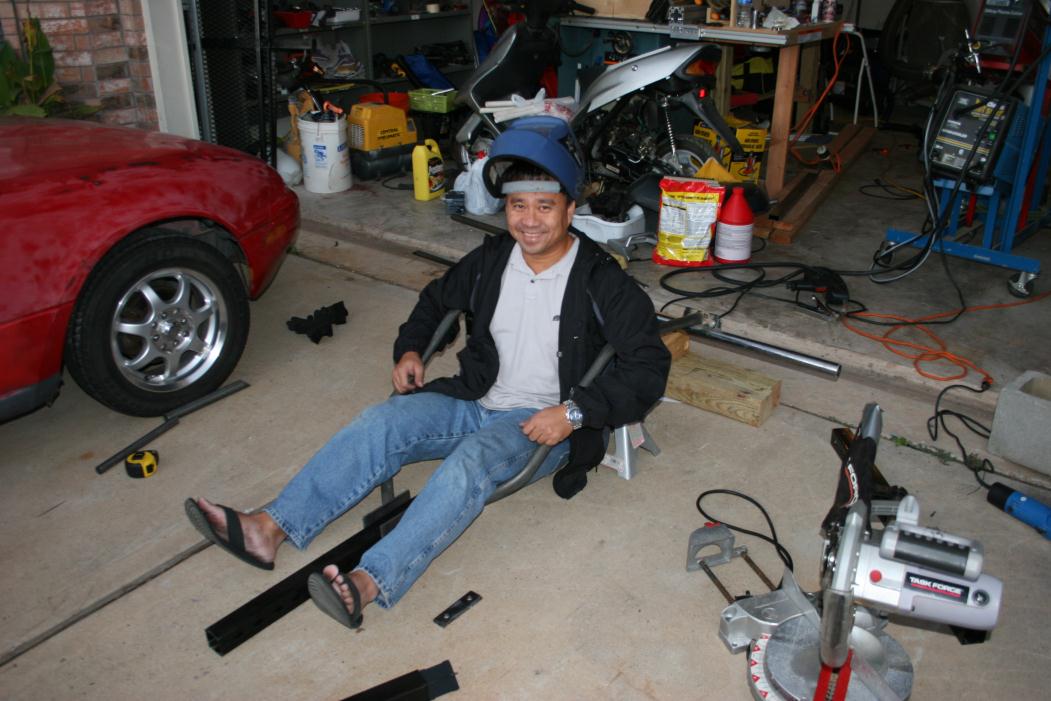
Ok.. couldn't resist.. had to sit in it again...


popeyethewelder - 14-11-2010 at 02:28 AM

Coming along very nicely indeed, and what I love about your project more than anything is the way you are using materials that you have laid around, really like your swan neck, why the added section on the front though...(just curious)

I also like the way you have got around making yokes.....piece of box section...ingenious

...and I know where you are coming from wanting to get sat in it before it is complete, I still do that even now, I cant resist it 30 odd buggies down the line.

You are doing a great job, and its a joy to see you stepping out of the box and trying something different.

Once your frame is sat at the ride height, ie fix the rear wheels on, prop up your side rail/ swan neck plate, set your fork legs to around 65 degrees, you wont be far out then, it only starts becoming difficult when you have offset yokes, that pushes the fork legs forward of the axis or headstock bolt....everything then start taking some working out, especially trying to keep the trail right, or within the parameters that we know work well.

About the axle bosses, yeah sorry, I have moved on since making that race buggy page, I have had to, I used to have to get the bosses machined up ect, and from solid round bar....expensive, so I am always trying to think of cheaper and more cost effective ways to make thing without losing any of the structural integrity. I have found a much simpler way with the footpegs also.

I will (if I can) try to make some instructional buggy building videos, showing how I make things now, just using normal tools that are cheap and probably have lying in your garage. Each video will relate to one part...ie how to make a swan neck, rear axle, side rails etc etc....it gives me something to do while I am trying to find a new job.


Oh and another thing....how did you manage to get your photos so big on PKF, no matter what size I upload, they always end up small photos on here...

rocfighter - 14-11-2010 at 05:50 AM

I like the extention on the swan neck. I would mount some silly-scarry looking skull on it!!:lol:

indigo_wolf - 14-11-2010 at 09:40 AM

Quote:

Originally posted by popeyethewelder
Oh and another thing....how did you manage to get your photos so big on PKF, no matter what size I upload, they always end up small photos on here...


Attached images get shrunk... linked images fly first class. ;)

ATB,
Sam

WELDNGOD - 14-11-2010 at 09:53 AM

Nice build Van:thumbup: More to come I'm sure:yes:

van - 14-11-2010 at 07:12 PM

I'm considered the mad scientist among my friends ... hahaa... I had the swan neck extended because it just look COOL!! :smilegrin: I was thinking about a head light to make it look like an old Schwinn cruiser bicycle. I have my images saved to my personal server so when you link to it you need to use the size parameter to get it as big as you want , like this
Code:
[img=800x500] your link here [/img]
. I'm always keeping scraps or unused pieces of metal around just in case I will use it for something else. I have a universal gym that I plan to cut up for future builds :smilegrin: It's worth more in metal than if I was to sell it at a garage sale.


Here's the look I was hoping to go for with the Schwinn headlight. I'm gonna have to search ebay.


Something like this mounted on the front would be cool...

popeyethewelder - 15-11-2010 at 01:53 AM

Thanks for the image sizing....simples ehh

van - 15-11-2010 at 08:11 PM

I got the plates cut and welded to the fork. The current problem I got right now is where do I find an axle bolt in 5/8" diameter that is 12" long? I manage to get a 5/8" bolt for the rear rims but am not sure how you keep the bolt from backing out. Do you have to put a locking nut on the (inside end of rim) axle end of the bolt?


popeyethewelder - 16-11-2010 at 12:56 AM

Just use the stud bar you already have then Van, you can do the same with the rears too, wind the stud bar into the rear axle, wind a nut on do it up real tight, wheel then another nylock nut

van - 16-11-2010 at 06:40 AM

ptw,

I wasn't sure if the stud bar was a problem. I thought that the grade of steel they use for it might not be strong enough or that the threads might cause problem with the bearings on the wheel. I'll try the stud bar as you suggest. I am gonna find a small tube to use as spacer.

btw ... how much clearance should I have between the ground and the square tube in the center of the buggy? I had originally measured everything for 22x12x8 slicks. They are back ordered so I had to get 18x9.5x8 for the time being. It makes the buggy sit a little lower. I only have about 2.5" clearance. I thought about shortening the swan neck to raise it up and also add an adapter plate on the axle to mount the rails a little higher.

van - 16-11-2010 at 10:41 PM

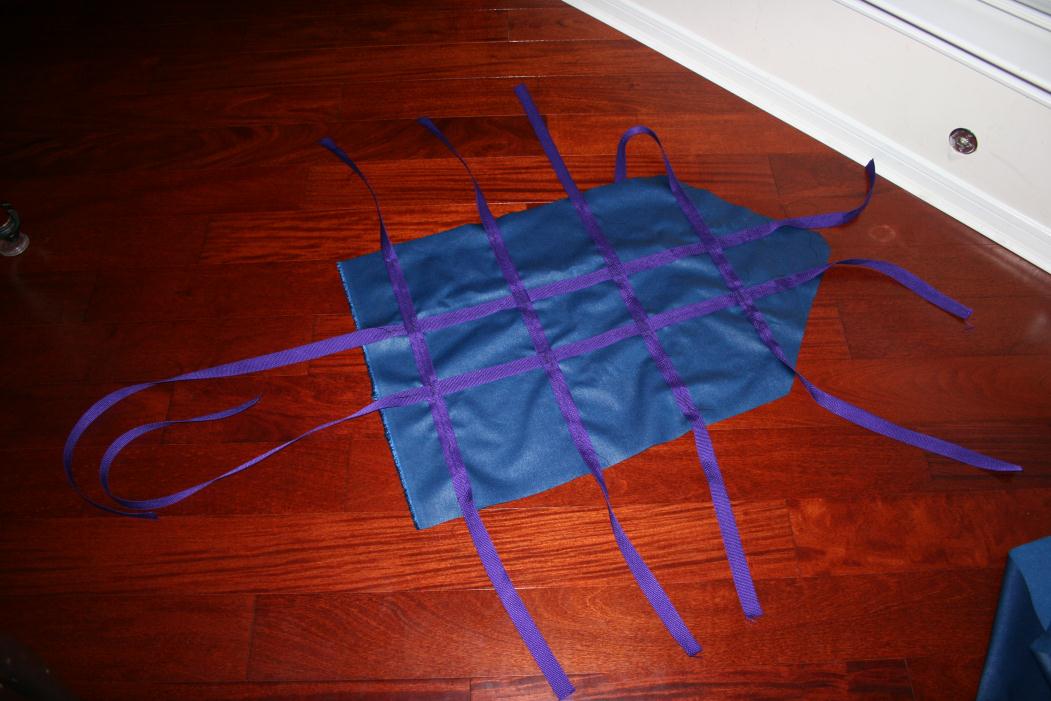
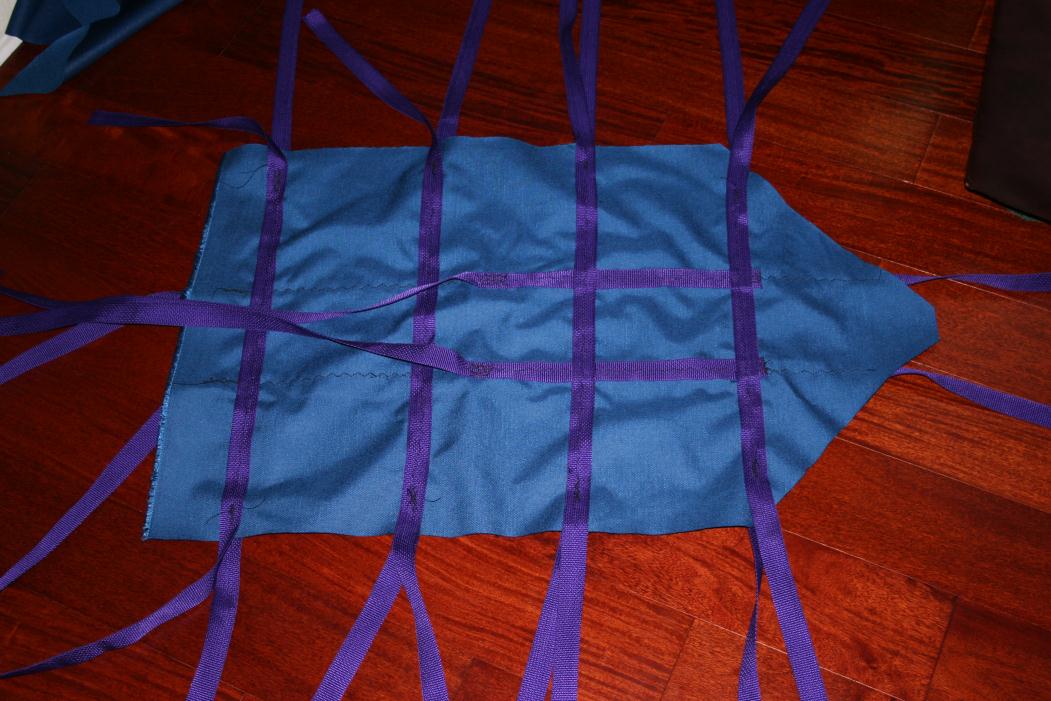
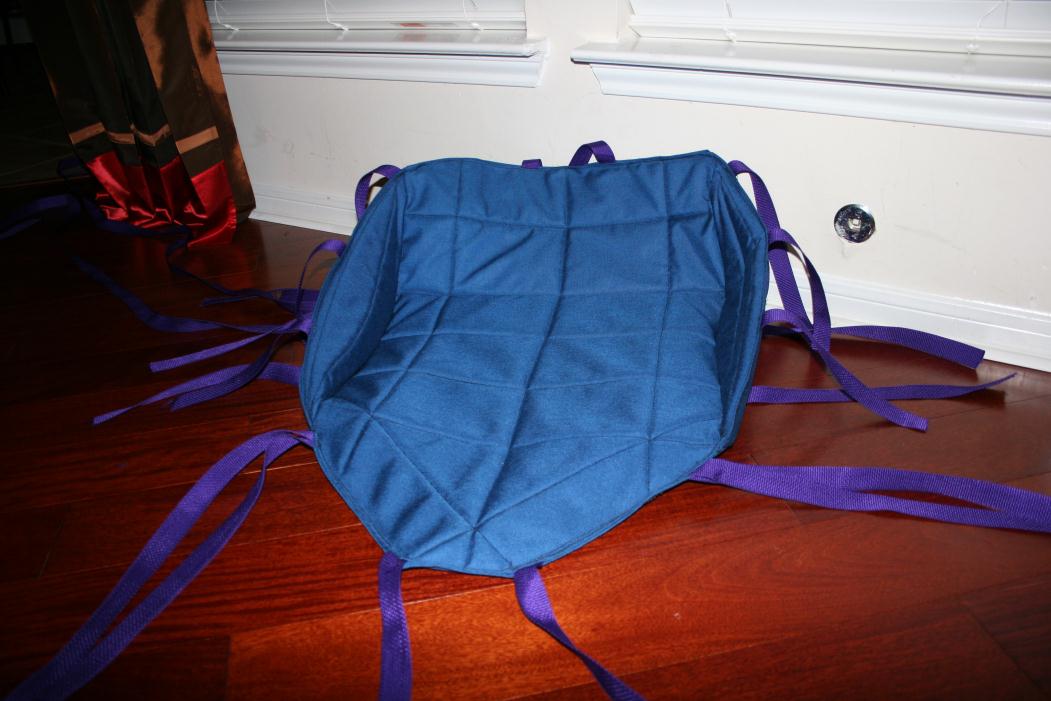
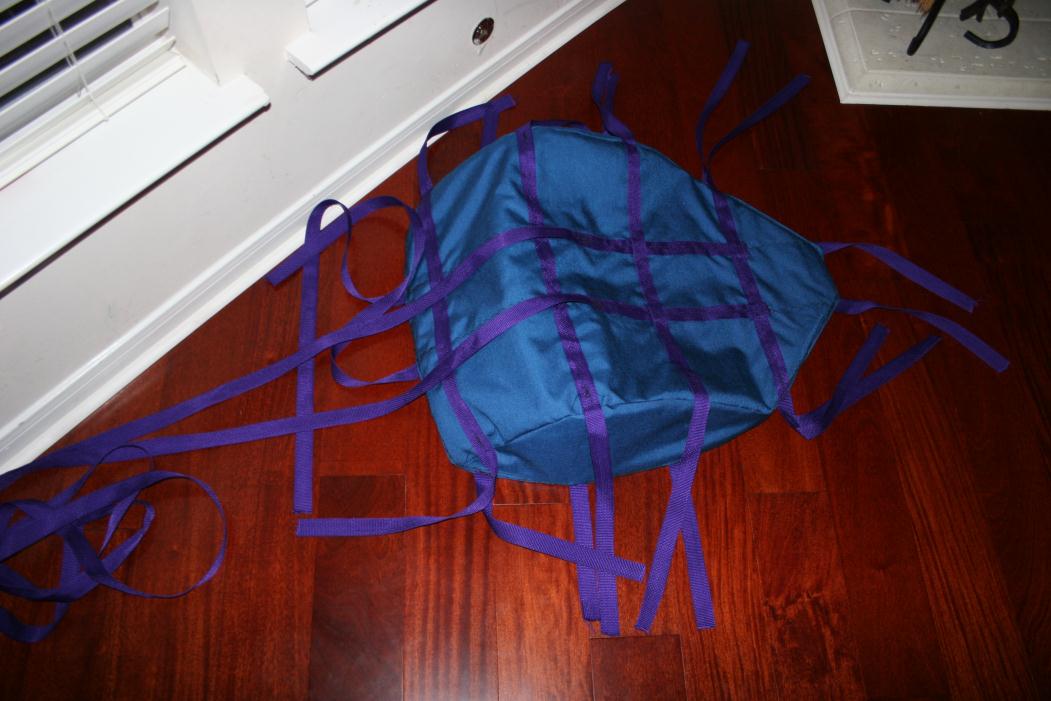
Who said men can't sew??:moon: After 3 hours of measuring, cutting, pinning, cussing, sewing, more cussing...


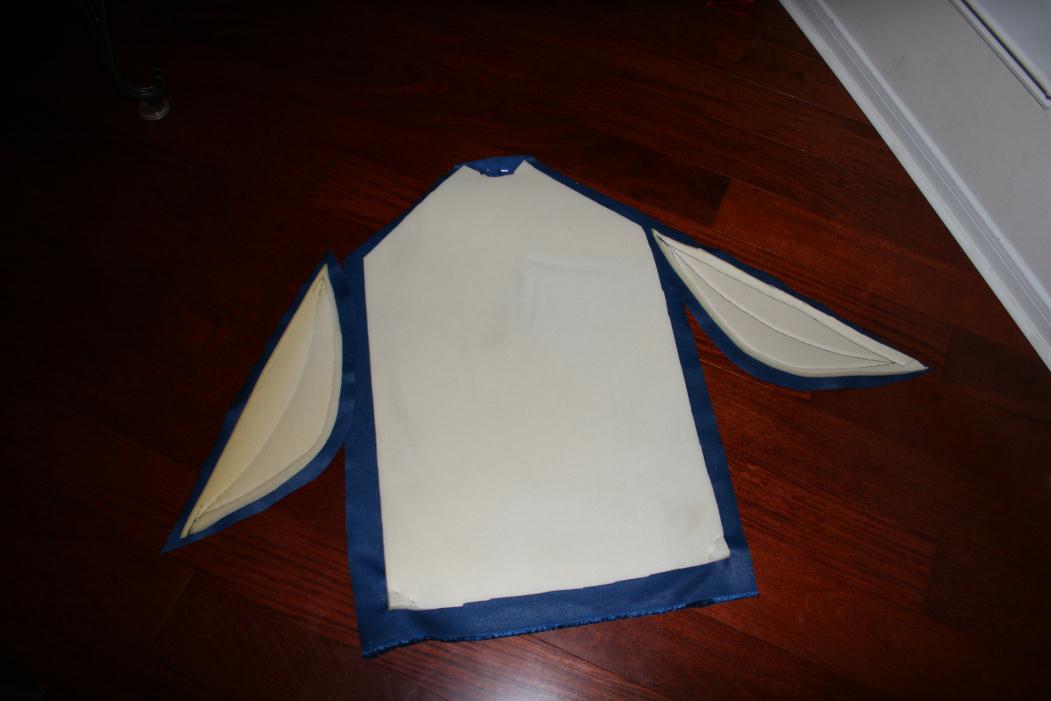
The seat, back and side pieces with foam :


The 3 pieces sewing together:


This is the top/inside of the bottom layer with the webbing sewn into it:


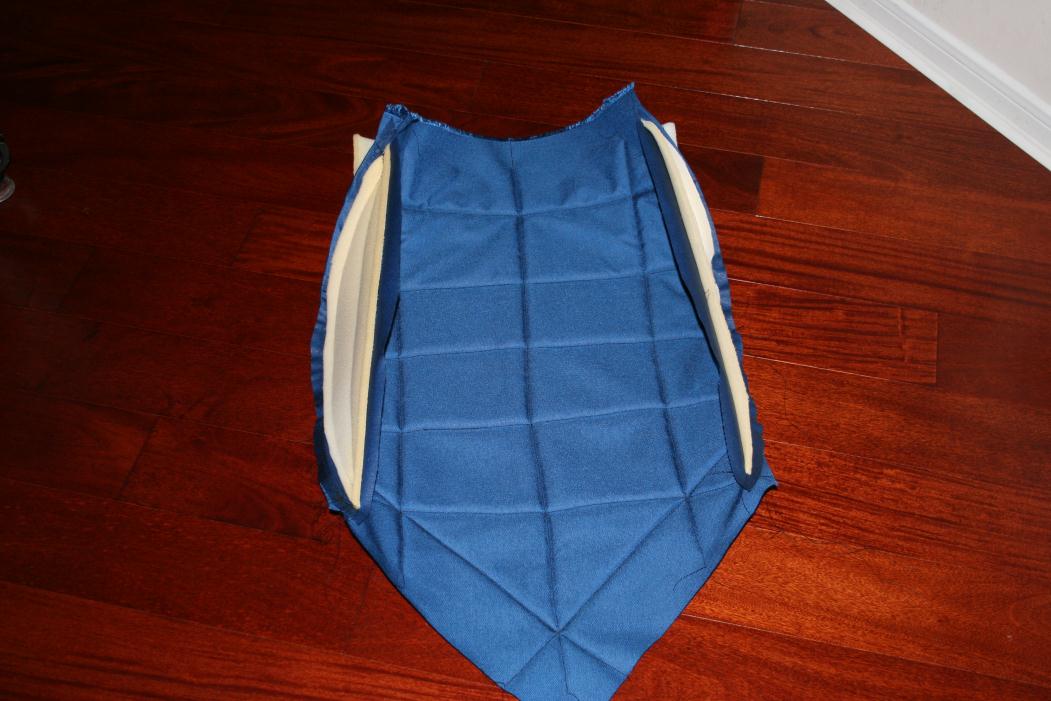
This is the bottom side of the bottom layer:


Both top and bottom layer sewn together (top side):


Both top and bottom layer sewn together (bottom side):

popeyethewelder - 17-11-2010 at 12:03 AM

Quote:
Originally posted by van
ptw,

I wasn't sure if the stud bar was a problem. I thought that the grade of steel they use for it might not be strong enough or that the threads might cause problem with the bearings on the wheel. I'll try the stud bar as you suggest. I am gonna find a small tube to use as spacer.

btw ... how much clearance should I have between the ground and the square tube in the center of the buggy? I had originally measured everything for 22x12x8 slicks. They are back ordered so I had to get 18x9.5x8 for the time being. It makes the buggy sit a little lower. I only have about 2.5" clearance. I thought about shortening the swan neck to raise it up and also add an adapter plate on the axle to mount the rails a little higher.


What is the size of the stud bar? thats all I have been using for years but it is 20mm


Clearance wise, depends on a few factors, what ground you will run on and the angle of the bottom of your goose neck.

The plate that hold my swan neck are usually around 4 3/4" from the ground to the bottom of the plate, remember, your ass will be lower than this, I normally aim for around 1 1/2-2" clearance between my backside and the ground....the lower you can get your body without causing yourself any damage the better.

Great work on the seat BTW

cheezycheese - 17-11-2010 at 05:00 AM

Van, when i had my custom fork built i ordered a rolled steel rod 12mm from Mcmaster-Carr then cut to length and threaded the ends to use as a front axle rod. Tiresunlimited.com should have the Nanco BF's @ $33 a piece. Good luck !!! looks great !!!

1aaa.jpg - 167kB

van - 17-11-2010 at 06:39 AM

I am using 5/8" all around which is about 16mm. I'll stick with the stud bar for now and see how it goes. If it gives me any problem, I can go the Cheezy route :thumbup: with the threaded bar. I had already ordered my tires from selecttire.com for $28 / piece. I guess if I really need them, I can cancel my current order and get them from tiresunlimited.com .

ptw, base on your numbers, I should have about the same clearance with BF tires since they are 22" high. I am running 18" tires right now. The larger BF tires should give me an extra 2" clearance right?? I guess I'll know this weekend when I take it for a test run at the beach. I can always cut and re-weld .. starting to actually learn how to weld!!

bobalooie57 - 19-11-2010 at 05:29 AM

That is a really nice seat. Did you make a pattern first, or just do it all by eye? I've been puzzled as to how to go about it, and you have helped immensely. Thanks!

van - 19-11-2010 at 07:58 AM

I got some poster board and made paper to match my arse. You can see from the first picture what the pattern looked like since I use it to cut the foam. I then cut the fabric about an inch larger all around. The two side pieces, I made it curve to match my arse again... apparently I'm the only one that don't have a triangle shape arse. :frog: Lay it on the ground and it should look like a T-shirt or a penguin :) Since all this is an experiment , I still have not try it on the buggy to see how comfortable it is. I should be able to try it on once I get the buggy painted and put together today or tomorrow. I will update with pictures. I did not have the wide seat belt material so end up using the smaller 1" straps. I would recommend the larger straps since those look like they support you better.
Ready for a test ride

van - 20-11-2010 at 08:04 PM

I will be taking the buggy out to DBBB tomorrow so I thought I update everyone what I've been doing the last 2 days trying to get it ready. I still need to make a backrest and better foot pegs but it's good enough for a test ride!!


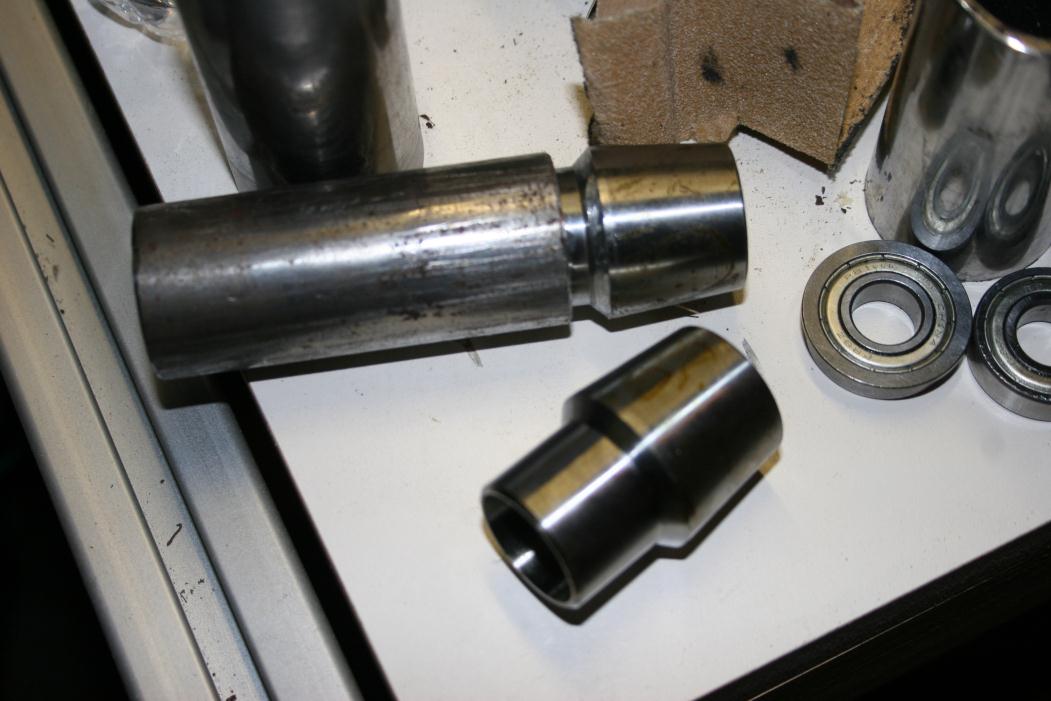
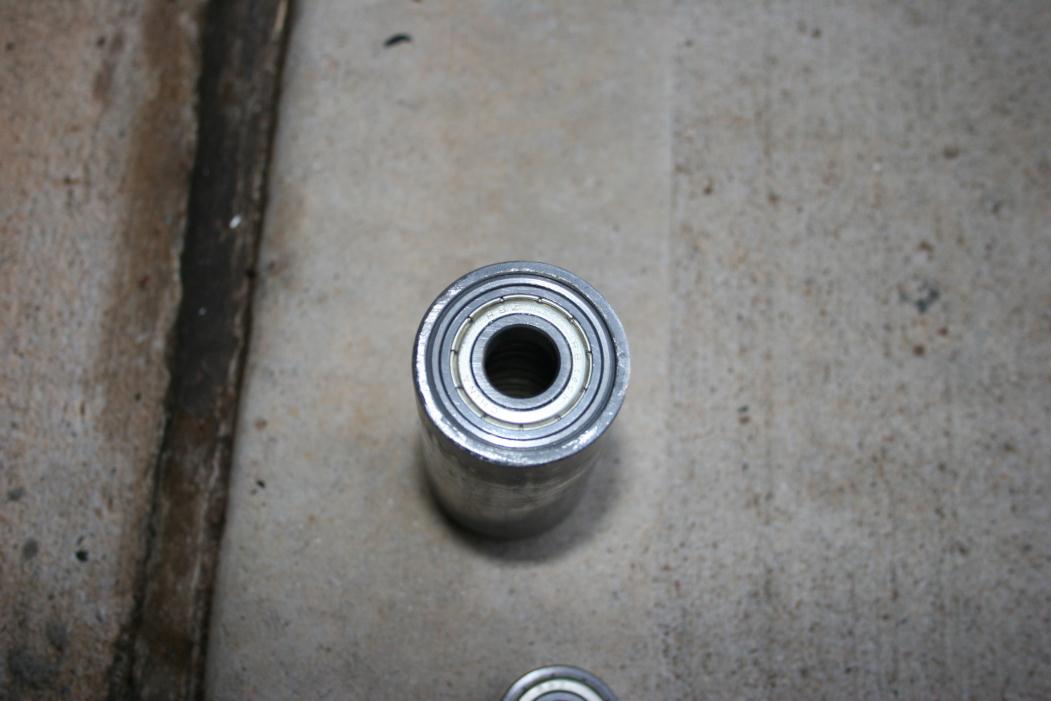
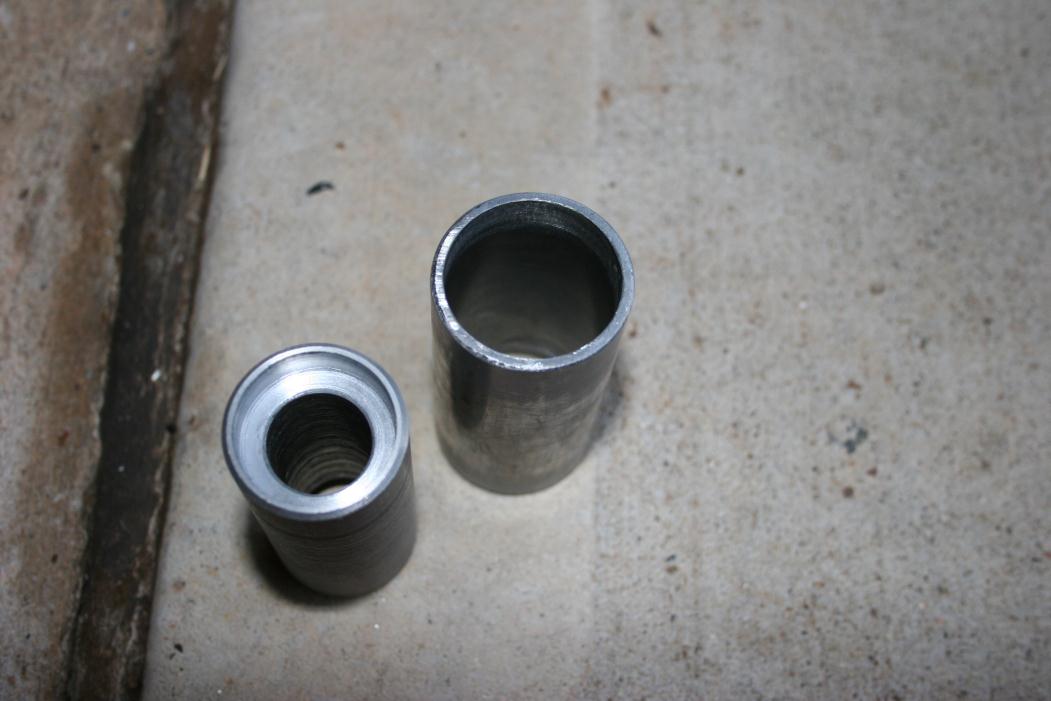
Got a local machine shop to make the bearing holder for the fork neck. The piece on the right is the same size piece as the tube that I already welded to the forks.


The bearing holder is a tight fit into the tube. Almost a press fit.


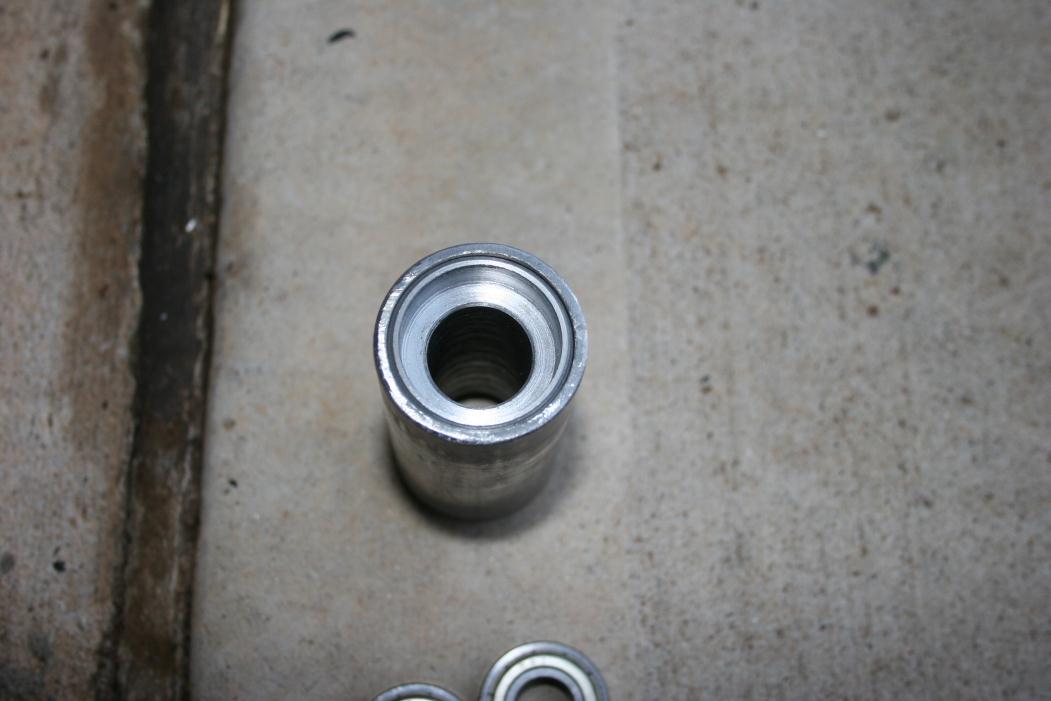
Bearings in place. For now, I will not be welding the bearing holder into the fork neck yet.. still too many mods. The fit is tight enough that it will stay.


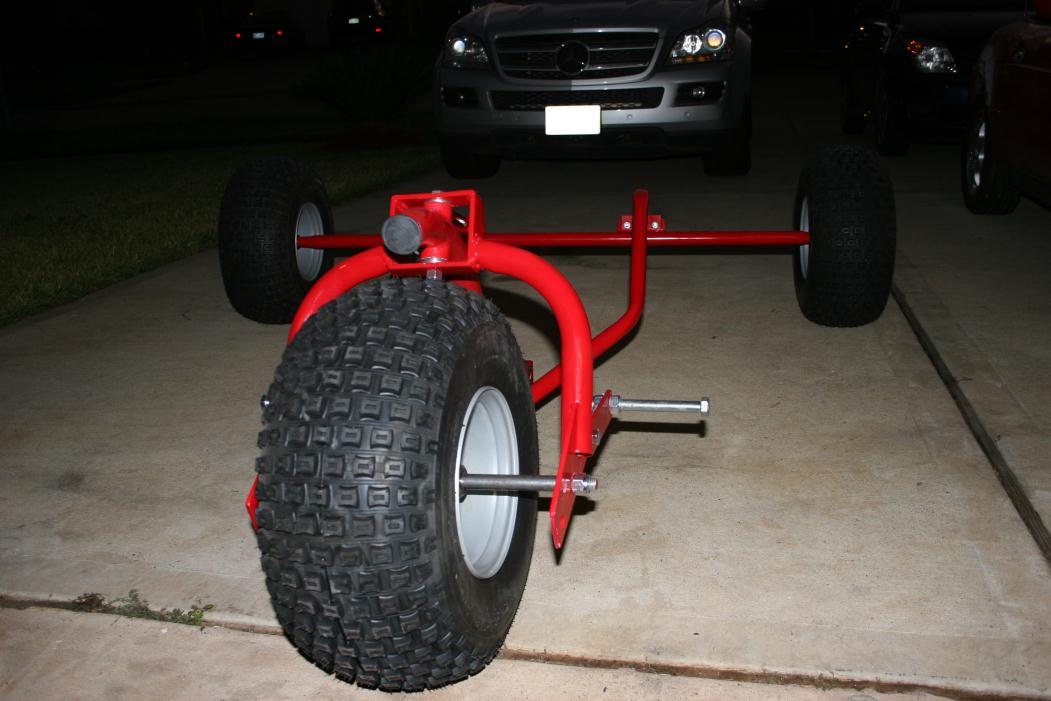
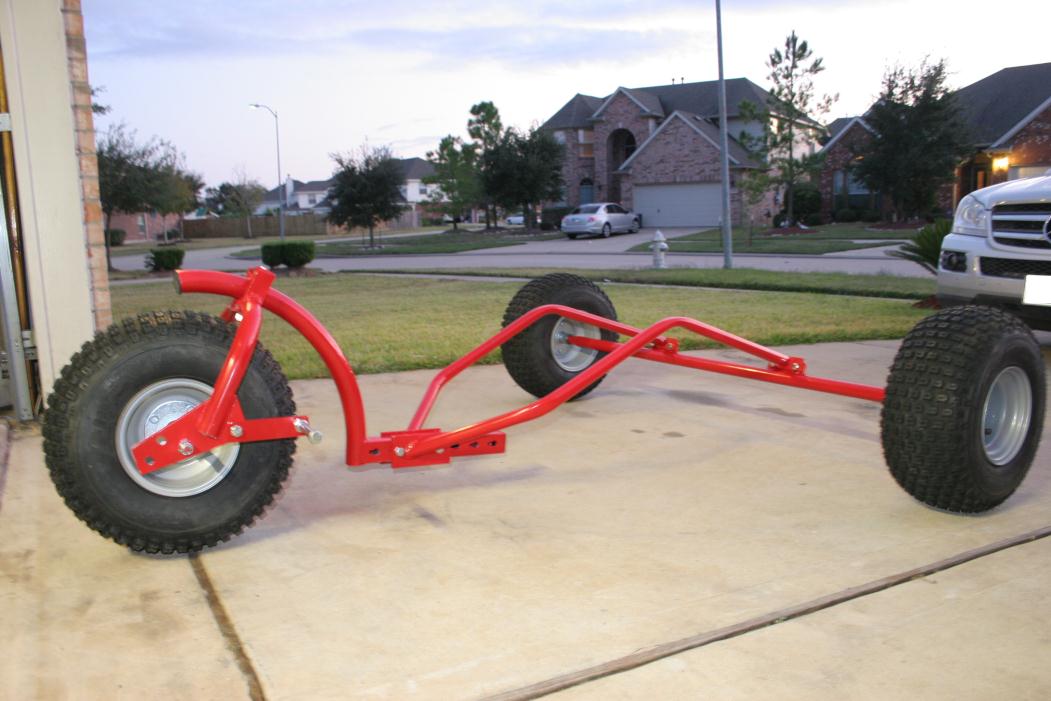
Frame painted bright red..


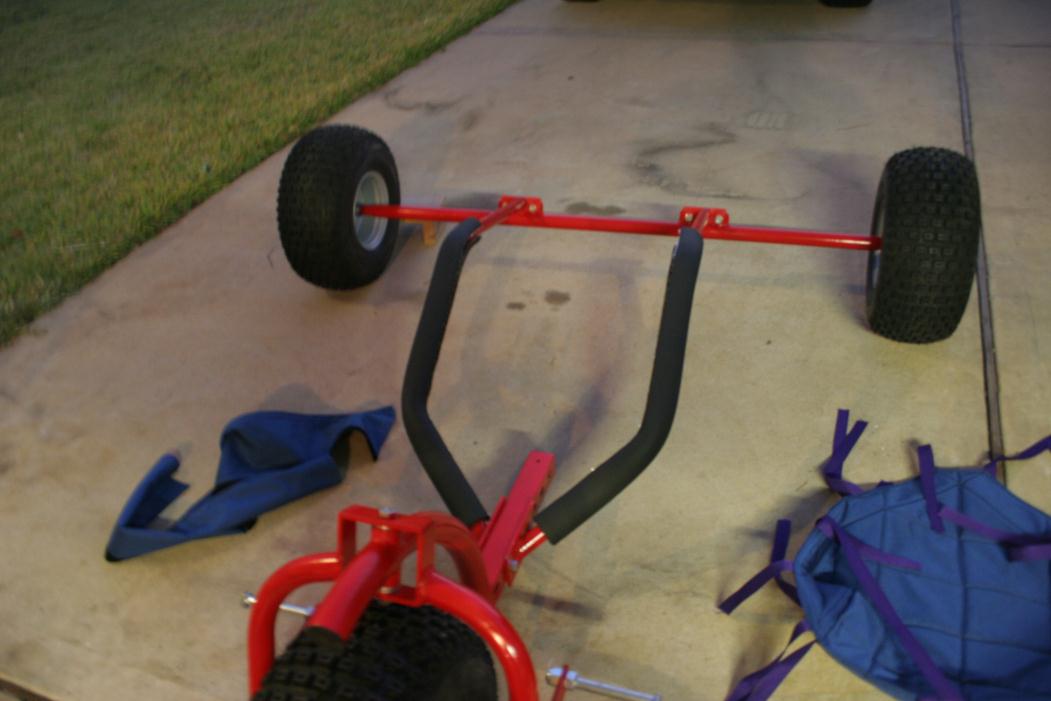
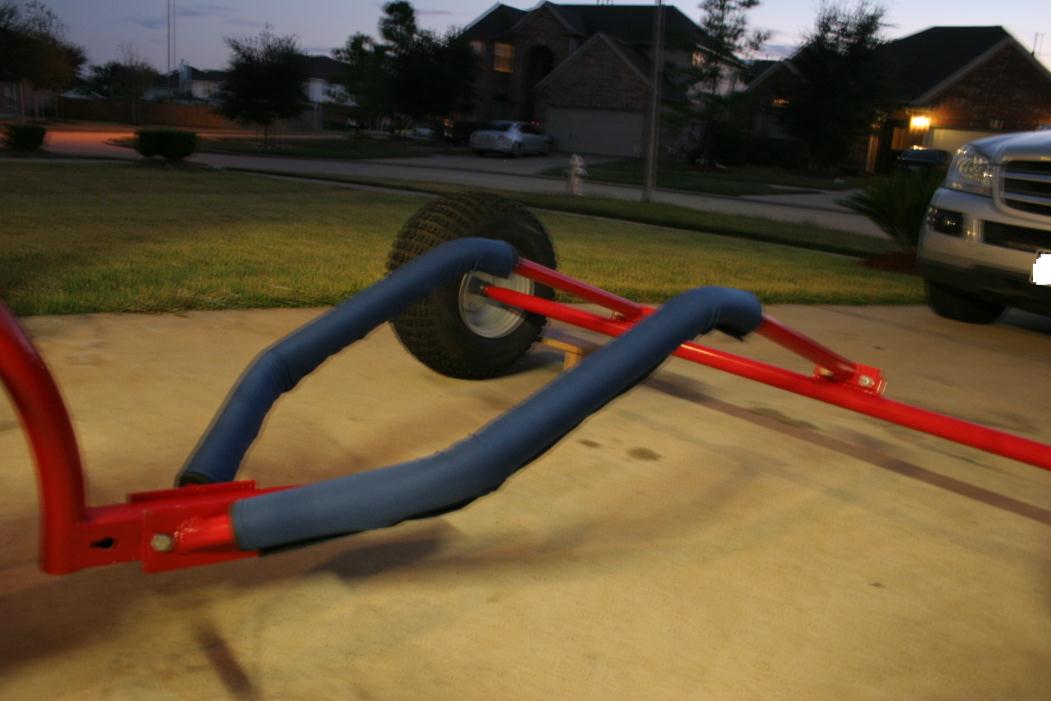
Foam on rails. Got these from Home Depot. They are used on HVAC lines.


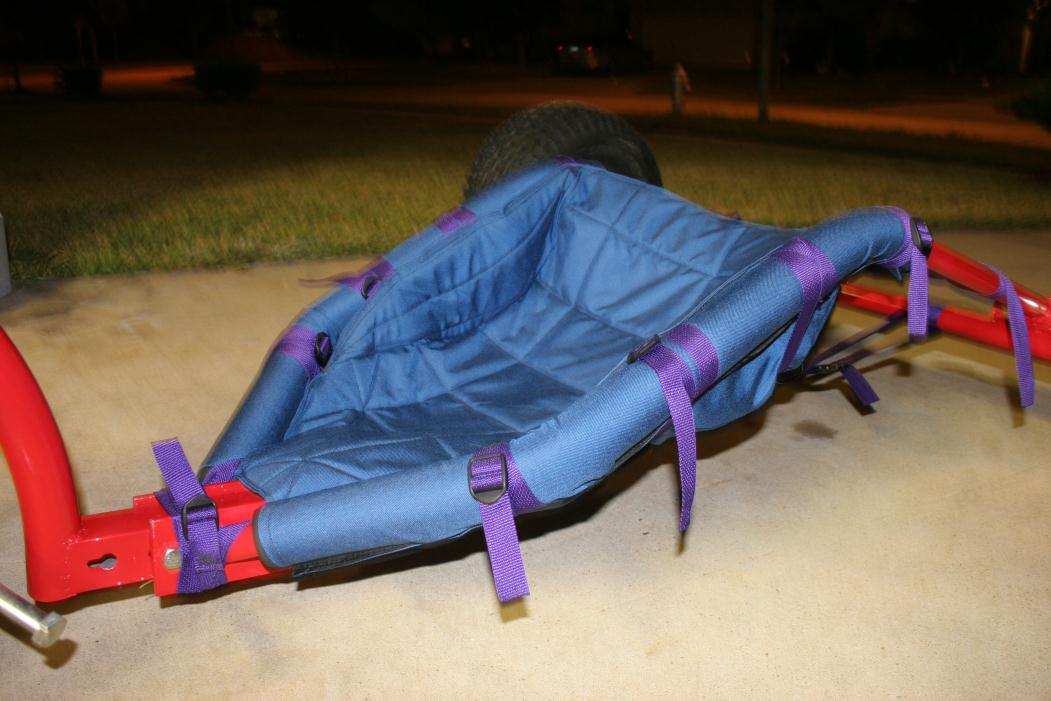
I made covers out of the same seat material


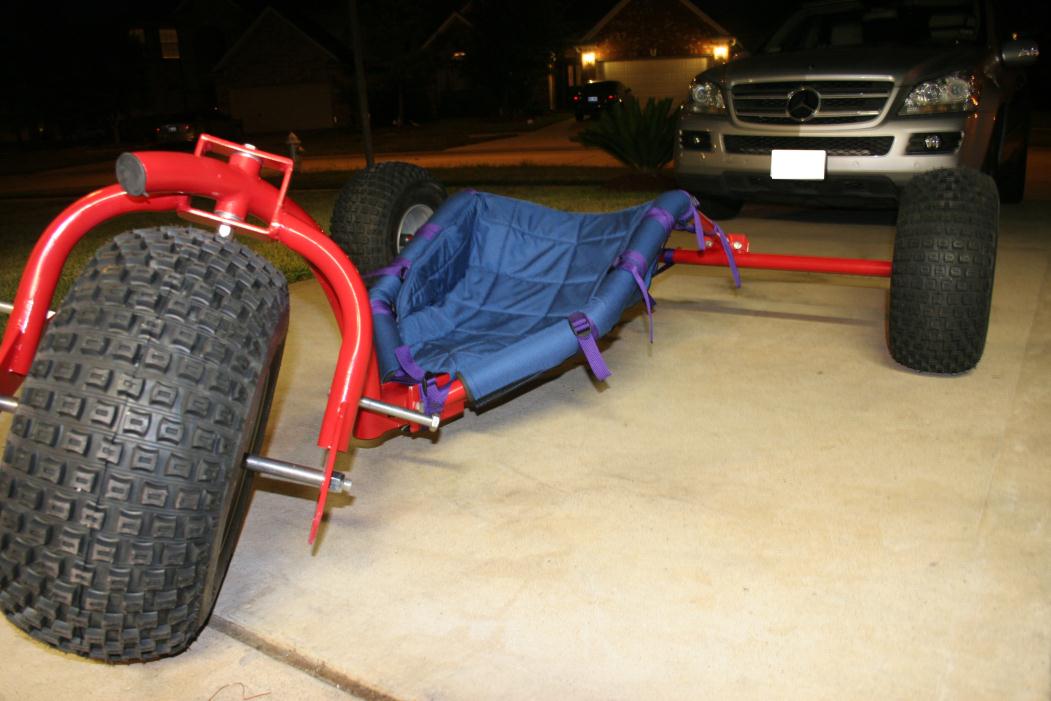
Seat strapped in and ready to go


Peter_R - 20-11-2010 at 08:45 PM

WoW, great work! I've been viewing your build as guest. This is such a COOL build. I can't wait to see it in action. Where's the headlight...:wink2:

van - 20-11-2010 at 09:08 PM

head light and tail light on order from ebay .. should be here mid week.

cheezycheese - 21-11-2010 at 12:19 AM

Van, that is freakin awesome!!!! Great work, love the recycled bits :thumbup::thumbup:

popeyethewelder - 21-11-2010 at 12:42 AM

Great work Van...love it, are you considering a back rest?

flexiblade - 21-11-2010 at 12:53 AM

That was a very impressive build time - not to mention some very creative use of scrap. The only thing left is a go pro mount and some footage to post. Beautiful work man - she looks fun.

van - 21-11-2010 at 07:43 AM

flexi .. I knew I forgot something! I am heading down to the beach in an hour or so. Better find something around the house to mount my gopro to.

ptw .. yes, I will make a backrest. It got push down the list with the mono fork due to time limitation.

bobalooie57 - 21-11-2010 at 08:38 AM

Pretty simple camera mount solution here. http://www.powerkiteforum.com/viewthread.php?tid=15823 I could see that 'T' clamp being usable for a back-rest, also.

snowspider - 22-11-2010 at 10:06 AM

WOW fast build , nice work! Can't wait to see the bling. (did I phrase that right or is it bling bling). Very nice.

van - 28-11-2010 at 10:05 PM

I finally got some video recorded today. Most of the DBBB attendees have left the beach so I had the beach to myself.


popeyethewelder - 29-11-2010 at 02:59 AM

Nice one Van...MISSION ACCOMPLISHED....., I must say that part on the front of your headstock....is crying out for a camera mount...I like that, and may do something along those lines one day.

What did you think after riding it...any faults, anywhere where you wish you had done something else differently...anywhere where you think you can improve on what you have done so far...it looks dam nice...10/10

rocfighter - 29-11-2010 at 04:21 AM

Very smooth ride. I like the big tires much like the ones I used. It looked like perfect conditions, why did every one else bail?
Great video and a great ride.

van - 29-11-2010 at 06:30 AM

The buggy rides real nice. Even with the knobby tires, I was able to do some cool 180 ( did not get it on tape since my wife was filming that part with a dead battery ... I swear it happened!!) . The buggy is very stable due to the heavy tires and steel rims. I have some aluminum rims that I might try to swap it out to see how it does. I believe the knobby tires are also heavier than the slicks. It definitely needs some kind of backrest. I was getting tire on the longer rides with nothing to lean against. I hear alot of negatives about the hard backrest in a backward OBE situation. Overall, I was surprise how the buggy performed consideration this is my first build. My wife keep saying it's gonna fall apart since I'm still learning to weld. :D

I can see a few improvements already. Most of it near the front. Of course, I still need to finish the monofork and test that out!!!

btw.. most people left DBBB because the weather got bad on friday. It was not good for camping. The weather was beautiful all week.

DAKITEZ - 29-11-2010 at 11:54 AM

Buggy is looking good! It must be a joy and massive pride to ride in something you built.
From all your projects you do I can tell you are a person who sets his mind to something and gets it done ... all we have to do now is set your mind away from pansh kites and you will be good to go :lol:

popeyethewelder - 29-11-2010 at 12:29 PM

Keep a back rest low, not much higher than you side rails...and adjustable if you can, most of the time when leaning back I can hardly feel the back rest, but when you brace hard thats when you need to feel it there for support

shehatesmyhobbies - 29-11-2010 at 01:27 PM

Great job on the buggy! The video was good too!

mdntdncr - 29-11-2010 at 06:20 PM

Awesome, Van!!!!
Put a great smile on my face.

flexiblade - 29-11-2010 at 08:10 PM

Nice to see that you got some footage with your new ride - great to have a memory that won't fade. Looks like the buggy held up just fine, now you got to beat on it a bit and see what falls off. Better to give it a really hard test and see what happens then wait to find out when you're least expecting it. One test I find that sums up your welding skills is standing on the frame/swan neck clamp - it's a massive stress point of your body weight and side rail pressure. If it can handle you standing on it then it can take most anything. It's rad that you got some seat time so soon after your build completion. Here's to more footage in your near future.

van - 29-11-2010 at 10:12 PM

Thanks for the compliments everyone!!! You should see the smile on my face when I did a donut with it. I need to get that on video!! Of course more buggy abuse video will follow. :o

I will have to start saving money for some nice kites to go with my buggy ...hehehee... :frog:

popeyethewelder - 30-11-2010 at 10:17 AM

Quote:
Originally posted by van
Thanks for the compliments everyone!!! You should see the smile on my face when I did a donut with it. I need to get that on video!! Of course more buggy abuse video will follow. :o

I will have to start saving money for some nice kites to go with my buggy ...hehehee... :frog:


with your extensive skills.....why not make one


How to Turn a Sad Old Kite into a Masterpiece


Ps...watch the last video....its amazing

WELDNGOD - 30-11-2010 at 02:43 PM

You've done well Grasshopper.:borg: Doesn't it feel nice to ride that which you created?:wee:

Now, where is your passenger gonna sit?:frog: Uh-Oh ,I mighta just lit the fuse..... TANDEM TRAILER!...:yes: free buggy rides at the beach...:wee:
Good job on the vid too!:thumbup:

van - 21-12-2010 at 09:55 PM

This is how I transport it ... cool folding and transport. Very easy to setup and put away. I also added the BLING just for fun and a passenger seat ( quick 5 minute addition using old universal gym seat).

I will have to make a better seat with better support and seat belt for my passenger. I need to add a foot rest of some type for the passenger also. For the time being , I had a little sling right behind my seat that the passenger can put their feet on.


mdntdncr - 22-12-2010 at 04:23 AM

Transformers!!!!!

flexiblade - 23-12-2010 at 12:23 AM

Awesome design work - that is simply inspired.

van - 1-1-2011 at 09:35 PM

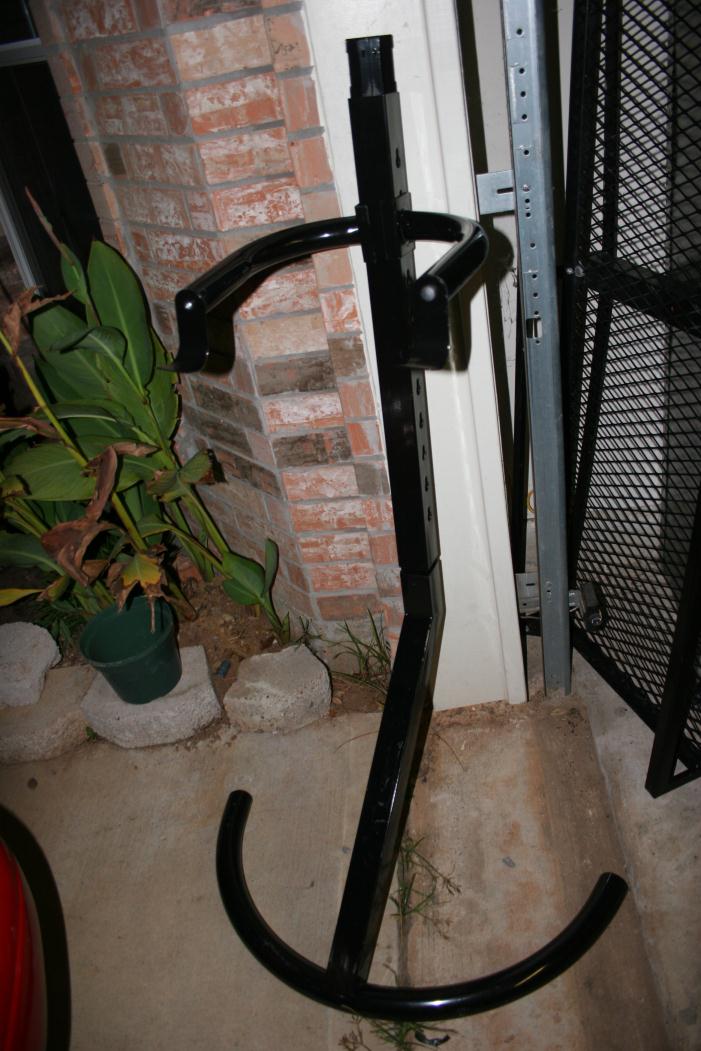
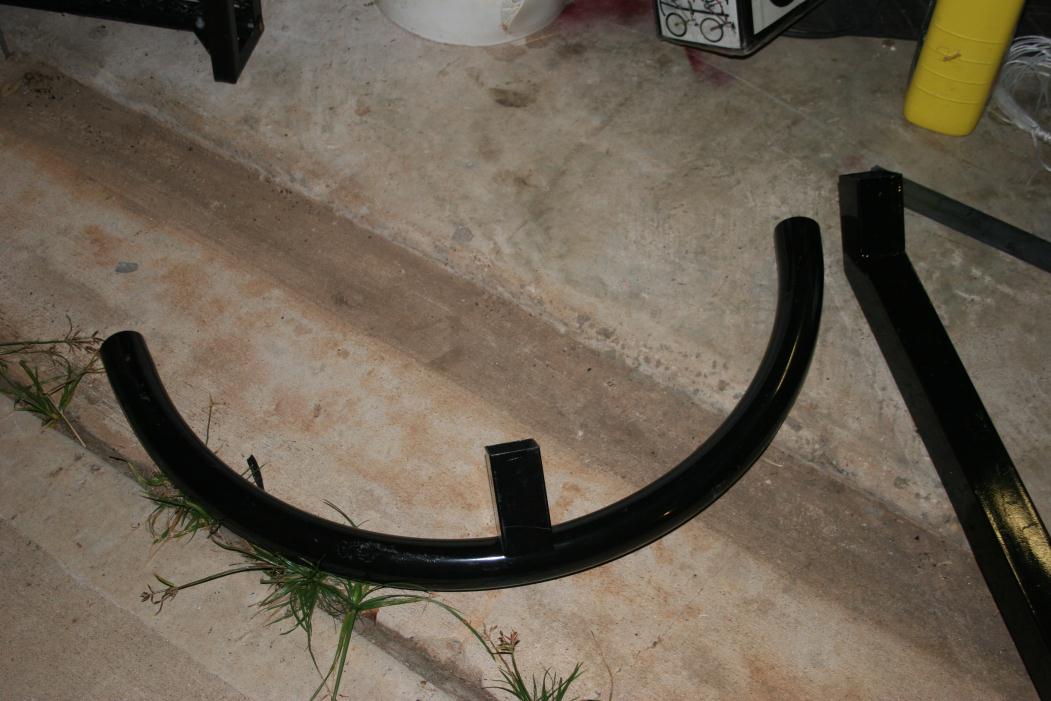
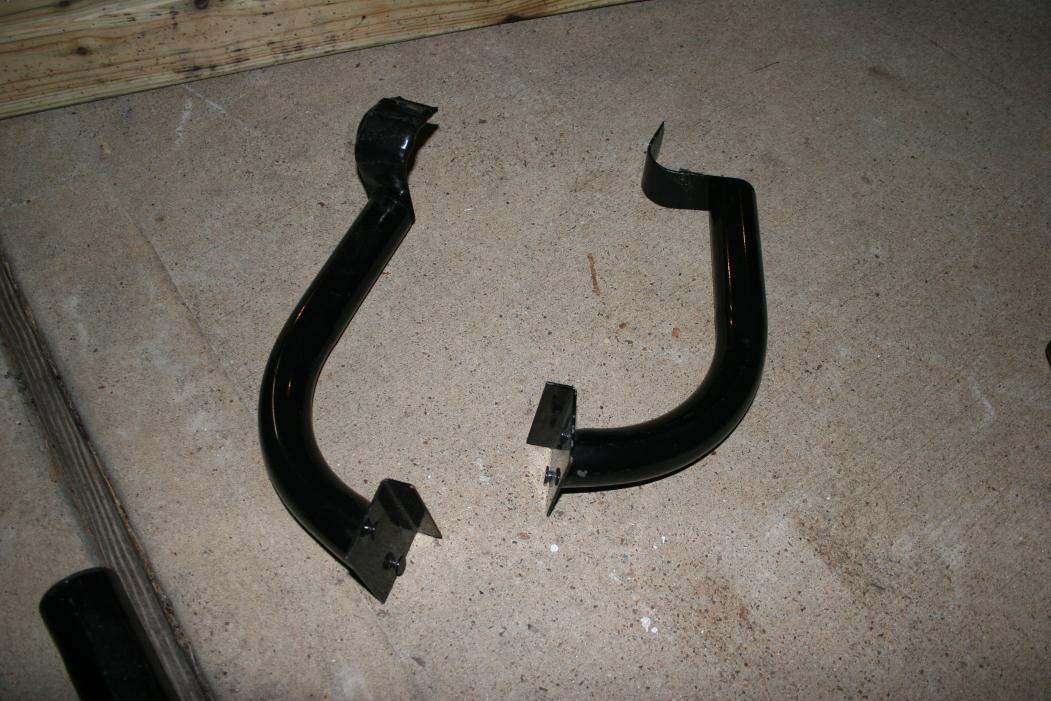
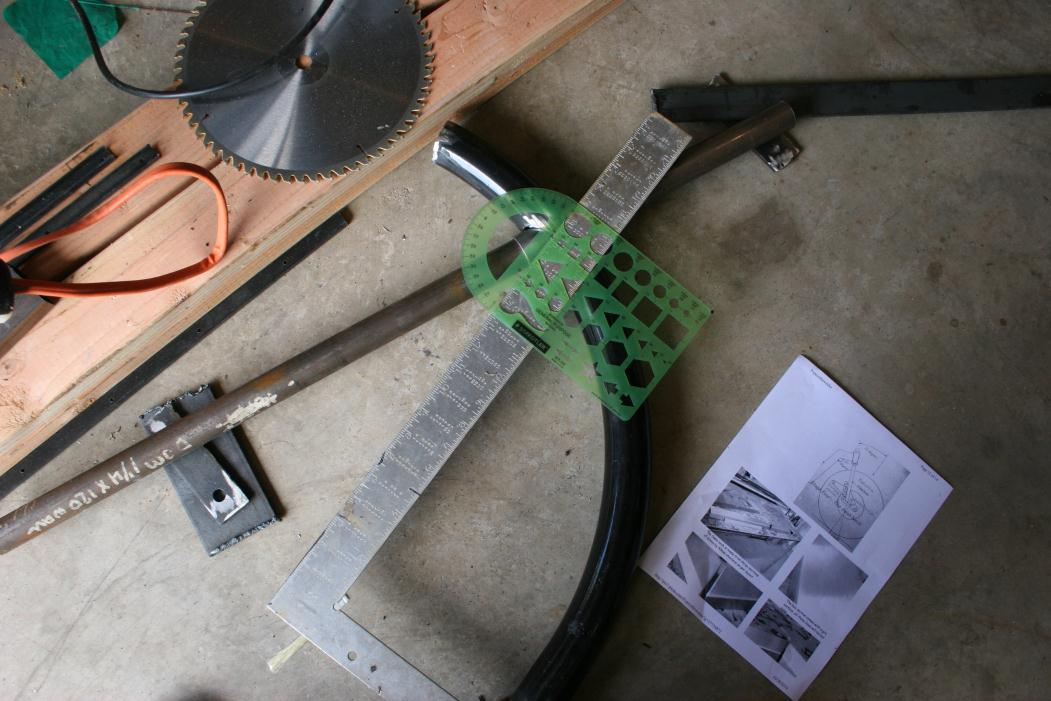
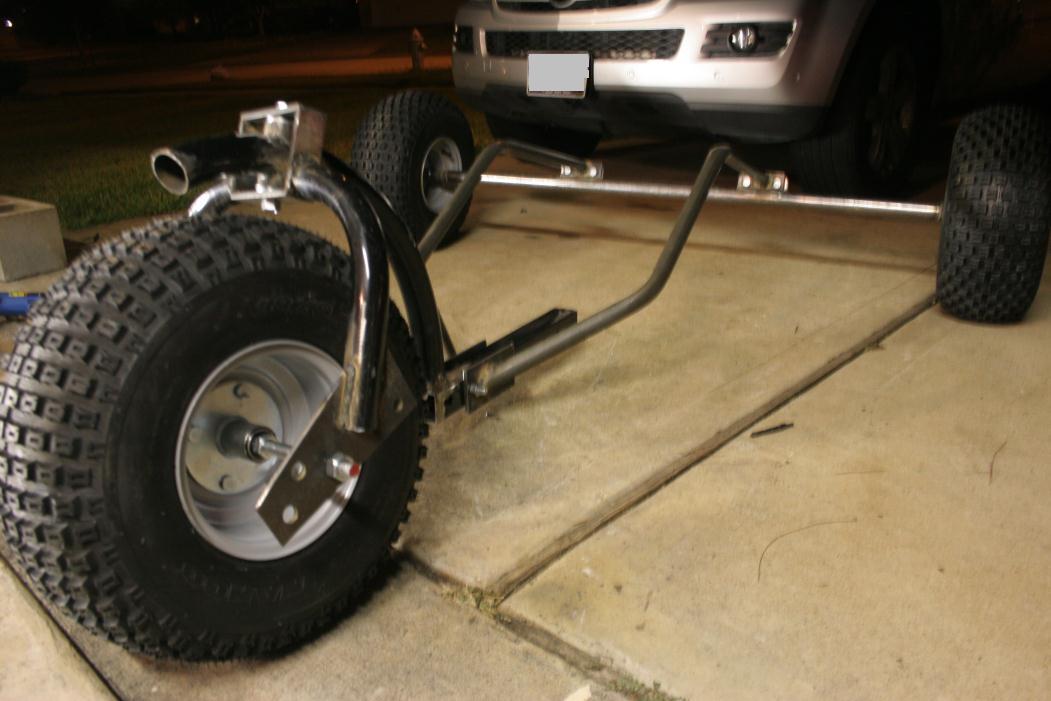
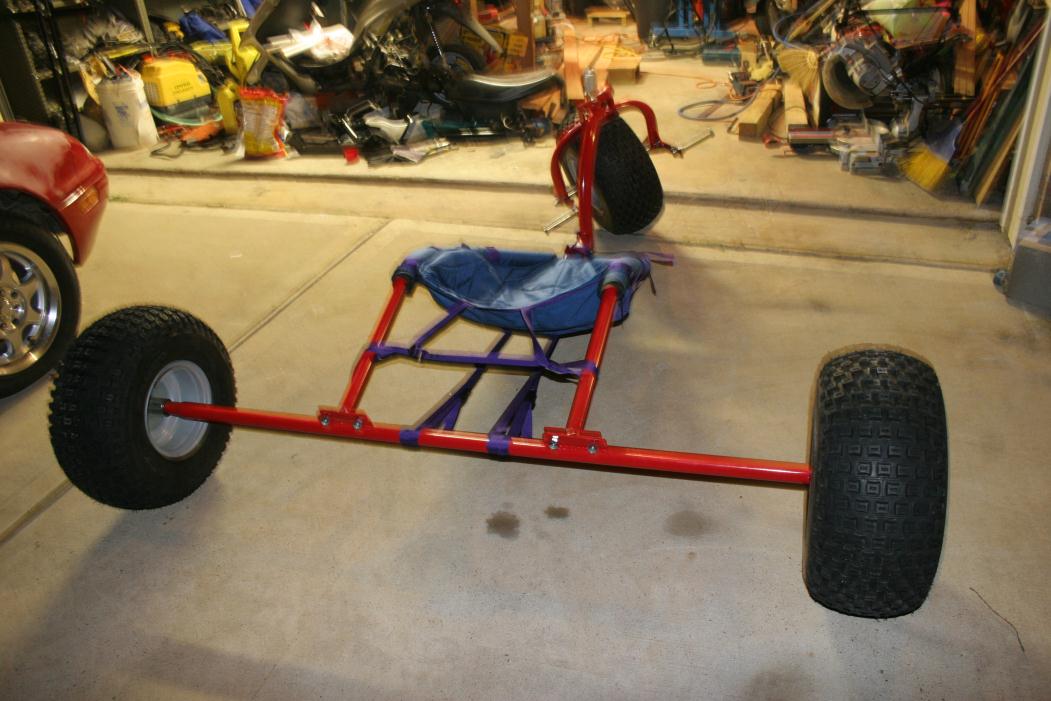
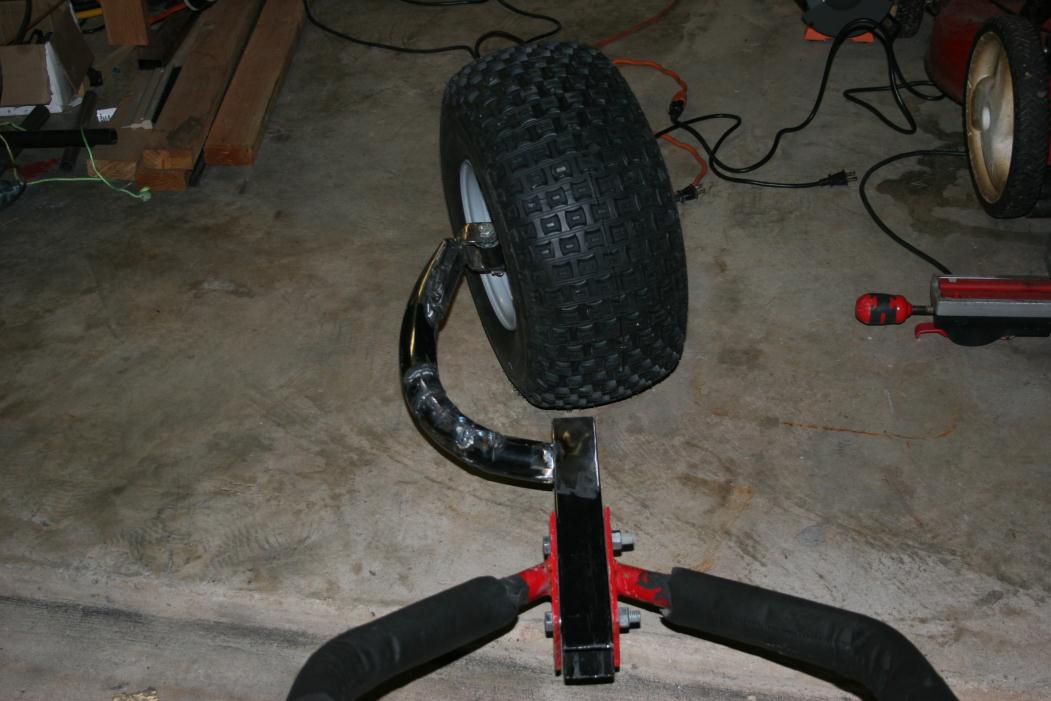
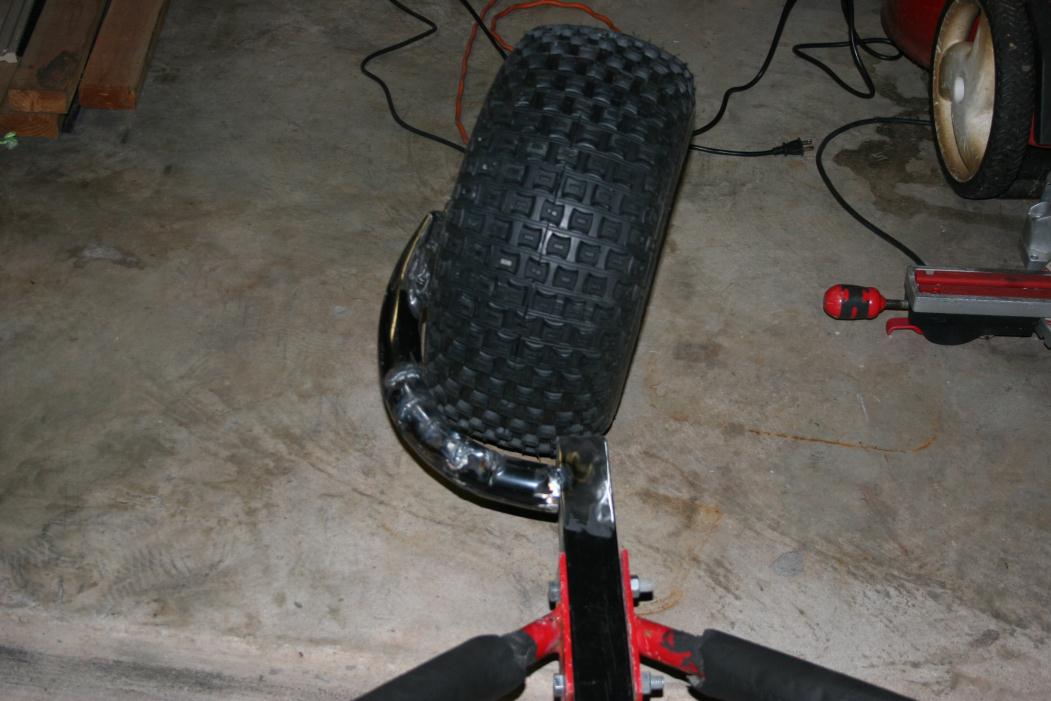
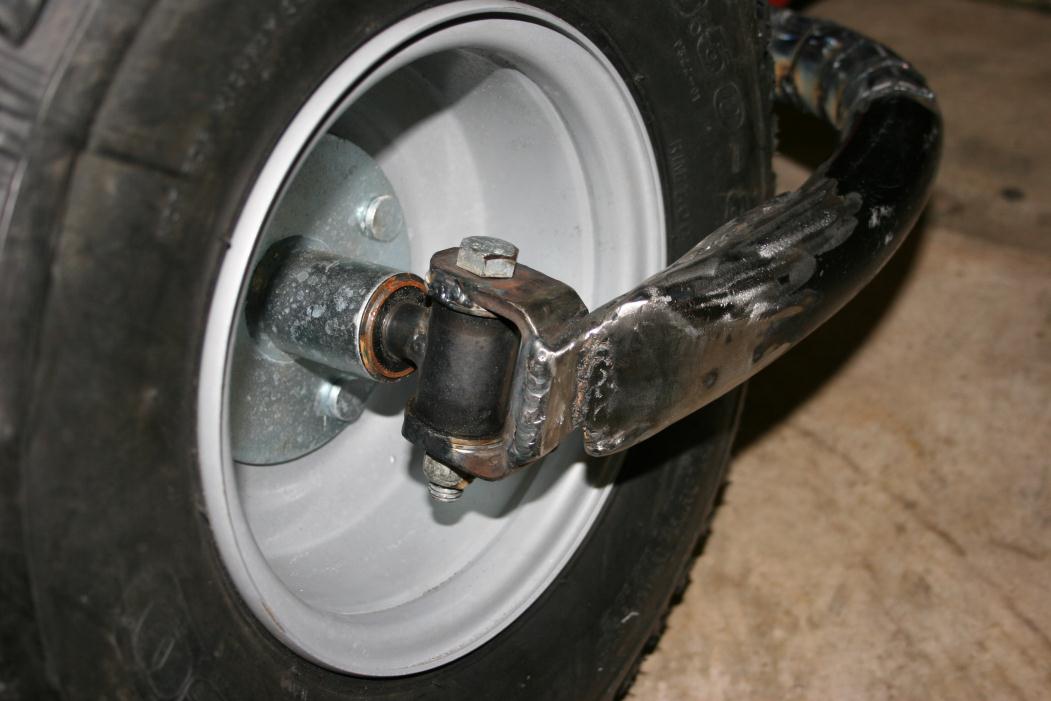
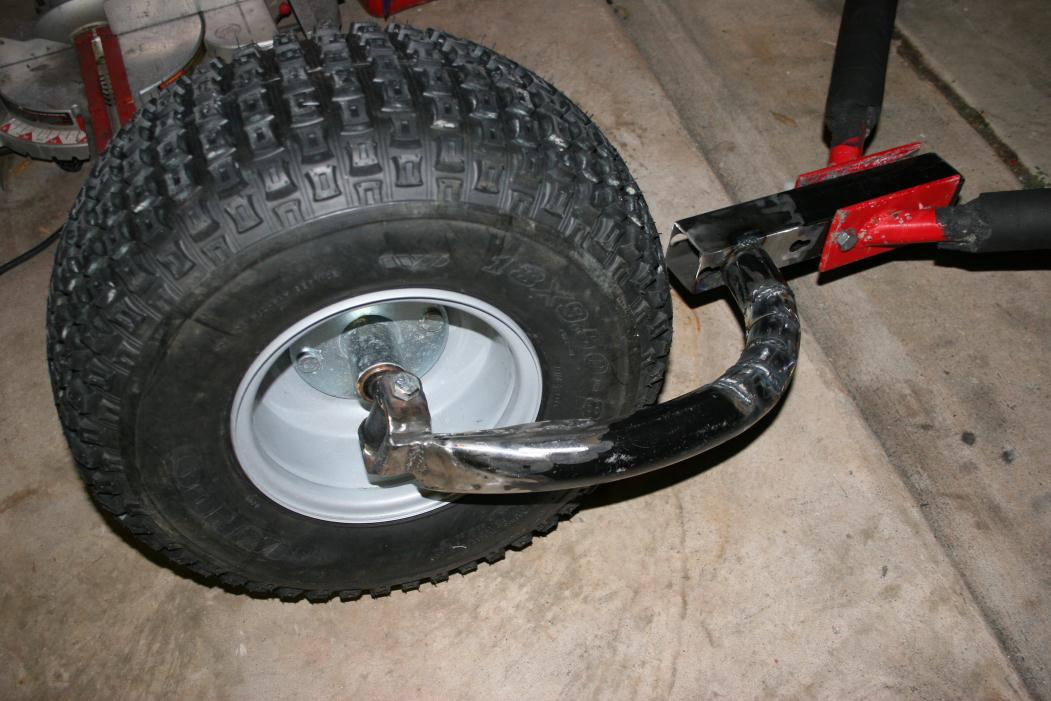
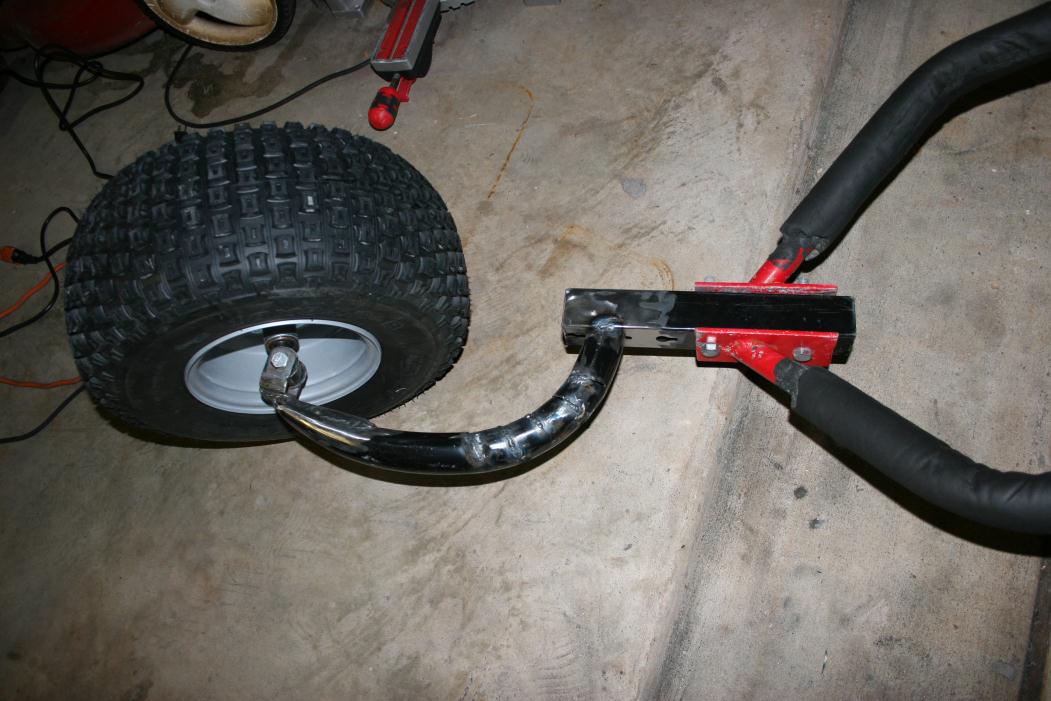
Ok.. it's the new year so I better get off my butt and build something!! I got my new TIG welder hooked up so I figure I learn how to TIG. The monofork seem like a good candidate to learn on. I got more of that scrap from my bike rack and started making a fork to see how it would work. It didn't turn out exactly like I would like but it's a good start. From here, I can modify it now I know what's wrong. You can tell that it will allow me to turn left on a dime but turning right would be a little harder. I guess that's why they make multiple prototype. Btw.. it's a #@%$#! to learn TIG on 1/16" thick wall tubes.


AD72 - 1-1-2011 at 11:38 PM

It may be difficult to do but if the pivot point was closer to the center of the tire it would be more in line with a traditional front wheel pivot. You would probably need to modify the rim.

Where do you plan to put the foot pegs?

WELDNGOD - 2-1-2011 at 03:51 AM

turn the amperage down van, you're crystalizin your welds(too hot for too long.It's all about heat input). What kind of rig are you using? remote or scratch start?

van - 2-1-2011 at 08:06 AM

WD,

I got an Everlast PowerTIG 200DX. It has a foot control and a remote button on the handle. I haven't used the foot control yet. I assume its giving me full amperage at whatever I'm setting when I push the start button on the handle. It's set for HF start right now. It's alot harder than I thought but I did do a couple good looking weld..hahaa.. the rest looks pathetic. I might have to give you a call and get some pointers. i've been giving too much heat or too little, just can't get it right. MIG welding is so much easier.

AD72,

It's not really necessary to put the pivot exactly in the center, just like your car. It's got a rake and camber so the turning point is directly right in the center and in front of where the tire touches the ground. What I need to work on is the arm so that it clears a sharp turn. If you look at my 3D drawings, I have a couple of ideas that will accomodate a foot peg.


btw .. here's the machine I have ...

http://www.everlastgenerators.com/PowerTig%20%20200DX-351-pd...


WELDNGOD - 2-1-2011 at 08:42 AM

To dial it in you need to set it for remote,then put the foot control/hand remote on it. Set the amperage on the machine for what you want your maximum current to be. For 1/16 steel I would set it for 75 -100 amps max. You dont want too much heat input, so you can't go real slow. The slower you travel ,the less heat you should use. When you start AC welding aluminum it will be "hot n fast"

I never heard of that brand of welding machine,but their web page looks alot like Millers web . The only thing I don't like about it is the knobs sticking out like that,my Lincoln invertec is like that and all the old thermalarcs used to be like that. They always get damaged by getting banged into somethin or something fell against it. If the potentiometers are on a board it's costly too. So be very careful when moving it around! Not saying it's a bad machine or anything ,just passin on 30 yrs Marine/shipyard welding experience.
Don't ya just love building your own stuff! PS always keep fire extinguisher HANDY .