Power Kite Forum

Making a Rear Axle for the Buggy

popeyethewelder - 19-11-2010 at 11:47 AM

Making a rear buggy axle...

BeamerBob - 19-11-2010 at 01:36 PM

I know these 10 minute videos represent hours of work each. It sure does make it look easy watching you work.

WELDNGOD - 19-11-2010 at 06:09 PM

Carl, that is awesome dude . You are really hooking the new builders up w/ some great knowledge. It is an excellent gift to the community:thumbup:

BeamerBob - 19-11-2010 at 06:30 PM

Is that a welder a beginner can work with or is it too advanced to learn on? I recognize the welder types names, but don't know the differences in them. I grew up playing in the shop yard of my grandfather's welding/boiler contracting business, and I have played around with a stick welder just for fun but that's the extent of it. Just wondering out loud.

van - 19-11-2010 at 11:05 PM

I am using a Clarke 110v wire feed welder that I got for Christmas a couple years ago. This is actually the first time I welded with it and the second time in my life that i did any actual welding. I am not using gas with this setup, just flux core. It's like holding a pencil and drawing a line ...hehee... I'm still learning but my welds seem to be decent so far. Of course, no where near the quality of PTW or WeldingGod !!! but watch out, I'm learning quick. :evil: I hope to one day get a TIG setup like PTW. btw .. is TIG better for stainless steel or can you use MIG like my welder? I was planning to make my next buggy out of stainless but didn't know if my MIG will be good for that.

awindofchange - 20-11-2010 at 02:04 AM

You can use your MIG to weld stainless, you will need to purchase some stainless wire though. It can be done but usually is not nearly as clean or as strong as a TIG. Strength of course depends more on the user doing the welding though.

popeyethewelder - 20-11-2010 at 04:30 AM

Quote:
Originally posted by BeamerBob
I know these 10 minute videos represent hours of work each. It sure does make it look easy watching you work.


This is the part I find the hardest....to get as much information into the normal speed parts as I can, the speeded up parts speak for themselves....I thought to myself....right the next video is making an axle...at least this video wont be as long.....WRONG, I really struggle getting all the info I want into the video, you will notice even in the speeded up parts I am talking to the camera...but I am sure even if its just a small help to buggy builders, then it is worth it...

I am having a few days grace now from my garage, and then I have to make the side rails....now putting that into a video 10 minutes long will be my greatest task ever I think....lol....

Then the back rest, foot pegs, stub axles and spacers, putting a buggy together, polishing, fitting padding and a seat, ordering materials.....then I think I will just have about covered everything....and that will be my contribution to all the new and existing kite buggy builders out there....my kind of pay back for all the great times I have had kite buggying.

If there had been something like these videos out when I first started making buggies, I would have saved myself shed loads of time, effort and most importantly money.

I am not saying my way is the right way to do these tasks, I am just saying with the experience I have gained during the buggy making years, this is the way I have found that works best for me, with the equipment I have around me, obviously if you have access the industrial benders, polishing equipment, CNC benders, laser cutters etc etc, it will only be so much easier. but everything I am showing with these videos can be done in your own garage at home.

bigben91682 - 20-11-2010 at 06:53 AM

I've never welded before, and honestly probably never will, but I still find these video's very fascinating and insightful. I love knowing how things are made, very interesting to watch - thanks for the hard work required not only to make the buggy but share your craft with the community.

BeamerBob - 20-11-2010 at 08:33 AM

One thing I didn't get from the video in fast mode was how you were careful to get the axle plates on straight and true to each other. It looked like you just tacked the first one on there and then lined up the second to it. I know I missed something.

popeyethewelder - 20-11-2010 at 08:46 AM

Quote:
Originally posted by BeamerBob
One thing I didn't get from the video in fast mode was how you were careful to get the axle plates on straight and true to each other. It looked like you just tacked the first one on there and then lined up the second to it. I know I missed something.


Yeah sorry I will add that to the video, I use a piece of angle, sit that on the tube and draw a straight edge along the tube, across the marks for the centers of the plates. Tack one plate on along that line then clamp a straight edge to that. I then position the other plate and clamp it to the straight edge. Both plates remain perfectly inline then.


If I have missed anything please tell me.

BeamerBob - 20-11-2010 at 08:53 AM

Quote:
Originally posted by popeyethewelder
Quote:
Originally posted by BeamerBob
One thing I didn't get from the video in fast mode was how you were careful to get the axle plates on straight and true to each other. It looked like you just tacked the first one on there and then lined up the second to it. I know I missed something.


Yeah sorry I will add that to the video, I use a piece of angle, sit that on the tube and draw a straight edge along the tube, across the marks for the centers of the plates. Tack one plate on along that line then clamp a straight edge to that. I then position the other plate and clamp it to the straight edge. Both plates remain perfectly inline then.


If I have missed anything please tell me.


The angle is a great idea. Great way to make sure you have a straight line on a round object. How do you make sure the plate is perpendicular to the axle? Is that something you can do by "eye" or do you jig that in some way?

popeyethewelder - 20-11-2010 at 09:04 AM

Quote:
Originally posted by BeamerBob
Quote:
Originally posted by popeyethewelder
Quote:
Originally posted by BeamerBob
One thing I didn't get from the video in fast mode was how you were careful to get the axle plates on straight and true to each other. It looked like you just tacked the first one on there and then lined up the second to it. I know I missed something.


Yeah sorry I will add that to the video, I use a piece of angle, sit that on the tube and draw a straight edge along the tube, across the marks for the centers of the plates. Tack one plate on along that line then clamp a straight edge to that. I then position the other plate and clamp it to the straight edge. Both plates remain perfectly inline then.


If I have missed anything please tell me.


The angle is a great idea. Great way to make sure you have a straight line on a round object. How do you make sure the plate is perpendicular to the axle? Is that something you can do by "eye" or do you jig that in some way?


You can use a pipe/center square,


you just move the rule so that it sits on the tube, the edge of the rule will then be the center line of the upright plate.


but it is very easy to see by eye, there is quite an easy way to make one of these, I have many tools, that I have made, including the tap wrench in the video I made too.....perhaps thats another batch of videos

acampbell - 20-11-2010 at 10:07 AM

Popeye is it practical to clamp the axle to the bench to keep it straight until it cools after the weld, or are the bending forces just too great?

Great video series by the way. Thanks.

popeyethewelder - 20-11-2010 at 10:20 AM

Quote:
Originally posted by acampbell
Popeye is it practical to clamp the axle to the bench to keep it straight until it cools after the weld, or are the bending forces just too great?

Great video series by the way. Thanks.


It may help just a small amount, even if you tacked two axles back to back, then welded the plates on opposite sides, when you released one of the tacks holding the axles together, the axle tubes will spring apart with some force, in reality there is no way to stop the axle bending....even just when tacking the plates on the axle will bend....

Another way to straighten the axle tube is to put heat in the opposite side, but that is a practiced art form to get right....if you do try that way, make sure you have a bucket full of wet rags.....as soon as the axle has been pulled back straight, immediately cover it with the wet rags, to take the heat out.....its the heat that expands the steel, then as it cools down, it contracts, but will contract more....and keep contracting until the steel is cold.

I would not recommend doing this on stainless though, or if you have no experience in using heat to straighten steel

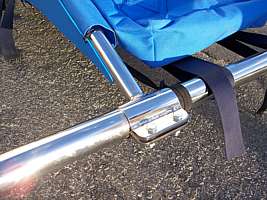
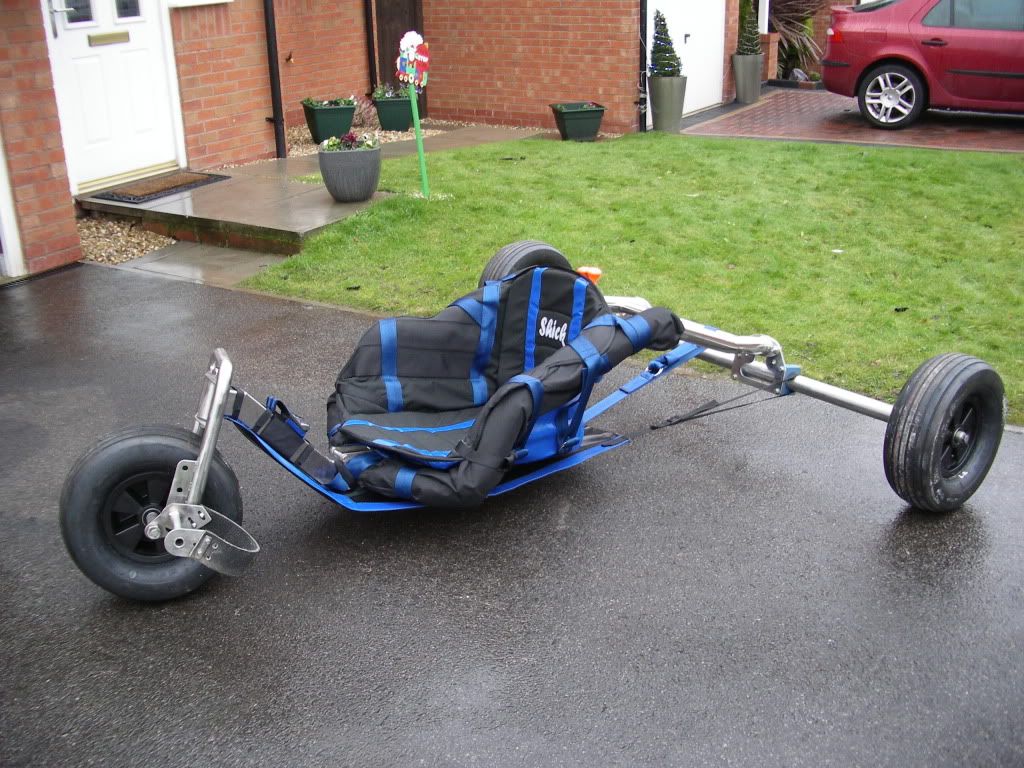
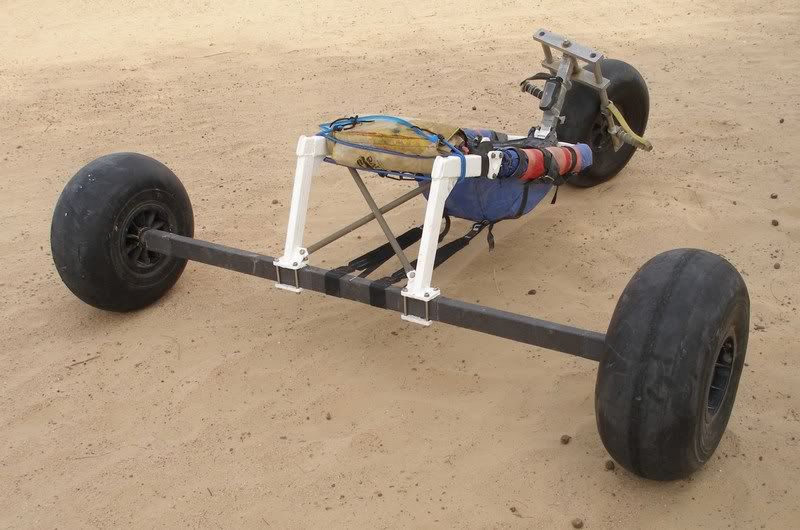
There are alternatives to fixing the axle to the side rails, by using clamps, you can either make these yourself, like the SuperBug 2...with hinges


seen better HERE

or the Ivanpah


or even use plastic clamps like the ones uses on the Tornado Buggies


or like Sand Yeti on his buggies

aircav1182 - 20-11-2010 at 11:37 AM

Popeye - Everyone has said most of what I feel but just wanted to add that the video instructional series are very gracious and they have made me consider taking up welding. Awesome job and your hard work is appreciated!

popeyethewelder - 20-11-2010 at 12:11 PM

Quote:
Originally posted by aircav1182
your hard work is appreciated!


Thank you, I really would not bother with it if it wasn't for you guys, I love the way you guys are so enthusiastic about making buggies....like me.

Its enough spending all day in the garage, then to spend all evening working on the video...you make it worth my while, thanks for the encouragement and kind words

WELDNGOD - 20-11-2010 at 12:30 PM

Quote:
Originally posted by acampbell
Popeye is it practical to clamp the axle to the bench to keep it straight until it cools after the weld, or are the bending forces just too great?

Great video series by the way. Thanks.


sorry to hijack your post Carl, But you can PREBEND in the opposite direction a few degrees before welding , we call it backbreaking or negative camber. In the case of your axle,I would put a 1/8"to 1/4"(do a mock up first to get the right amount) thick piece of flatbar under where you are going to weld. Then clamp each end down,thereby bowing the axle.When welded and unclamped, if ya did it right ,it will be straight.:thumbup:

BeamerBob - 20-11-2010 at 01:09 PM

Now we're talking. Popeye and weldngod in the same garage.

rocfighter - 20-11-2010 at 02:53 PM

Very nice popeye. I like the bung system with the nut for the ends. Makes every thing come together better.

popeyethewelder - 21-11-2010 at 12:30 AM

Quote:
Originally posted by WELDNGOD
Quote:
Originally posted by acampbell
Popeye is it practical to clamp the axle to the bench to keep it straight until it cools after the weld, or are the bending forces just too great?

Great video series by the way. Thanks.


sorry to hijack your post Carl, But you can PREBEND in the opposite direction a few degrees before welding , we call it backbreaking or negative camber. In the case of your axle,I would put a 1/8"to 1/4"(do a mock up first to get the right amount) thick piece of flatbar under where you are going to weld. Then clamp each end down,thereby bowing the axle.When welded and unclamped, if ya did it right ,it will be straight.:thumbup:


No hijack at all WG, thank you and please chip in as and when you want my friend, I forget to add things sometimes and you always offer sound advice, Yes of course you can go down the method you have advised, my problem with that method is space, you can see I am turning and flipping the axle all during the welding process, if you have enough space to clamp down over a 1/4" bar and leave it there until all the welding has been complete and cooled down, this is certainly another method to try.

BigMikesKites - 21-11-2010 at 05:48 AM

I just caught this and find it very interesting. I've welded a fence with crummy welds to boot. My dad has wire and gas setups. My son is taking a shop class in school that includes welding. Maybe I can coax some help from them on creating a monsterpiece for myself.

Thank you for your efforts.

WELDNGOD - 21-11-2010 at 06:37 AM

Carl, are you going to do a whole series? If so, you know this will probably jumpstart alot of peeps to try their hand at building their own. :eureka:

popeyethewelder - 21-11-2010 at 02:56 PM

Quote:
Originally posted by WELDNGOD
Carl, are you going to do a whole series? If so, you know this will probably jumpstart alot of peeps to try their hand at building their own. :eureka:


Yes I will try to cover everything

WELDNGOD - 21-11-2010 at 03:16 PM

Good Man!

acampbell - 21-11-2010 at 04:18 PM

After that Carl, do you have any good recipes? Maybe a good Bolognese or a pot roast?

bigkid - 22-11-2010 at 03:42 PM

Quote:
Originally posted by acampbell
Popeye is it practical to clamp the axle to the bench to keep it straight until it cools after the weld, or are the bending forces just too great?

One of the things we did when working in the Nuclear Power Plant industry, was to preheat the area before welding to eliminate any movement at all, before, during, and afterwords. In a small shop it would be a little hard to run a rose bud and heat it up to 400 degrees and hold it there till it was done being welded.
You can help to reduce the pull of the weld by welding small sections at a time and allow it to cool between welds, or skip weld the plates to reduce heat build up. Or as you do just bend it back.
Not trying to be one up on anyone who is willing to do it themselves but it is the QC part of my welding training that enjoys the fact that you are welding and making it happen, Great work guys, keep it up:thumbup:

WELDNGOD - 22-11-2010 at 04:16 PM

Quote:
Originally posted by bigkid
Quote:
In a small shop it would be a little hard to run a rose bud and heat it up to 400 degrees and hold it there till it was done being welded.
Quote:


You forgot about the fact that most buggies are stainless.
BK, if ya heat stainless that hot and weld on it, carbide percipitate will occur (sugar),esspecially on thin material. But in theory you WILL reduce weld induced stress, just one of the many reasons we control interpass temps.
We don't want nobody doin it wrong and hurtin themselves.

acampbell - 22-11-2010 at 04:25 PM

Never thought I'd be glued (welded) to a welding nerd-fest. Good stuff

BeamerBob - 22-11-2010 at 05:03 PM

Angus, as good as you are at turning out nice stuff with wood, you would be dangerous with a chop saw and a welder. :wow:

bigkid - 22-11-2010 at 06:23 PM

Quote:
Originally posted by WELDNGOD

You forgot about the fact that most buggies are stainless.
BK, if ya heat stainless that hot and weld on it, carbide percipitate will occur (sugar),esspecially on thin material. But in theory you WILL reduce weld induced stress, just one of the many reasons we control interpass temps.
We don't want nobody doin it wrong and hurtin themselves.

Sorry, I was thinking of inkanell and nickle. stainless is a softer metal. only need somewhere about 250 degrees. mild steal needs 250 to 500 degrees depending on thickness. with stainless it was more the color of the steal that determined the point of which the welding was done.
this thread is bringing back to many memories of years of welding in the field. I am remembering why I got out of it:smilegrin:
Tig welding will do a better job with less clean up and at a lower temp than mig or stick.
But the point is, making your own bug is much better than buying one, even if there are dog turds hanging off the welds, they grind off.:thumbup:

WELDNGOD - 22-11-2010 at 06:52 PM

yup,grinders were made by and for NON-WELDERS ...:lol::lol: ridin a buggy that YOU built is an awesome feelin:wee:..As long as you are not wonderin ,when it is gonna fall apart....then ,not so awesome..:lol::lol: