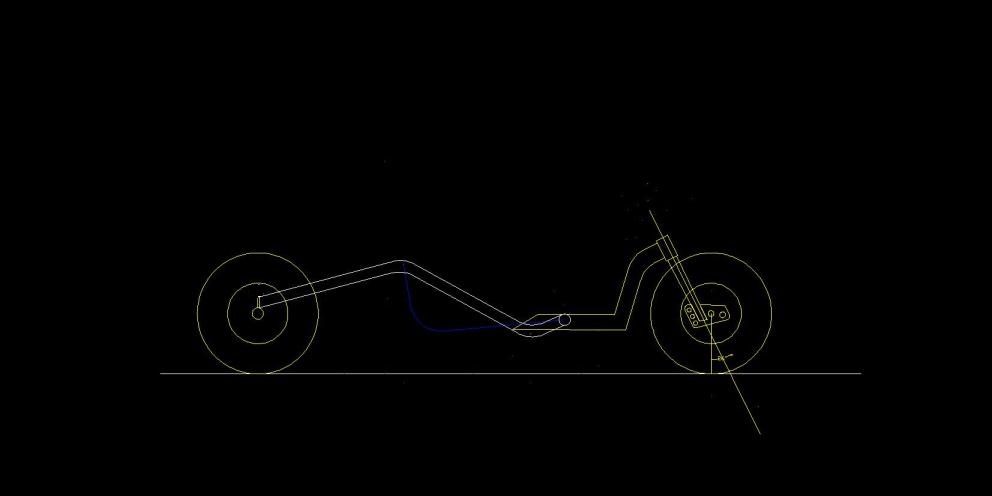
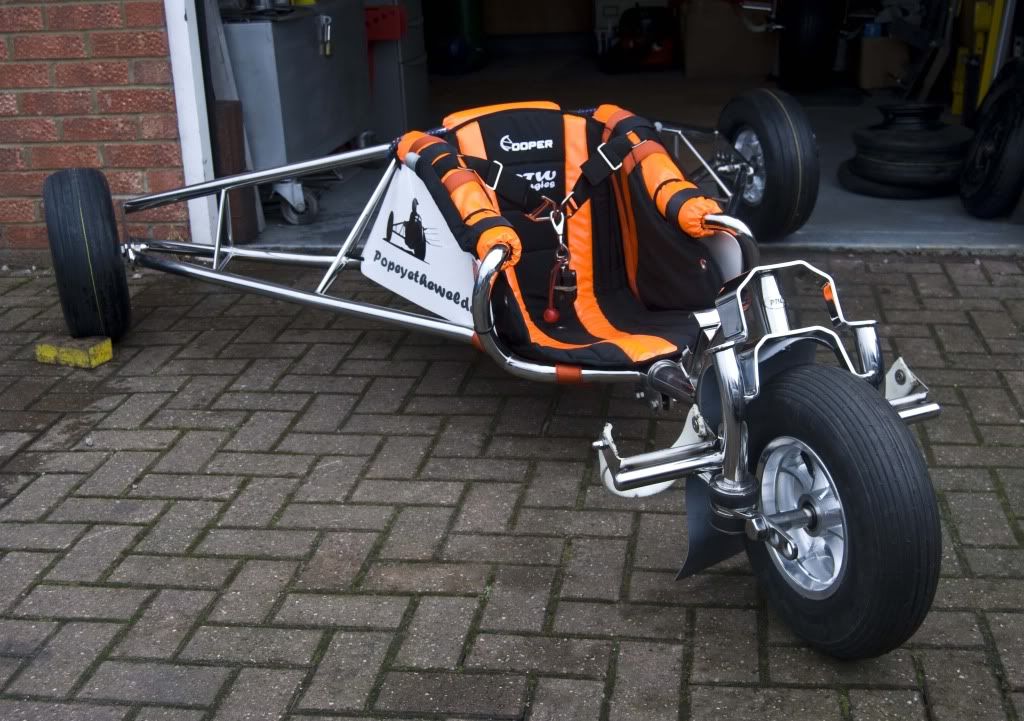
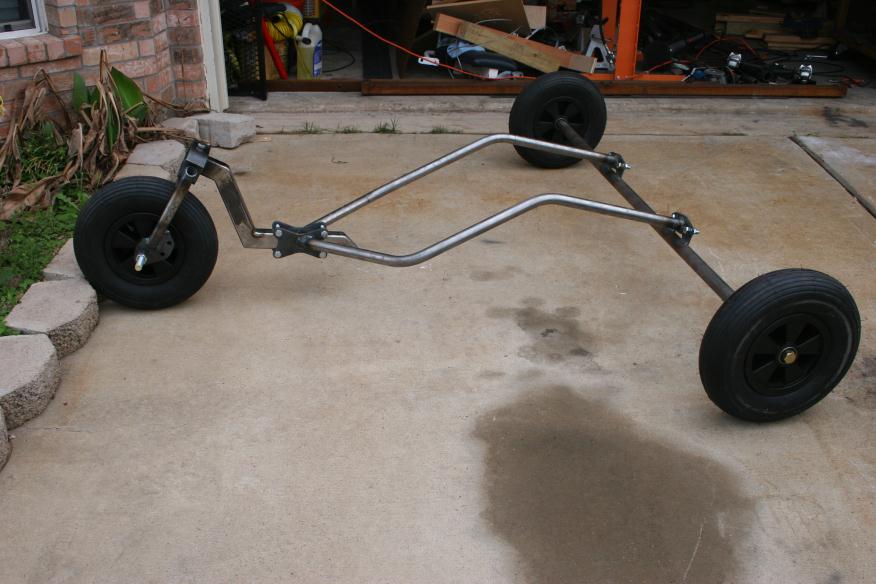
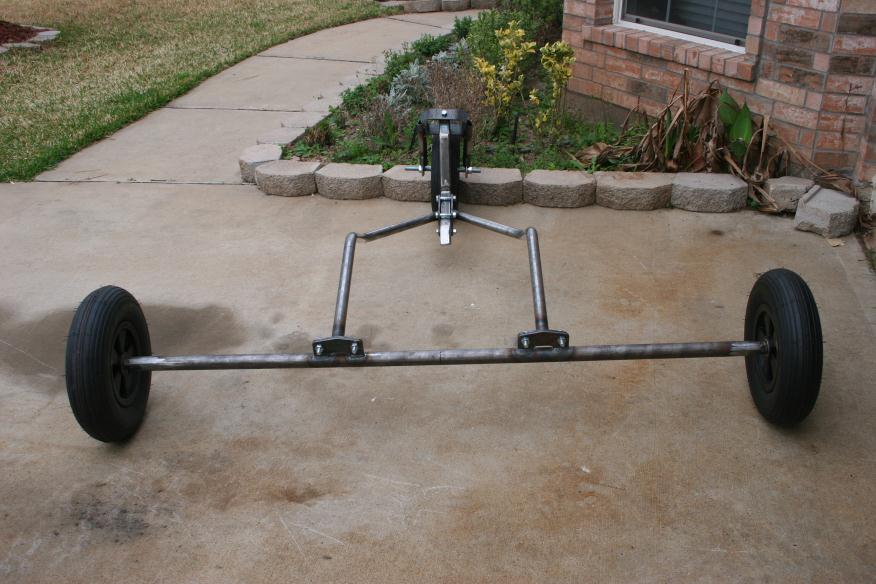
While I'm taking a break from playing with the monofork, I thought I sketch a design for my 2nd build.
Requirements:
1) A single buggy for regular and bigfoot tires
2) fold in half
3) share rails for regular and bigfoot
4) share axle
As you can see here.. Everything is shared except for the fork. I think it would look much better with 2 different forks
awindofchange - 11-1-2011 at 12:29 AM
You would need to build two different forks and downtubes if you want to maintain the exact same ride height with standards and bigfoots. It looks
great though!!!popeyethewelder - 11-1-2011 at 03:43 AM
Looks pretty good to me VanKamikuza - 11-1-2011 at 04:37 AM
No, do something really off-the-wall - hub center steering, use the rider as a stressed member, MacPherson struts :Dmdntdncr - 11-1-2011 at 05:16 AM
you know . . . if you kept only the fork and neck of the bigfoot, the regular tire should still fit inside.van - 11-1-2011 at 07:14 AM
Kami ... the off the wall buggy will always be the first one .. haha.. and I'm not done with that one yet. I figure I build something more standard
and clean looking for the second one.
I want to use the exact same rails and axle for both tires so the rails will have to mount under the axle when using bigfoot tires and over the axle
when using standard barrow tires.
mdntdncr .. I don't want to use the big foot forks because it would change the height of the front and also the forks are too wide apart that it would
not look good.WELDNGOD - 11-1-2011 at 08:55 AM
Van, what I did was make an adjustable rear axle inserts like this w/ multiple holes drilled so it bolts into high mid and low position.
van - 11-1-2011 at 09:42 AM
WG , that's a cool looking solution. That would then also shorten your main axle making it easier to transport I bet. I might have to try that
modification on my first buggy. On this one, I would like to keep the build as simple as possible so others can build one just like it using simple
available parts.van - 11-1-2011 at 09:47 AM
Kami ,
I missed that part about using the rider as a stress member ...ahahha... I'll get going right on it. You'll be my first test pilot. mdntdncr - 11-1-2011 at 10:26 AM
Quote:
Van, what I did was make an adjustable rear axle inserts like this w/ multiple holes drilled so it bolts into high mid and low position.
This was similar to my thinking on the front fork. but obviously with spacers to center the wheel appropriately. However, it sounds like you don't
think the aesthetics can be sufficiently worked out . . . ?van - 11-1-2011 at 12:44 PM
I've seen alot of people using bigfoot forks with the smaller tires and its hideous. The forks are like 12" apart with spacers. The regular tires
are only 4" wide so you have alot of space between the forks. It's like putting 12" bicycle tires on a Harley. It just don't look right.Kamikuza - 11-1-2011 at 05:30 PM
:frog: I'm not stressed what're you on about? indigo_wolf - 11-1-2011 at 09:15 PM
Quote:
Originally posted by Kamikuza
No, do something really off-the-wall - hub center steering, use the rider as a stressed member, MacPherson struts
MacPherson struts.... hmmm....
:o Don't even want to think about what that would do to the budget.
ATB,
Samflexiblade - 11-1-2011 at 09:55 PM
The Difference in height of the wheels would be about 4 inches from center so on a fork your looking at about a 3" gap if running a barrow tire
compared to a bigfoot at it's height. Axle plate on the fork could compensate with holes 2 - 3" apart vertically from one another. As far as the
side gaps you'd need to find a way to adjust the fork distance. I've wrestled with this notion a while back and came to the conclusion of just
getting 4 ply larger tires - they can be expensive but they will last for a rather long time.
When it comes down to it your either dealing with 2 things - riding terrain differences, or riding style differences. Starting with style, either
cruiser/racer or freestyle. Rarely do you see a set of large tires on a freestyler's buggy - the only time I would suggest using barrows. A
racer/cruiser will almost always be larger tires, softer ride and more terrain availability. As far as terrain you have either soft or hard - beach
or grass=soft [ pavement, dirt, playa=hard. Soft=2 ply hard=4ply.
So unless you're planning to start doing some 2 wheel, backwards, jumping stuff you might just want to stick with the larger tires rather than trying
to design a buggy that will fit tires that don't fit your riding style.
Oh, and if you can afford the struts above I highly recommend them.van - 11-1-2011 at 10:50 PM
Thanks for the insight flexiblade. This buggy will be for cruising definitely, no freestyle. It will have a 60+ inch track. I guess the tire size I
might stick with will be the bigfoot and the midsize ones. Would the 4 ply standard size tires give less friction for racing?? I was hoping to make
it to NABX with this buggy to do some speed runs. What size tires is everyone using on the dry lakes?
I'm gonna have to budget for two struts, one on each side to balance the buggy out. Kamikuza - 11-1-2011 at 10:56 PM
I had a life-sized poster of the MacPherson struts long, long ago ... the benefits of working part-time in a copy shop. With a laminator machine :D
popeyethewelder - 12-1-2011 at 02:58 AM
Quote:
Originally posted by van
I was hoping to make it to NABX with this buggy to do some speed runs. What size tires is everyone using on the dry lakes?
Most will be on Barrows with 4ply slicks, may see you therevan - 12-1-2011 at 07:14 AM
PTW .. when you use the word 'Barrows' , are you referring to what we have here in the USA in size 4.80/4.00-8 tires?WELDNGOD - 12-1-2011 at 08:00 AM
here is mine on "barrows"
BeamerBob - 12-1-2011 at 08:24 AM
Quote:
Originally posted by van
PTW .. when you use the word 'Barrows' , are you referring to what we have here in the USA in size 4.80/4.00-8 tires?
That's correct Van.van - 12-1-2011 at 12:41 PM
WG .. looks like your ass is 1/2" off the ground!!rocfighter - 12-1-2011 at 12:44 PM
Well he was always protected by the PINK SKIRT. But now he needs to boost it up a bit!
No that is his mud flap hanging down. His skinny butt is safe!WELDNGOD - 12-1-2011 at 12:56 PM
Van, that was setup for Kenda multiribs but still had barrows on it.Just thought it showed the 4 inch drop spindles in action.popeyethewelder - 12-1-2011 at 02:03 PM
Quote:
Originally posted by van
PTW .. when you use the word 'Barrows' , are you referring to what we have here in the USA in size 4.80/4.00-8 tires?
yes...
like these, front is a 4X8" (8" refers to the rim size) barrow tire, rears are midis
van - 12-1-2011 at 02:17 PM
sweet .. I was making sure it wasn't a different size in the UK. I like the forks .. it fits the size of the tire very well.van - 28-1-2011 at 06:09 PM
OK.. finally , a little update. Been busy trying to get some tools built. I spent some time last week to modify my manual pipe bender into a
pneumatic / hydraulic bender.
I bought a pneumatic / hydraulic ram from harbor freight and one of those digital angle finder. It makes bending the rails a breeze. Enjoy!!
WELDNGOD - 28-1-2011 at 06:16 PM
nice one!Taper123 - 28-1-2011 at 06:22 PM
Cool! Everybody needs their toys WELDNGOD - 28-1-2011 at 06:31 PM
that's no toy. that makes toys. and that makes it a TOOL! and Tools are our friends!!!van - 28-1-2011 at 09:02 PM
So that means.. I'm making friends!!! :evil:WELDNGOD - 28-1-2011 at 09:27 PM
erratic winds - 28-1-2011 at 11:02 PM
some people make friends, engineers MAKE friendsvan - 22-2-2011 at 09:16 PM
Ok .. here's the reason I've not been able to update my build. I've been trying to source a good waterjet company in Houston and had no luck in the
last 3 weeks. I finally gave up and added a plasma cutter torch holder to my CNC router table that I made earlier this year. Since the CNC wood
router was in working order, I only needed to remove the wood table and make a torch holder.
Here's a raw / unedited video of it cutting 1/4" steel plates into buggy parts. Sorry about the quality. It was film with my G2 phone.
mdntdncr - 22-2-2011 at 10:10 PM
Dude!!!!!
I cannot say how much that rocks!!!!
I think I can use this vid to get you another sale on your machine.Houston AirHead - 23-2-2011 at 05:04 AM
clean cuts man...cheezycheese - 23-2-2011 at 05:19 AM
Are you ready for the requests to come rushing in bro...?Chook - 23-2-2011 at 05:22 AM
First class !!!!Todd - 23-2-2011 at 05:28 AM
I love the sound of plasma in the morning... Nice work van - 23-2-2011 at 06:02 AM
I design the machine to cut wood so believe it or not, it's too heavy duty for metal. It's temporary for now until I build a proper plasma table with
a water table below it to catch all the plasma dust. The gantry on a plasma machine does not need to carry a heavy load such as a spindle or router
so it's usually lighter duty. It's like renting an 18 wheel truck to haul your kite buggy to NABX. It works but its a monster. Looks like I might
be selling buggy parts soon ..:singing:kitemaker4 - 23-2-2011 at 07:45 AM
Way to go Van. Let me know if you want more info.
Susan (npw goddess)bobalooie57 - 23-2-2011 at 08:01 AM
Brilliant!van - 23-2-2011 at 08:33 AM
Susan,
I'm running around like mad lately trying to get the buggy built and ready for NABX. I'm hoping to have a few built so I can loan out to any fellow
kiter that needs a buggy at the event. I'll get in touch with you soon as the time gets closer so you can give me pointers on which road to take to
NABX.snowspider - 23-2-2011 at 12:36 PM
I'm reminded of the old Mr Rogers song...."won't you be my neighbor"
super slick!!!shehatesmyhobbies - 23-2-2011 at 02:52 PM
Van, that is Awesome! You are a genius! Can't wait to see one of those buggies!flexiblade - 23-2-2011 at 08:44 PM
Wow! I am am uber impressed. Not only did you make a kick ass improvement to your hydraulic bender (nice video by the way) but you adapted a cnc
table that you made into a cnc plasma cutter - you essentially built a buggy factory in your garage. That is fricking amazing. You, Van, are a very
talented man. Here's to your future buggies and future buggying adventures!rocfighter - 23-2-2011 at 08:46 PM
I call first dibbs on the house next door to you when it goes up for sale. You have awesome tools to make increadible toys.van - 24-2-2011 at 12:03 PM
haha.. I just purchased a milling machine. it arrived yesterday. I still haven't open the crate yet but I already plan to add stepper motors to it
and turn it into a CNC mill. I also got a lathe on order so should be here next week. Having an automation / computer background really helps. It's
amazing what you can do with electronics. Been spending my bonus money like crazy My wife helped me unload the 1000 lbs milling machine off the trailer but she gave me this funny look the whole time. I might
have to buy the neighbor's house soon and live there if I keep this up :evil:jellis - 24-2-2011 at 06:48 PM
OK Van where did you get the table and is the house beside you for sale?van - 24-2-2011 at 09:43 PM
jon,
if you come down to galveston, you can come by my house and play with the toys. I'm about 1 hour from galveston.jellis - 24-2-2011 at 11:19 PM
Love to see you and your shop. Thanks for the invite . Hope you will have time to buggy. U2umdntdncr - 25-2-2011 at 06:31 AM
And the food's good, too, Jon!!!!jellis - 25-2-2011 at 11:28 AM
Food! You mean the catfish, stuffed with crab covered with craw fish ettufee? Maybe the great tasting tender steaks at the Salt Grass Trail. Could be
any food from Louisiana? Or just rice and beans with corn bread. Gulf shrimp in a gumbo. or Hush Puppies. Sorry but my drool got on the keys of my lap
top and shorted it out.popeyethewelder - 25-2-2011 at 11:56 AM
wow...wish I got bonuses like that...van - 25-2-2011 at 01:12 PM
Shell does pay pretty nice bonus. You can get up to 60% of your salary but the norm is around 25%. I used to work for BP and their bonus was around
5%. The Dutch know how to treat their employees well
Jon, my family are still in the shrimping business so I get fresh shrimp and crabs from the coast for FREE!!! Shrimp taste best when they are still
jumping around when you throw them into a boiling pot of water. They do give a high pitch scream though :evil:BeamerBob - 25-2-2011 at 04:28 PM
Nice job Van. I missed the cnc bender project. with that and your plasma cutter, the sky is the limit for you. I consider myself a cad expert but
you seem to have that end covered as well. I look forward to seeing where you take this.Taper123 - 25-2-2011 at 04:50 PM
You bring the shrimp, I'll cook them anyway you want them.... and any of my kites ya want to fly. I cooked some red potatoes and corn the other day
in the solar oven, with some shrimp added at the end. Was really good.. and can be done anywhere in the world on a sunny day.
I still like the way you designed your first buggy to fold up to make it easy to transport. The passenger seat was an added bonus.kitemaker4 - 25-2-2011 at 05:40 PM
I did not know that reading the pkf would make you hungry but I am now.
Susan (npw goddess)Houston AirHead - 25-2-2011 at 06:22 PM
Van if this fog dont mess up the show, im going out to surfside or the levee to ride some good surf. Ill let you know where i end up, there should
be allot of kiters out which will be a great time, ill let you know.
Kenvan - 28-2-2011 at 05:38 PM
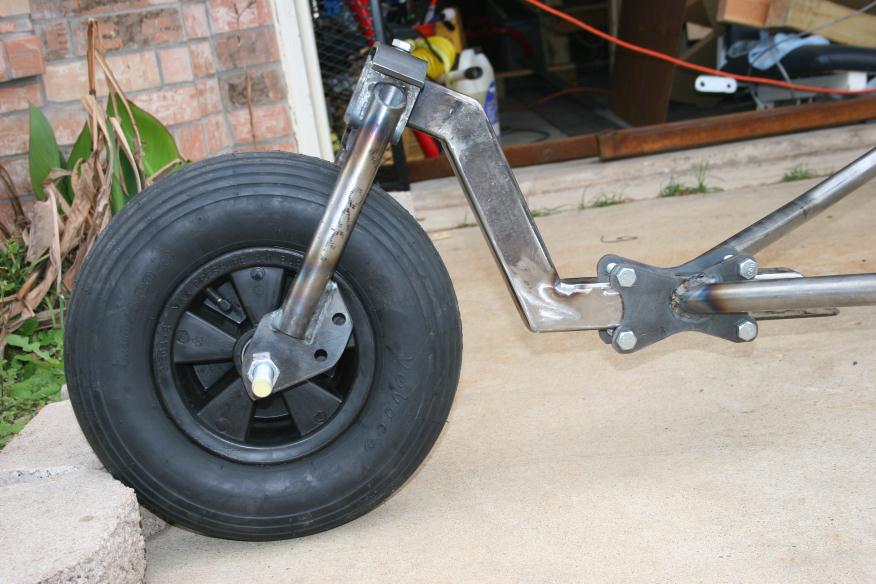
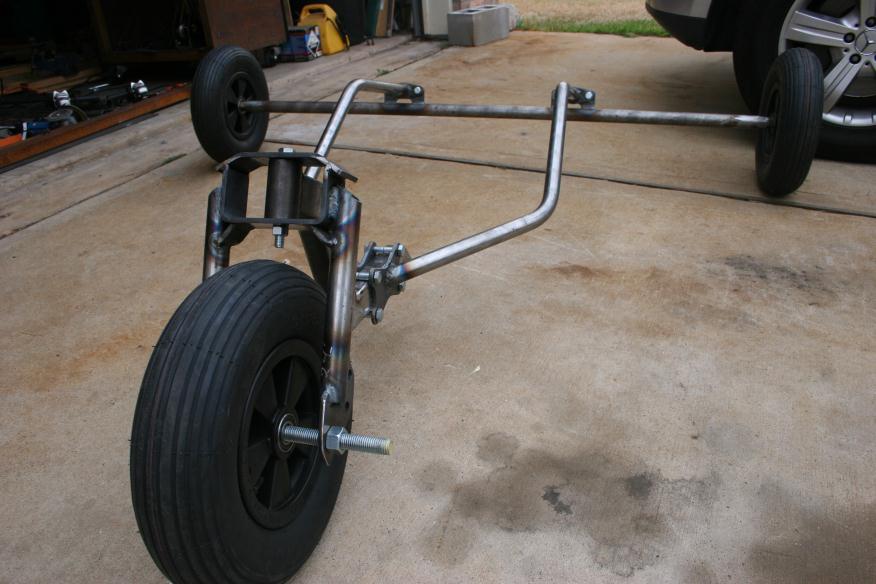
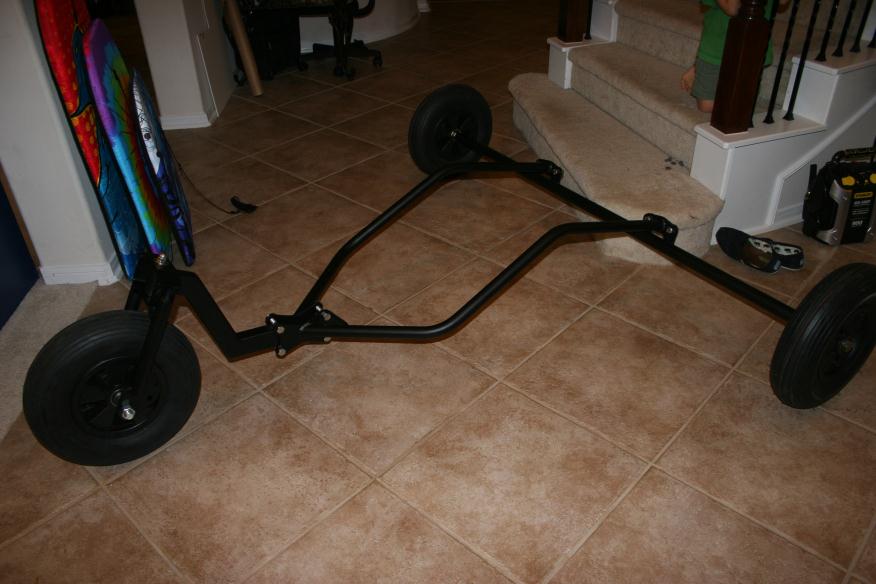
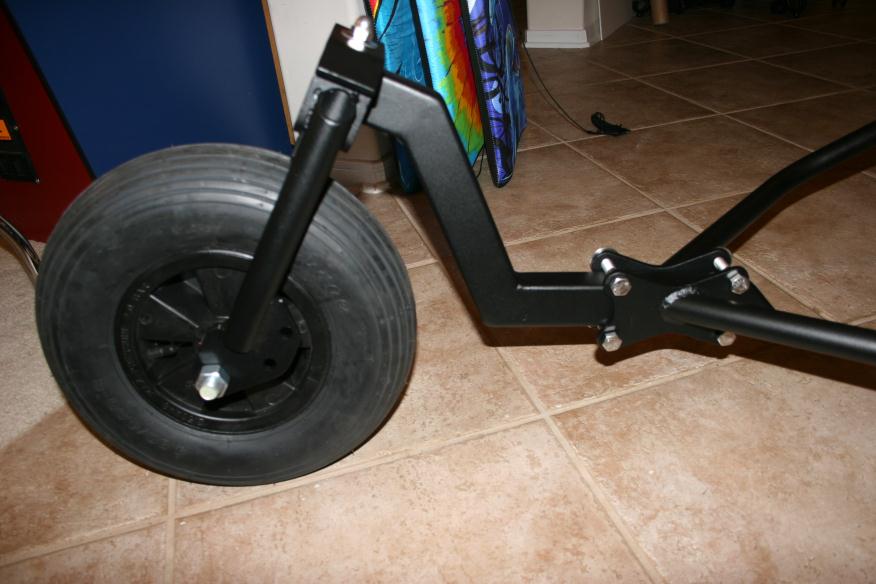
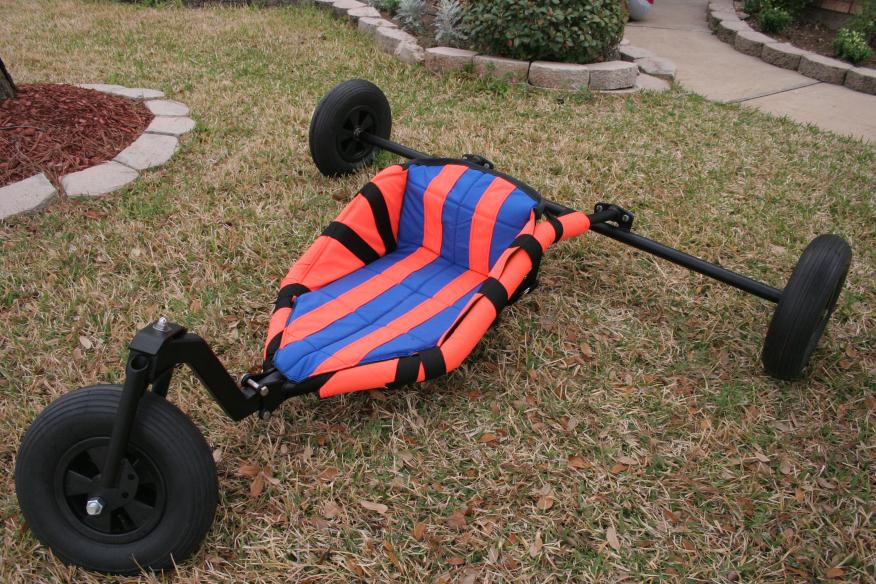
Here's an update of what I did this weekend. I didn't get to enjoy the wind since I was busy getting this buggy put together.
I will be sending this to get it powder coated tomorrow. It's gonna get a textured black.
Houston AirHead - 28-2-2011 at 05:59 PM
looks like you got yer self a bonafide bug.:bouncy:erratic winds - 28-2-2011 at 06:37 PM
Oh man do I wish I had a neighbor like Van! Van, looks like great work. Can't wait to see the "stress test" with the whole family on it again!van - 1-3-2011 at 07:17 AM
This one is much stronger!! I think I over did it with the 1.25" x 1/8" thick fork. I'm gonna build atleast 3 or 4 more forks just test the strength
and looks. Might have to go back to the 1" forks for the smaller tires. The last buggy was built from left over tubes so was mostly 1/16" thick
walls. I can handle a family of 5 now.WELDNGOD - 1-3-2011 at 08:05 AM
Hey Van(here comes the critique from the weldnsnob!) are those forks Stainless steel? If they are, you need to turn your amperage down! And dont stay
in one place too long. You are crystalizing the metal . Those dark discolored areas ,well that is the heat affected zone. Right next to the weld is
the weakest spot on every weld (no matter who does it).The trick is to keep the heat input to a minimum. You want stainless to be shiny Blue,red, and
if you can lay it down with the gold hue to it ,that's dialed in sweet.
And if they are Mild steel then you are doin alright(heat appears different on steel) ,welds still look a little dull gray even for steel. Back off
the heat or speed up the travel speed. Just some tips from someone who welds everyday ,all day.Any position ,any process , any alloy,any place, any
time,with a mirror or without and with either hand. I have even stick welded with the stinger duct taped to my foot cause I couldn't find a broom
handle. The things we do for money!
Other than that, they look great !van - 1-3-2011 at 10:18 AM
Your critique is always welcome WG!!! It's all carbon steel. I am still prototyping so can't afford to use stainless steel just yet. I am still
learning to TIG so am probably still having trouble controlling the speed and heat. I can adjust the heat but unfortunately, the speed is me.. hahaha
.. still moving a little slow but improving. I was in a hurry with the fork so did crank the amperage up to 160A. What's a typical amperage for
1/8" carbon steel?WELDNGOD - 1-3-2011 at 10:44 AM
that is a loaded question van. It depends on gap,material thickness,filler size,travel speed etc. . I can take a Lg filler wire and weld w/higher
heat and faster travel .If it takes alot of the arcs thermal energy to breakdown the filler wire then there is less to impart on the parent material.
Excess energy will start to have bad results with weldability,quality,warpage. So you gotta learn to use high heat at first and as the material gets
hot back off the heat a little. The hotter the metal the less energy it takes to get it to liquidus. Let it cool down,take your time.
If you are talking about 1/8" material thickness, I would set the high end for 150 amps but would only weld w/ about 115-140 when welding.I use a
hand remote so heat is variablerocfighter - 1-3-2011 at 01:17 PM
This is the best welding class there is!van - 1-3-2011 at 02:14 PM
WG,
I guess I need to start using the remote. My tig handle only has ON and OFF so it's either ZERO or full throttle. I have a foot control that will
allow me to control the amperage but it's cumbersome when I'm standing up. When I welded the axle, I was sitting down so I did use the foot control.
The weld was alot more controllable in terms of heat.
You want to be my neighbor? I'll cut the parts with my machines and you weld !!! :bigok:van - 1-3-2011 at 02:19 PM
Questions to everyone : I want a poll on the seat .
1) Do you think there's a need to put foam in on the side panel of the seat? I've been putting its a pain to sew. Seems like 1/2" foam on your
buttocks and back is good.
2) Plastic quick release buckles or HEAVY duty D rings for strapping ?
3) Do you really need to have PVC fabric on the bottom for easy cleaning?? I've never gotten the bottom of mine that dirty, especially if you use a
pan.
What is everyone using for the foam on the side rails. I've been using Home depot air conditioning pipe insulation ( the dark gray stuff , not the
light gray)rocfighter - 1-3-2011 at 02:25 PM
Swimming noodles to cover the side rails works. I have no fancey liners on my seat. I just rinse it off if need be. As for fasteners, If you are
freestyling I'd use D-rings and straps. If just smooth runs then Nylon clip buckles. They are strong and durable plus easier to remove the seat for
cleaning.jellis - 1-3-2011 at 10:29 PM
Weldngod impressive advice on welding. Myself I started on a pipe line crew. Now I love my tig. Welding table with a padded stool for comfort. No slag
on me. Stack of dimes for sale most of the time.van - 1-3-2011 at 10:40 PM
when you come to Texas , bring that stack of dime .. I could use a teacher :singing:cheezycheese - 2-3-2011 at 05:54 AM
I have had a few plastic clips bust on me. I think d-rings might be better.WELDNGOD - 2-3-2011 at 06:56 AM
D-rings w/ a half hitch in the webbing to lock it so it can't slip is the way to goBeamerBob - 2-3-2011 at 11:50 AM
Pool noodles are the best rail padding IMHO. They are durable and offer the best compression/rebound compared to pipe insulation. The best ones are
the large ones with a large hole that fits the tubing diameter. Otherwise you can do a spiral cut that lets it wrap around the tubing. Then tape it
enough to hold it in place and cover.van - 2-3-2011 at 12:59 PM
I noticed that the pool noodle I see at the stores have a very small hole. My rails are 1.25". They do sell pipe insulation that are identical in
material to pool noodles. I guess I will look into those also.
I have some 2" D rings that I am using with 2" webbing. They look huge compare to the last seat I made with 1" plastic buckles and 1" webbing. Isnt'
the 2" an over kill? I was thinking maybe 1.5" webbing and D rings might look better.popeyethewelder - 2-3-2011 at 01:24 PM
2" webbing is better much better than 1", spreads the load more, as far as fasteners as concerned, buggybags uses stainless rings, they lock the seat
fast, with zero slips or breakages
I used the pool noodles on my buggy! Worked great! I also am going to take a picture of the bottom of my seat van, and put it in here. I added a
little flap to the front of my seat that goes all the way to the back of the seat and attached one end of my buckles to that. It helped with weight
distribution and takes some pressure off the buckles!kitemaker4 - 3-3-2011 at 08:30 AM
If you go to a store that sells pool supplies they should have pool noodles that you can use.
Susan (npw goddess)cheezycheese - 3-3-2011 at 10:13 AM
Spring is coming. Your local $.99 store should have the pool noodles...van - 3-3-2011 at 10:32 AM
Thanks for the video popeye. I sew my seat last night with the 2" D rings. I counted a total of 20 rings!! The seat feels like it weighs 10 pounds.
:o I just got a call from the powder coater so looks like my frames are painted. Not sure it's worth it for powder coating or not. The cost was
$120 to get it sand blasted, acid washed and then coated with a textured black coating. It's looks like Rhino coating except thinner.
I should have pics later tonight with the seat mounted.BeamerBob - 3-3-2011 at 10:38 AM
I've always liked the look of a flat black frame. Adding the texture is the same understated elegance. Hardware and stuff contrast well with the
black. $120 isn't bad if you got a good durable coating.popeyethewelder - 3-3-2011 at 01:48 PM
Quote:
Originally posted by van
Thanks for the video popeye. I sew my seat last night with the 2" D rings. I counted a total of 20 rings!! The seat feels like it weighs 10 pounds.
:o I just got a call from the powder coater so looks like my frames are painted. Not sure it's worth it for powder coating or not. The cost was
$120 to get it sand blasted, acid washed and then coated with a textured black coating. It's looks like Rhino coating except thinner.
I should have pics later tonight with the seat mounted.
I would say that is a good price for the powder coating, just dont chip it...the seat weighing 10lbs is roughly the same as a buggybags seatvan - 3-3-2011 at 09:47 PM
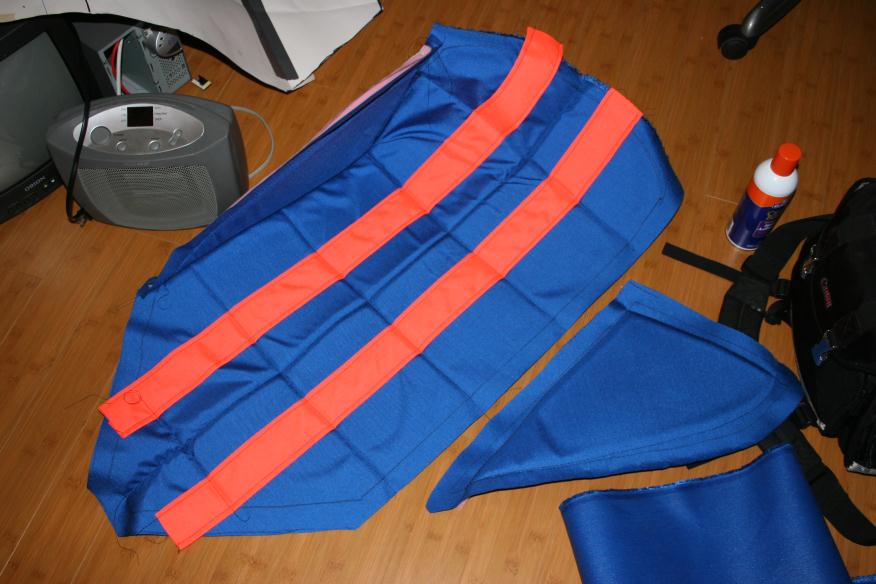
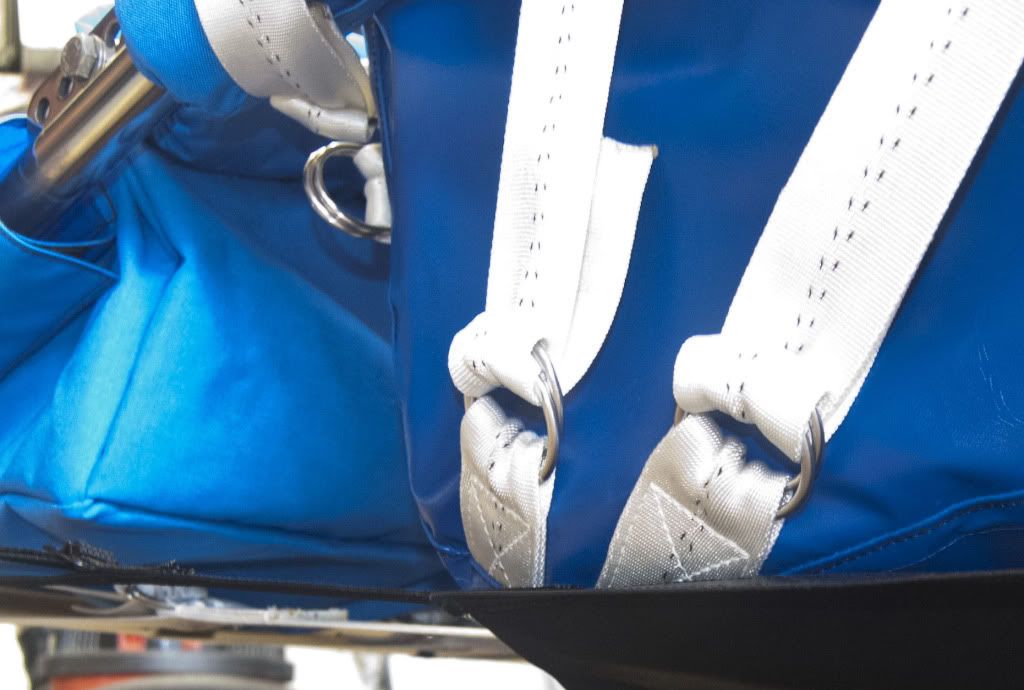
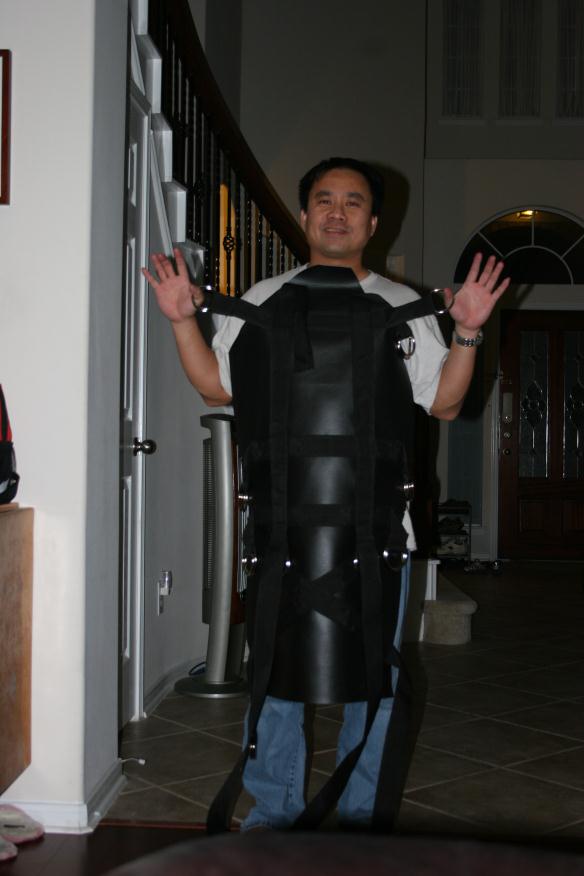
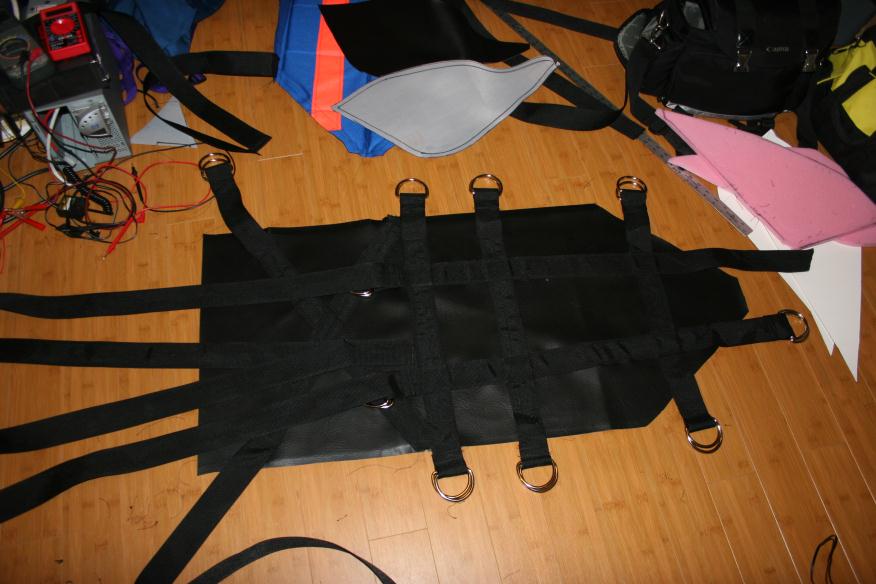
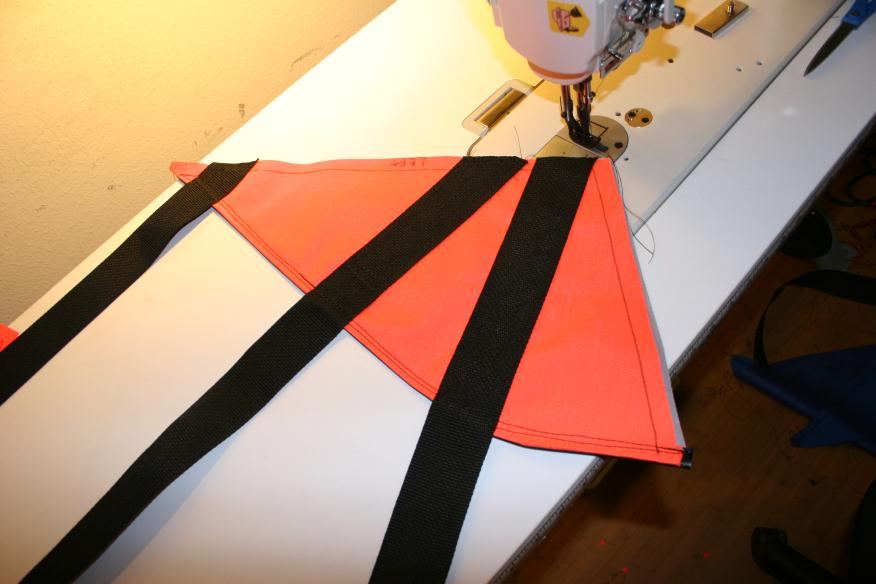
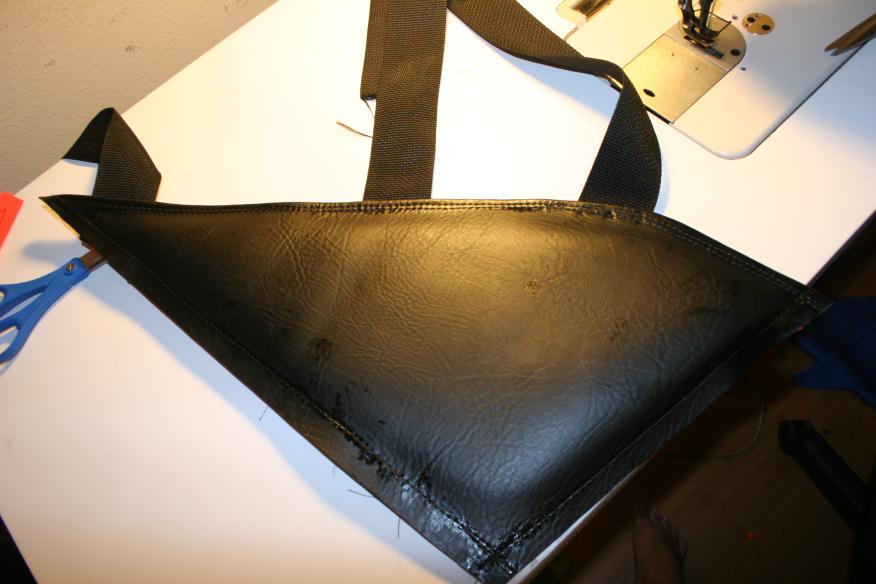
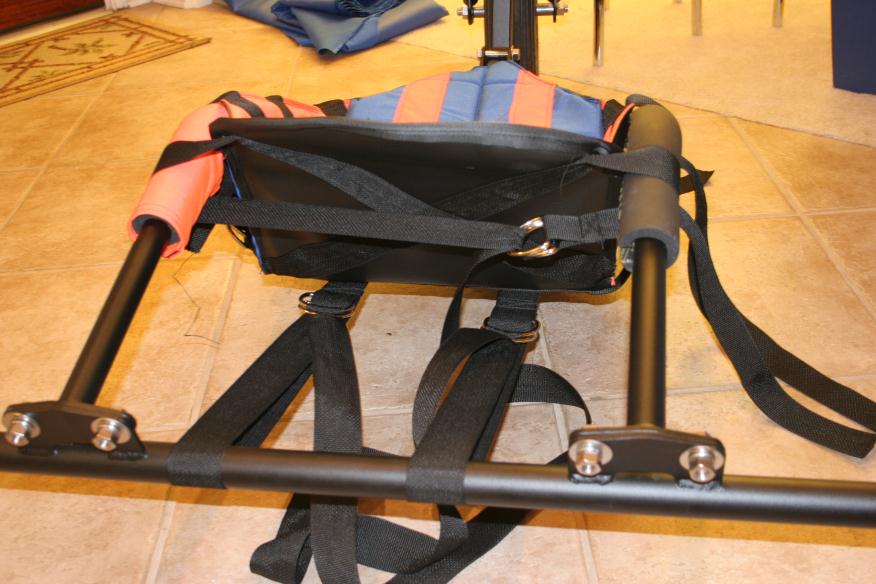
Sewing seats is alot harder than it looks when you have to deal with foam and multiple D-rings. Here's some pics of the work I did last night.
The bottom piece, made of PVC and heavy duty straps. Can also be used as an apron for the new Saw movie.
The side piece before foam inserts
The side piece with foam sewn in van - 3-3-2011 at 09:57 PM
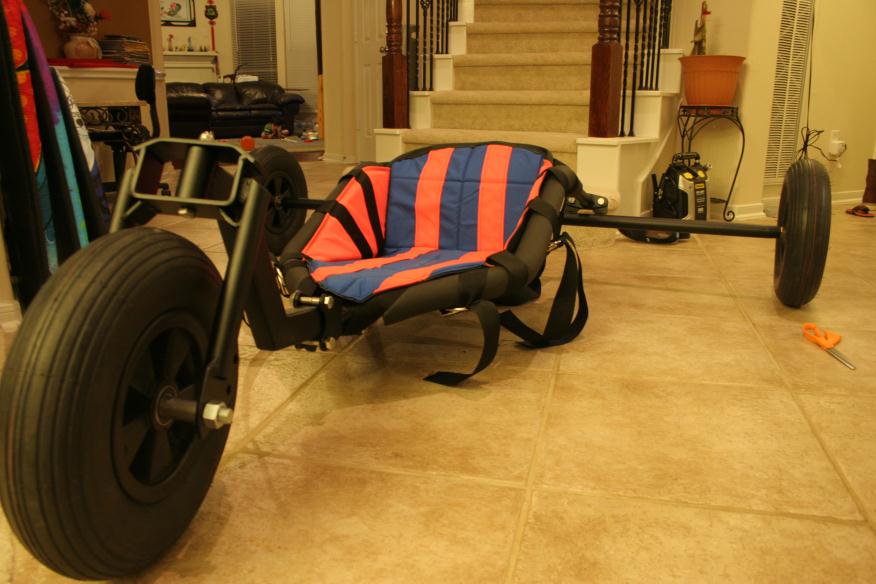
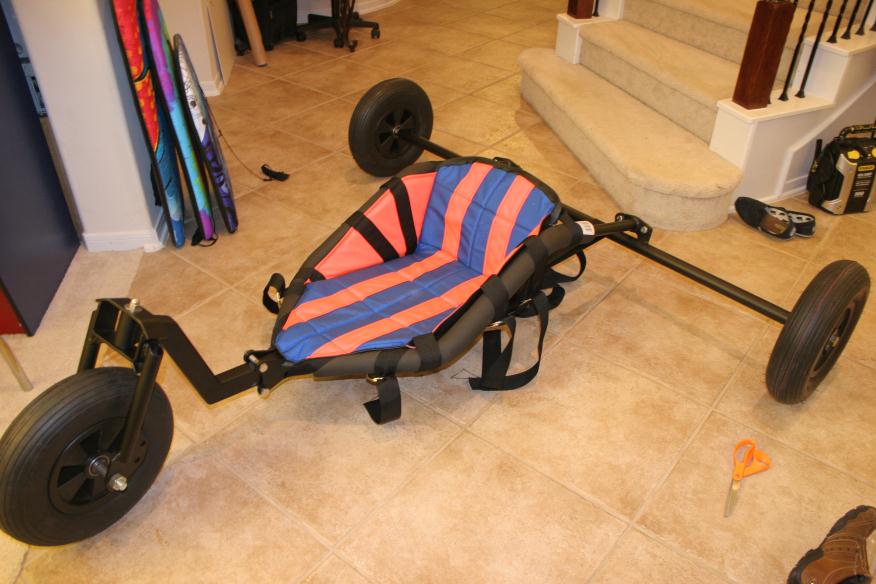
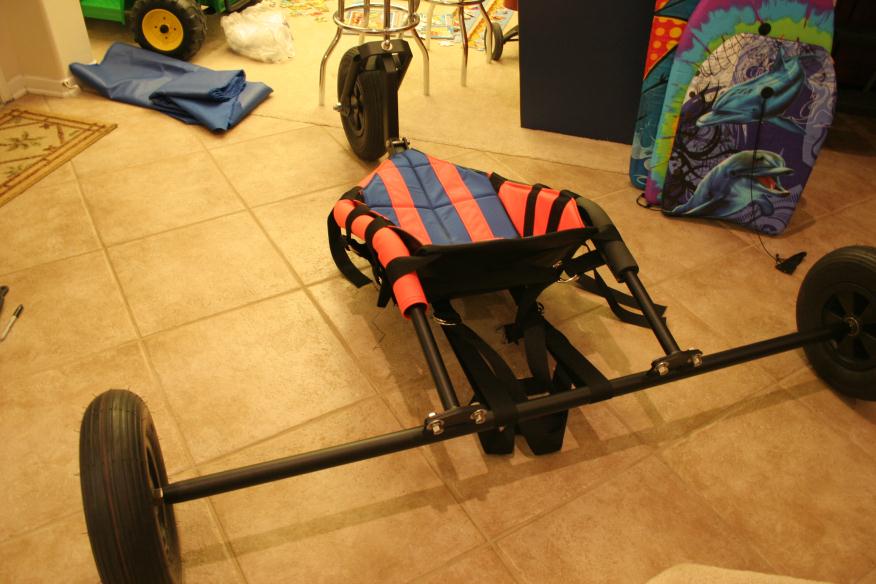
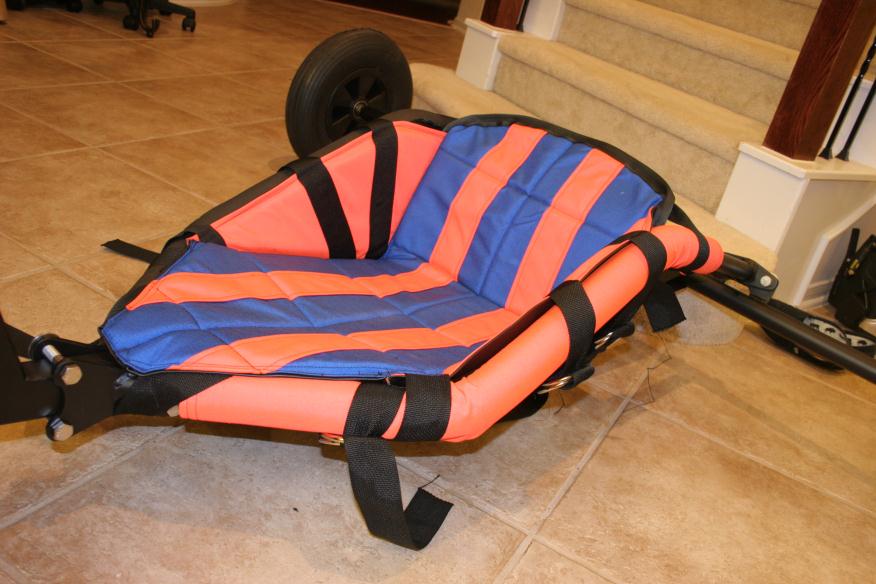
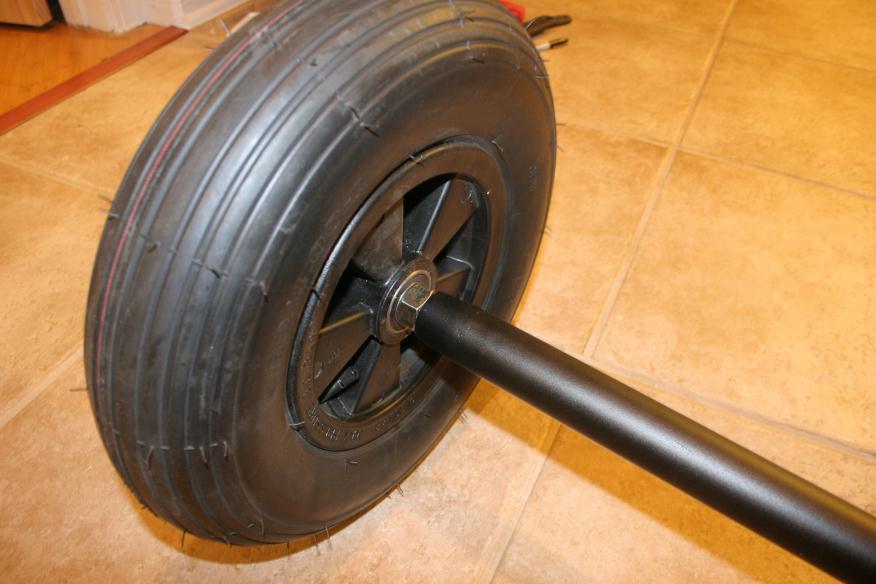
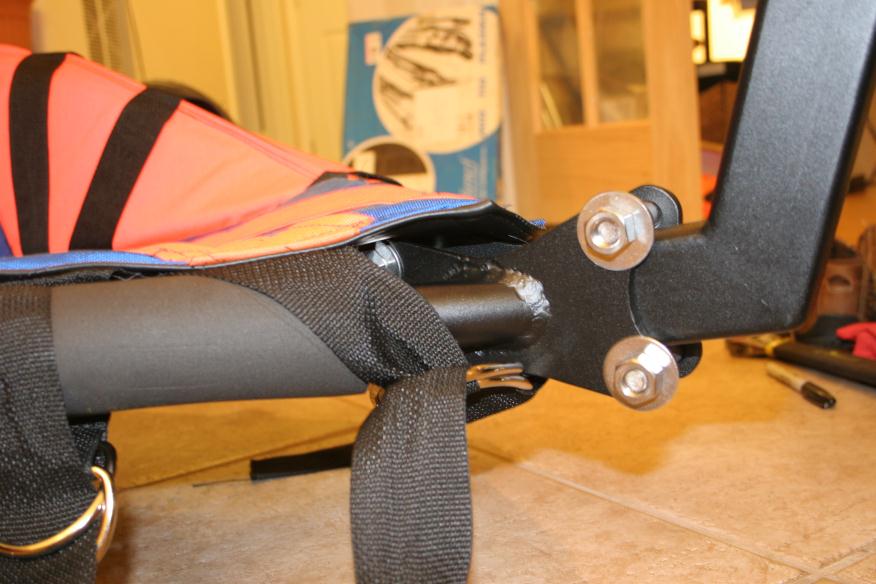
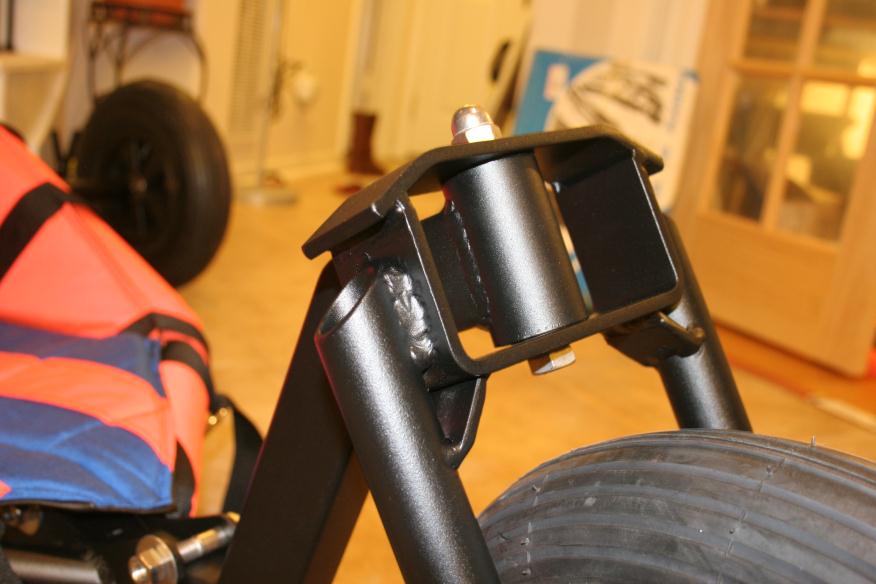
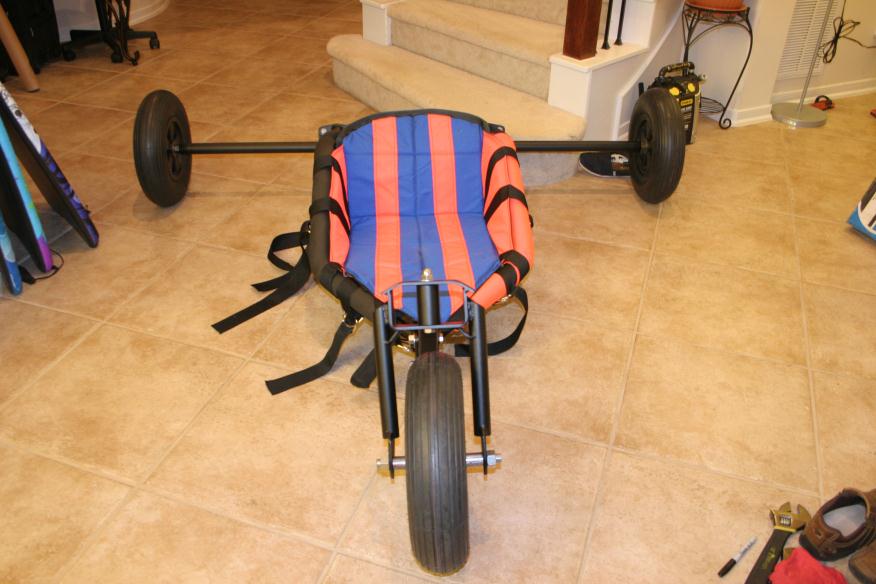
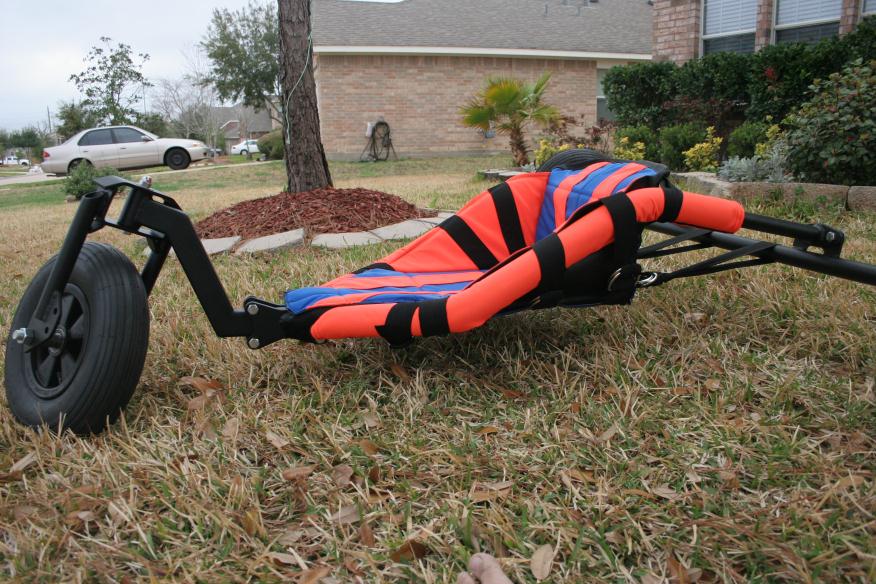
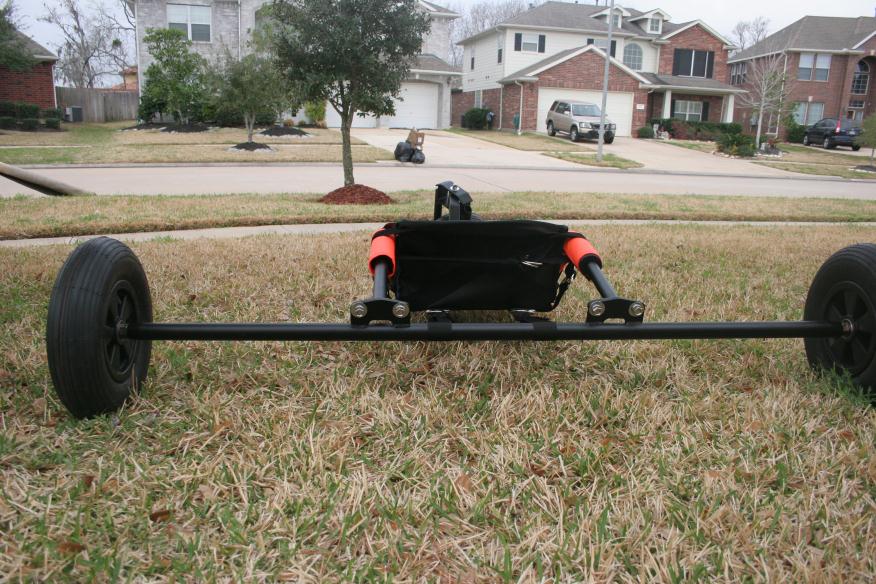
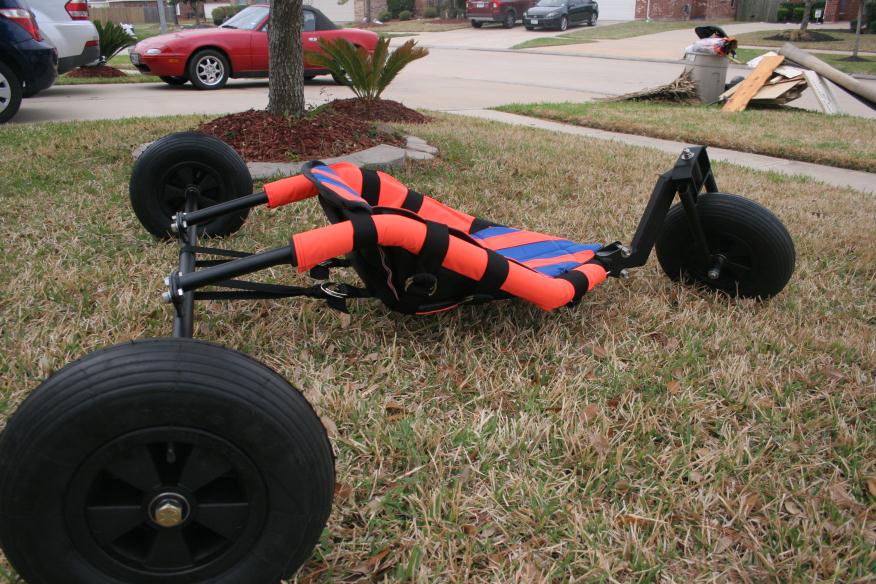
Ok .. here's the buggy all powder coated. Why powder coating?? I figure I try it to see how it looks and whether its as bad about chipping as people
say. I also wanted to know what the price was compared to just using stainless and polishing it.
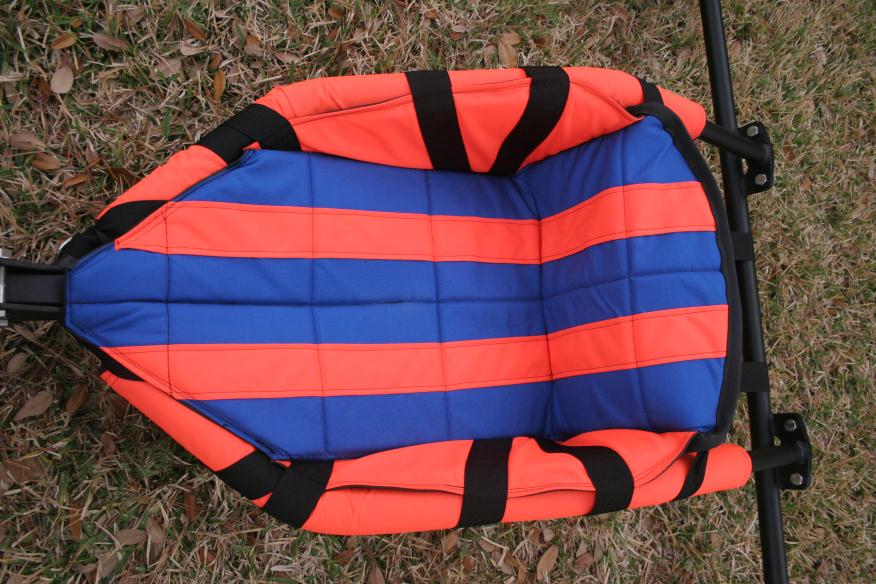
OK ... Do you like the look of BLACK rail covers or the flourescent ORANGE??
van - 3-3-2011 at 10:00 PM
MORE .. buggy PORN :shocked2:
van - 3-3-2011 at 10:02 PM
Just in case anyone is curious .. yes, it will have footpegs ... I got so excited .. I forgot to finish that part before I sent it to the
powdercoater. I'm gonna make the pegs later tomorrow out of stainless since it will get alot of contact / abrasion. I do love the black frame!!!!BeamerBob - 3-3-2011 at 11:42 PM
Do you have enough thread engagement on the bolts holding your side rails on the downtube? Very nice work Van.mdntdncr - 3-3-2011 at 11:48 PM
I do like the orange side rails, but the look is diminished by the black straps going over it, so I think the black looks cleaner.popeyethewelder - 4-3-2011 at 02:13 AM
Very nice work there Van, I look forward to riding side by side with you at Ivanpah...
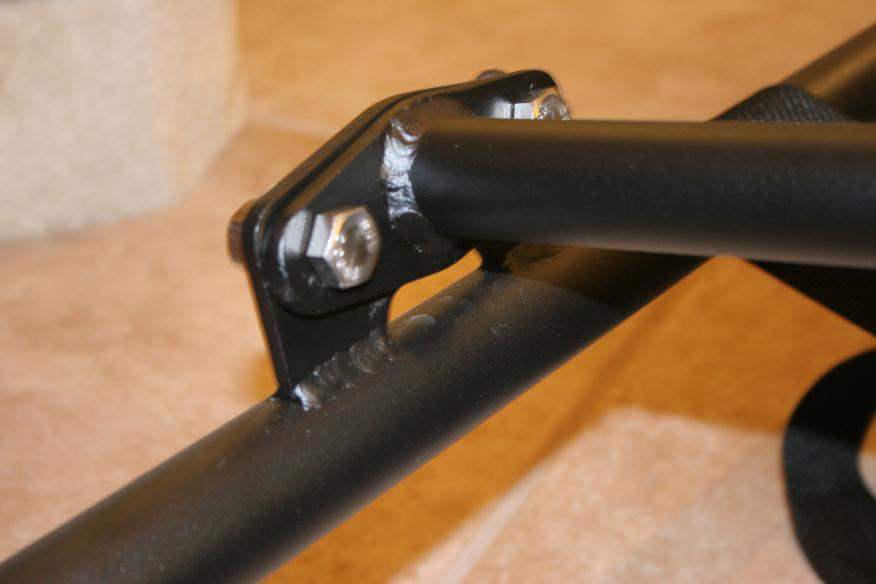
Van keep an eye on these locations and any buggies that are not coated need to be repaired asap. In the photo you posted I noticed that you did not
wrap your ends. If this weld is gonna fail it will start at the unwrapped end. It also allows water in, which will start corrosion. I can understand
your design thought to help keep the axle straight. But you almost always wrap the ends of a fillet weld unless otherwise directed. (some things need
to move in certain ways and wrapping the ends hinders this) This is a very frowned upon lazy welder technique.
Tighten up Bro'! ;-) Not tryin to bust your balls or anything, just looking out for your safety!
thrash - 4-3-2011 at 07:21 AM
Don't mean to take away from Van's build, Very nice by the way. BUT Popeye's buggy WOW!!!!!!!!!!!!!!! Beamerbob you a LUCKY man for him to leave it
with you!van - 4-3-2011 at 08:14 AM
WG .. thanks. I was wondering about that when I was welding it. I've seen alot of things welded and they leave the ends unwelded. I did not think
about the water and things getting in since it seems like it was all molten metal so did not think there was a gap. I always welcome your keen eyes.
You are the welding god after all hehehe.. I'm still the
grasshopper at this welding stuff. That's why this is just a prototype of what I plan to build in the future. Yes, I cut the space to space my weld
apart so the heat does not bend the axle. I'm not really fond of the clamp type.
Hope to see you at WBB. You will get a better look at the buggy. I would appreciate more feedback then. WELDNGOD - 4-3-2011 at 08:20 AM
Quote:
Hope to see you at WBB. You will get a better look at the buggy. I would appreciate more feedback then.
You gonna make the spring Bash?van - 4-3-2011 at 08:39 AM
I will be at Wildwood!! I've talked to Rich about doing something special with this buggy for the attendees.
Bob, there's enough thread. I was too excited at putting it together for photos so did not tighten any of the nuts. I just hand thread them on. I
am also looking for a nylon sleeve to put on the bolts so they don't scratch the downtube. I noticed my last build is all scratch up due to constant
assembly and disassembly.
I clean up the straps .. here's some pic I just took outside. Looks much cleaner. Now .. onto the foot pegs!!
BTW.. for you big boys ... the width between rails is 18 inches. The seat wasn't meant for racing so it's wide and loose .. very comfy. also not as
deep as a racing type seat. It's very easy to get in and out of.
cheezycheese - 4-3-2011 at 08:58 AM
Primo stuff there my brother... I smell a second career in the making... NY Knicks colors tookitemaker4 - 4-3-2011 at 08:59 AM
The buggy looks very nice and I see you are now enjoying your new sewing machine.
Susan (npw goddess)erratic winds - 4-3-2011 at 09:23 AM
What is the plan for the foot-pegs? Sure is a nice lookin bug!van - 4-3-2011 at 06:18 PM
The last foot peg I made was just a flat 1" flat bar bent and then welded onto a 6" 5/8" bolt. It worked out really well. I do have a another
design in mind that will allow me to easily attach heel straps. With the bolt, method, I haven't thought of how to attach a heel strap yet. I'll
think of something soon. :embarrased:
Susan,
I love my sewing machine.. you need hooj .. to use it :singing: It can take up to like a size 24 needle and go through 1/2" of leather, way cool ...shehatesmyhobbies - 4-3-2011 at 08:44 PM
Van, your buggy is coming along nicely! Cannot wait to see the finished product in person! Keep up the good work.
I like the color combination. Looks racy!van - 13-3-2011 at 07:14 PM
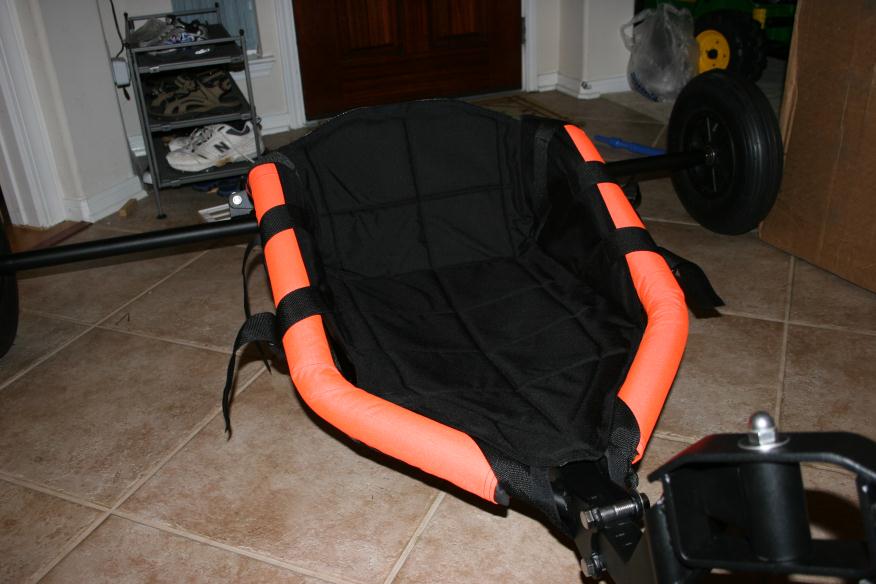
I got bored so made an all Black seat to see what it looks like. I might need to make black side rail covers to match. This seat I made with a
combination of D-rings and 2" plastic buckles. The buckles are used on the sides and the D-rings are used on the 2 main strap that run logitudinal
which provide the main bulk of the support.
Cheezecheese, send me that pattern for your seat.. I can have it done before I head to WBB. I'm getting pretty good at it. I can make one in a
couple hours from pattern cutting to final stitching.