soliver
Posting Freak
    
Posts: 3913
Registered: 15-12-2011
Location: somewhere, far, far away
Member Is Offline
Mood: sleepy
|
|
Revamp the clamp
Some of you guys may remember a while back I spent some time refabricating some parts of my VTT hybrid buggy. If not or if you want a reminder check
out Raising my ride height
Well the height was dramatically improved, and when I put 2 18x8.5-8 tires in back and a midi in front (an actual 16" rather than barrows) it was even
better.
However you may remember I had to make my downtube kinda goofy. The reason I did it like this is because initially when Van sold me these rails (they
are prototype VTT Stinger rails) I had him put a clamp on the front to fit a PL Comp XR downtube because I intended to use them only as a Tandem to
pull my girls so I could interchange the parts if I wanted. That said, I measured for what seemed comfortable and fabricated the swan neck downtube
this way so it would fit in the 1.5" square stock ready clamp angled to fit the XR.
Edit: I realize this is not the entire story, ...after I had them assembled for the first time, I was so impressed that I decided to use the XR as the
tandem and use the stinger rails for my own buggy... It's been morphing and evolving ever since.
Currently looks like this:
Unfortunately at JIBE this year, after A. trying to ride more extensively with a harness, and B. riding for MANY consecutive hours, I realized I had
made the downtube too short... My glutes (yes my arse muscles) were getting UBER sore... In other words, it was a pain in the @55. I decided at JIBE
that I needed to revamp the front end of the buggy. So when I got home, I put my Comp XR Frankenbuggy back together for riding and set the VTT aside
to fix up when I had the time.
Well, I'm all gimped up with a broken toe and a big honkin' boot and can't go kiting, and I'm done with school for a semester, so I decided its time
to Revamp the clamp and downtube. So I've been hobbling out to the shop to work on it the last couple of days and I've gotten a good start and thought
I'd share with y'all the progress as I go.
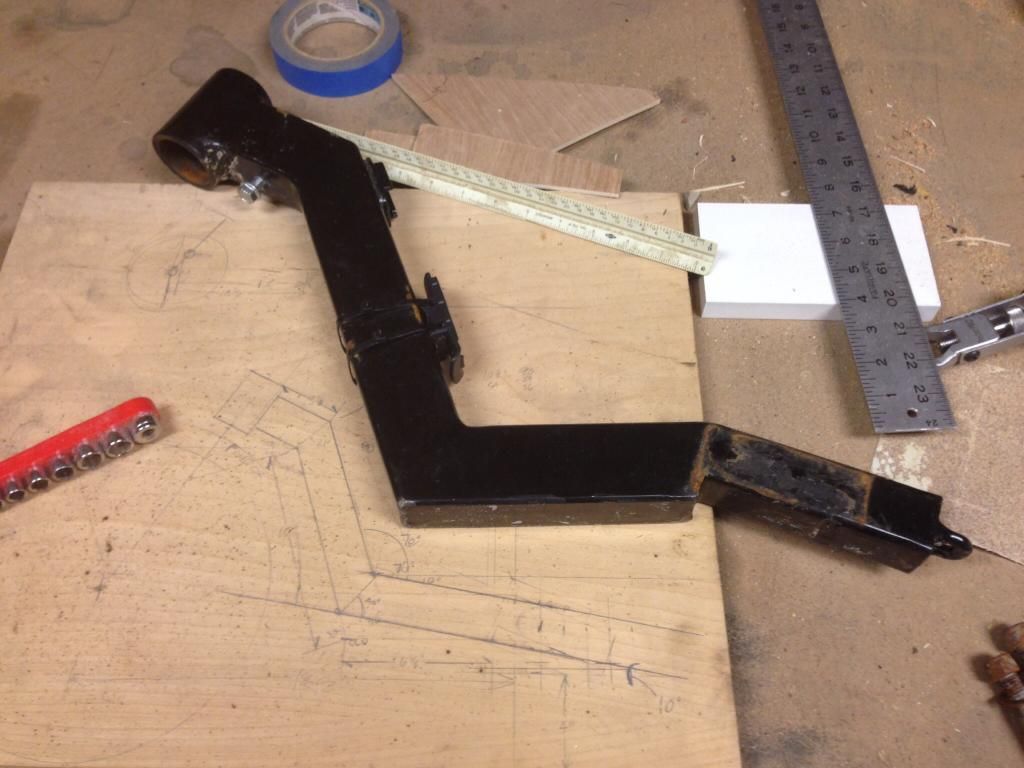
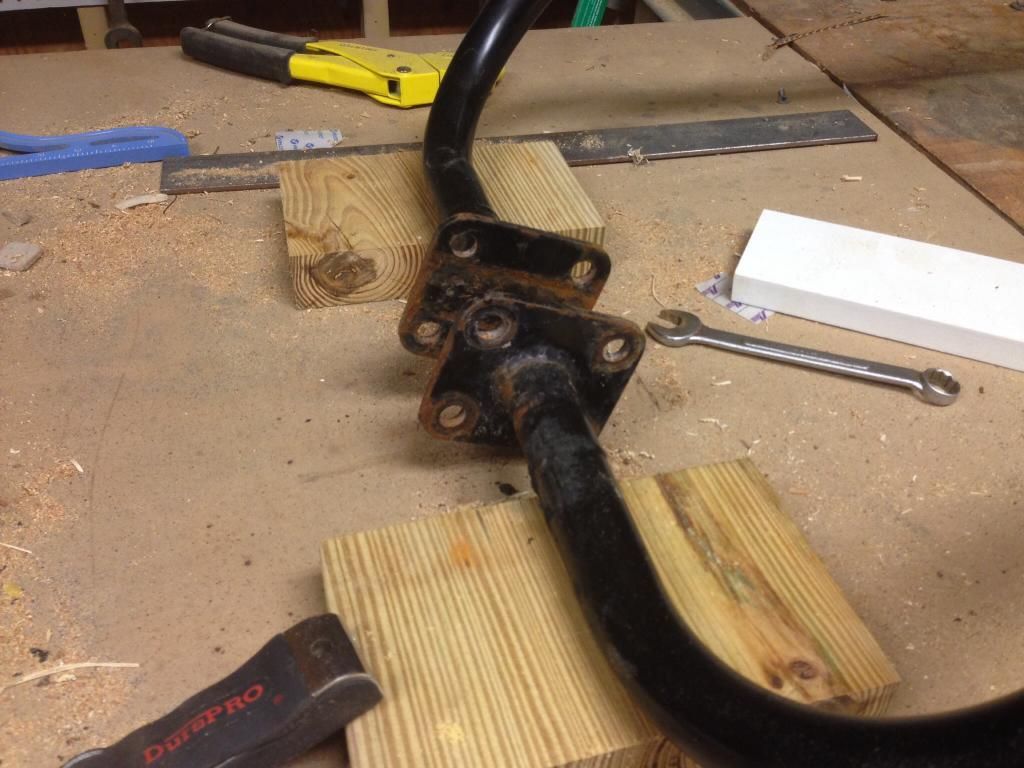
I thought about just adding some length to the downtube as is, but thought it would be a pain to do it and ride and realize it was still not right, so
why not make it "proper" and fully adjustable like it's supposed to be. Here is the clamp as it is currently.
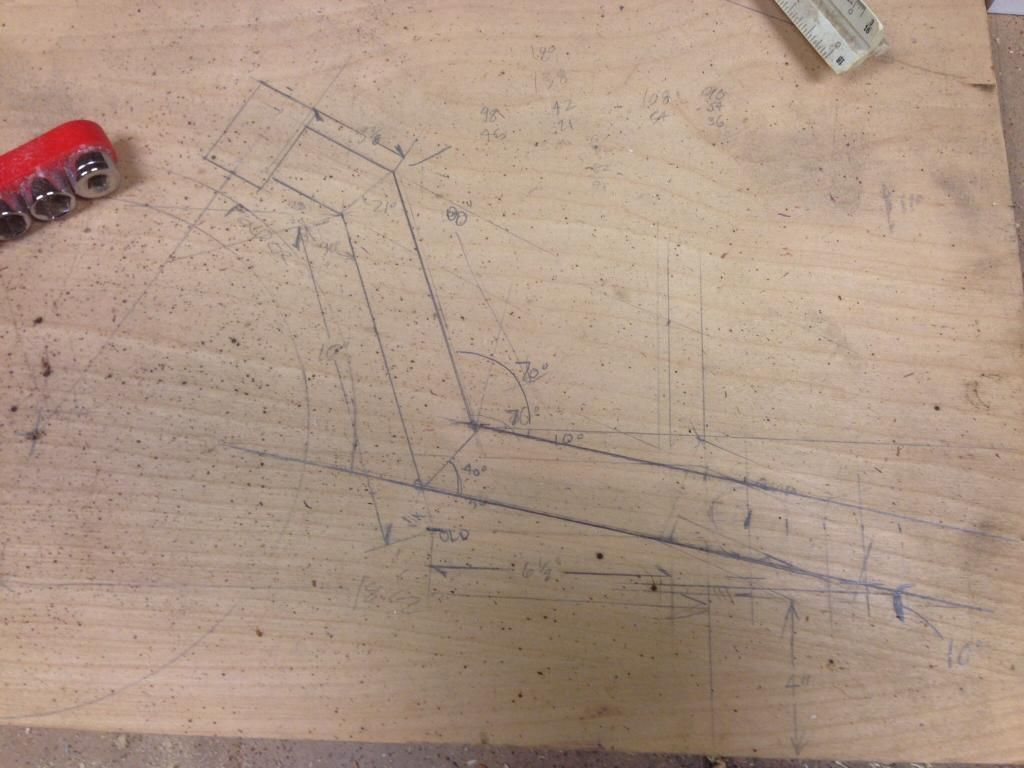
I pulled out the original drawing of the downtube and erased and redrew it with a 10 degree pitch on the long piece going through the clamp to help
make the seat fabric go over the clamp.
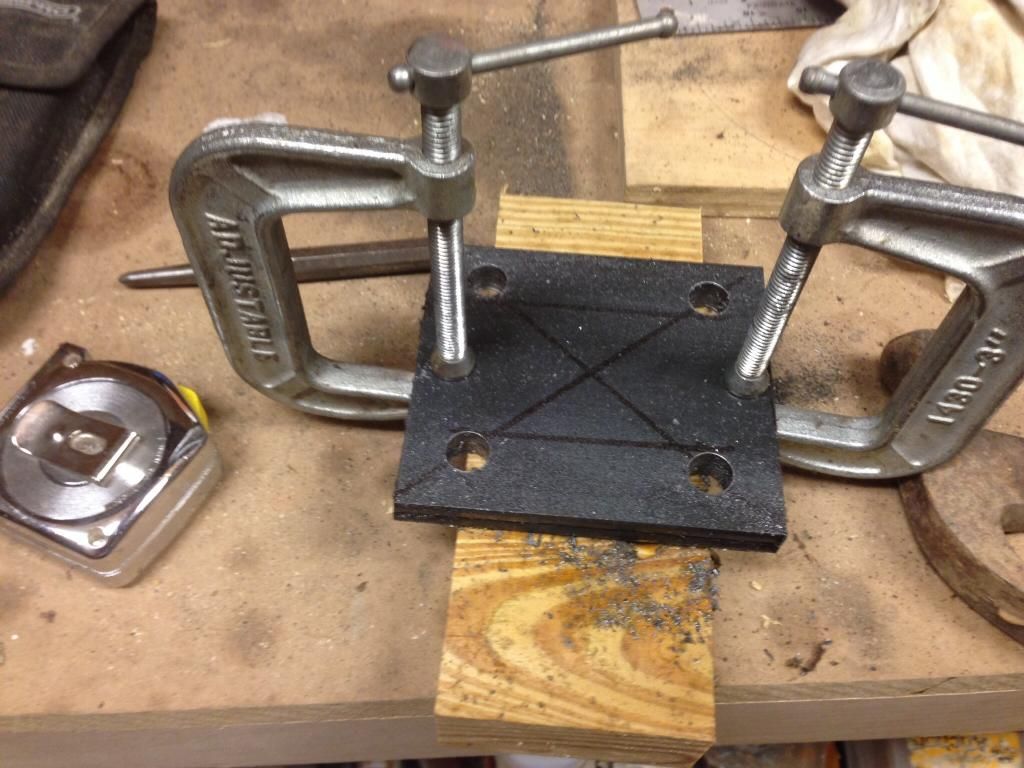
Since I'm going with a 2"x 1.5" stock for the downtube, I need to use a wider flat bar stock for the clamp, and I'm fortunate that I have a couple of
pieces of 1/4" x 4" flat in the shop which is exactly what I wanted. I cut them to the same size, clamped them together and drilled them.
With my angle grinder I shaped the new clamp pieces and then I cut a block of 2x12 at a 10 degree angle, and set the rectangle tube all on the block
to see how it looks.
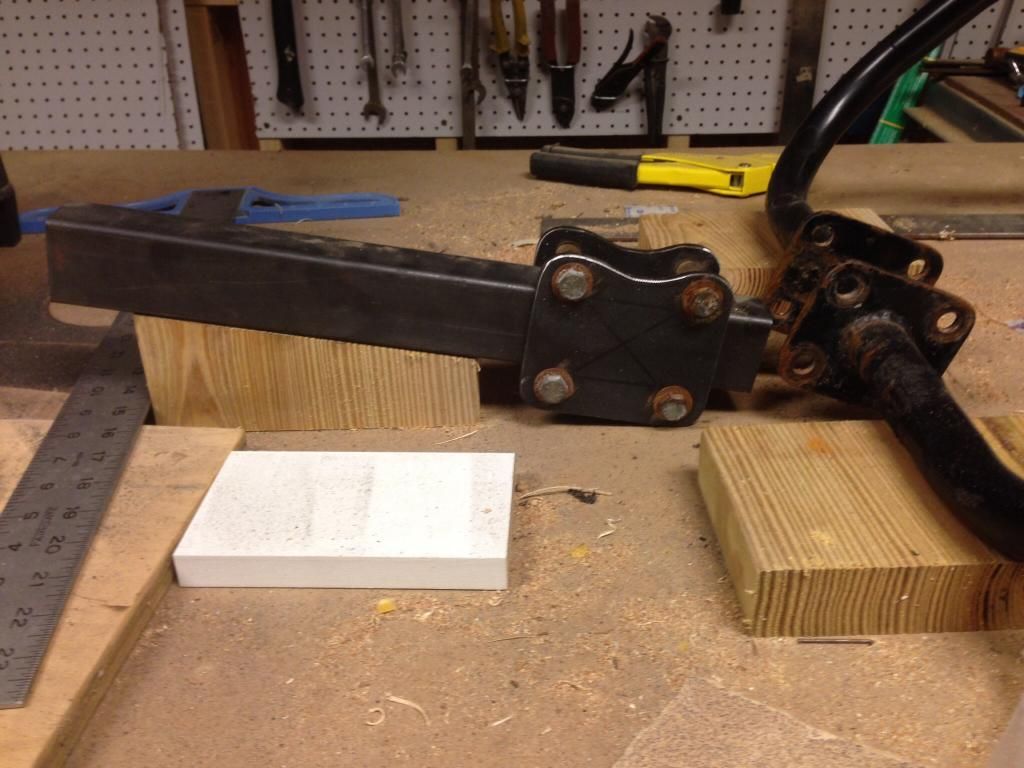
Tonight I plan on cutting the old clamp off the rails and maybe tacking the new ones in place... We'll see, and I'll keep y'all updated on my
progress.
I'm going to take a nap now
|
|
|
3shot
Posting Freak
    
Posts: 2631
Registered: 14-2-2013
Location: Virginia
Member Is Offline
Mood: JIBE Talkin'
|
|
I thought your hybrid looked great at JIBE. I really wanted to see what the Stinger seat felt like though.
Maybe next year. 
Cross Kites Sonic 3, 5m
Ozone Flow 2, 3, 4, 5m
Ace II 4, 5m
NAPKA-US24
4, 5, 6m ATB landsurfer. Custom longboard deck
Buggy: VTT Black Widow v2.0
  http://hint.fm/wind/
|
|
|
soliver
Posting Freak
    
Posts: 3913
Registered: 15-12-2011
Location: somewhere, far, far away
Member Is Offline
Mood: sleepy
|
|
I noticed (aside from the cramping in my gluteus Maximus) that looking at the pics of myself riding compared to other guys, that my knees are WAY more
bent that other guys'.
Remind me in May (if I end up making it out there) and I'll let you give him a ride... If I can give the Black Widow a spin! 
I'm going to take a nap now
|
|
|
3shot
Posting Freak
    
Posts: 2631
Registered: 14-2-2013
Location: Virginia
Member Is Offline
Mood: JIBE Talkin'
|
|
Absolutely bud. Me casa su casa.
Hope you guys can make it again.
Cross Kites Sonic 3, 5m
Ozone Flow 2, 3, 4, 5m
Ace II 4, 5m
NAPKA-US24
4, 5, 6m ATB landsurfer. Custom longboard deck
Buggy: VTT Black Widow v2.0
  http://hint.fm/wind/
|
|
|
soliver
Posting Freak
    
Posts: 3913
Registered: 15-12-2011
Location: somewhere, far, far away
Member Is Offline
Mood: sleepy
|
|
ditto,... its all a matter of when wifey's parents get the rental on SSI.
I digress... After clumping around in this boot for so many days, my legs were too tired to stand it out in the shop last night (its amazing how being
forced to walk all funny can wear you out)... the story will continue possibly tomorrow.
I'm going to take a nap now
|
|
|
soliver
Posting Freak
    
Posts: 3913
Registered: 15-12-2011
Location: somewhere, far, far away
Member Is Offline
Mood: sleepy
|
|
I spent some time tonight in the shop meticulously cutting off the old clamp. I was very careful in doing so in order to maintain as much length in
the rail as possible and to preserve the one and only cutting wheel I had for my angle grinder  .... It was much more time consuming than I expected, but I got it done and set up to see the clamp looks
like in place.
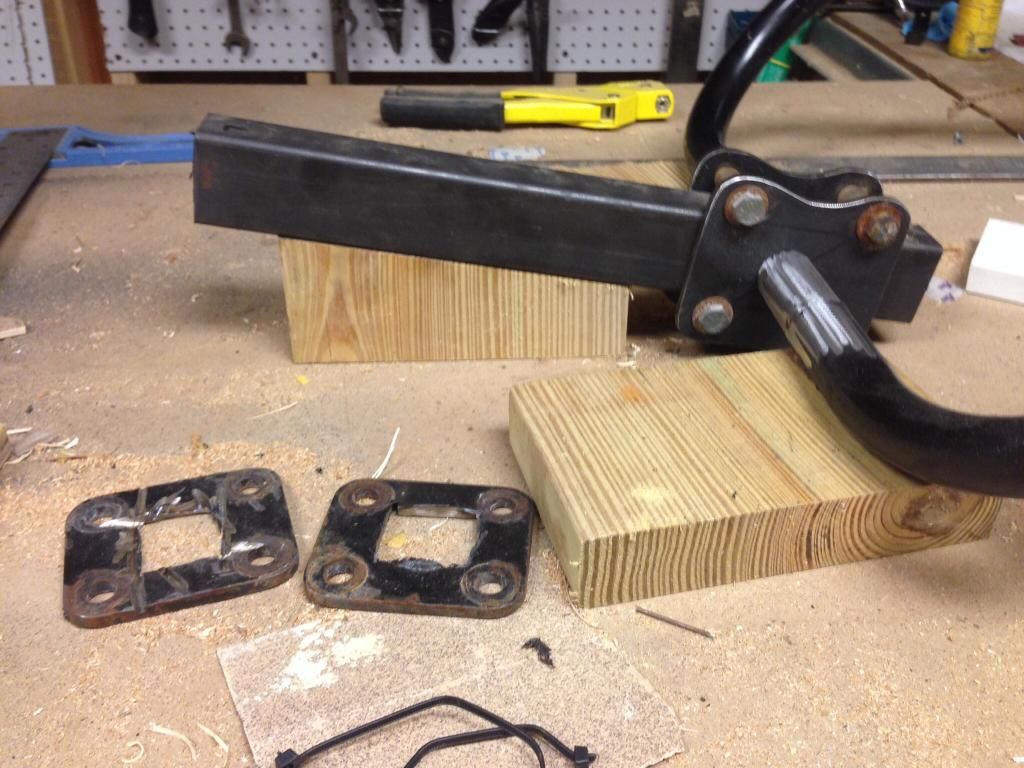
I plan on welding it all up tomorrow night.
I'm going to take a nap now
|
|
|
3shot
Posting Freak
    
Posts: 2631
Registered: 14-2-2013
Location: Virginia
Member Is Offline
Mood: JIBE Talkin'
|
|

Cross Kites Sonic 3, 5m
Ozone Flow 2, 3, 4, 5m
Ace II 4, 5m
NAPKA-US24
4, 5, 6m ATB landsurfer. Custom longboard deck
Buggy: VTT Black Widow v2.0
  http://hint.fm/wind/
|
|
|
ssayre
Posting Freak
    
Posts: 3588
Registered: 15-8-2013
Location: Indiana
Member Is Offline
|
|
Looking good. Is there a bearing that goes in the neck for the fork like the pl downtube?
|
|
|
soliver
Posting Freak
    
Posts: 3913
Registered: 15-12-2011
Location: somewhere, far, far away
Member Is Offline
Mood: sleepy
|
|
Yea, I had to fabricate it to receive the front fork just like the PL downtube. I used a 2" OD pipe with a 3/16" wall with another piece of pipe with
an OD to fit inside the 2" pipe for a "shelf" to rest the bearing on. It was still a fuzz too big ID for the bearing so I wrap the outer race of the
bearing in Teflon plumber's tape to take up the extra room and fit the bearings more snugly.
I'm about to head out to the shop to weld on the clamp. I'll take a pic and post it later.
I'm going to take a nap now
|
|
|
soliver
Posting Freak
    
Posts: 3913
Registered: 15-12-2011
Location: somewhere, far, far away
Member Is Offline
Mood: sleepy
|
|
Here you go Sean, here's the headstock of the downtube made to suit the Comp XR front fork.
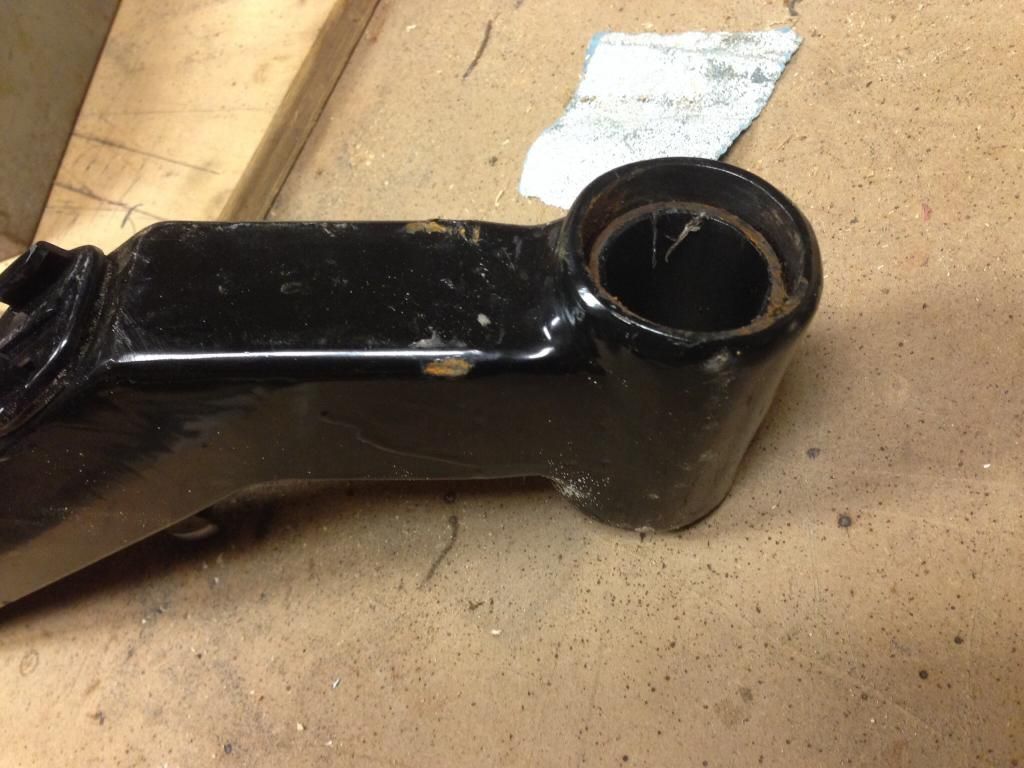
I'm going to take a nap now
|
|
|
soliver
Posting Freak
    
Posts: 3913
Registered: 15-12-2011
Location: somewhere, far, far away
Member Is Offline
Mood: sleepy
|
|
Back out in the shop tonight. I took the time to make sure it was all squared up as much as I possibly could by creating a common point near the end
of the mock downtube and measured to the ends of the back axle. Once I got it to where it measured the same to each end of the axle, I would know it
was square.
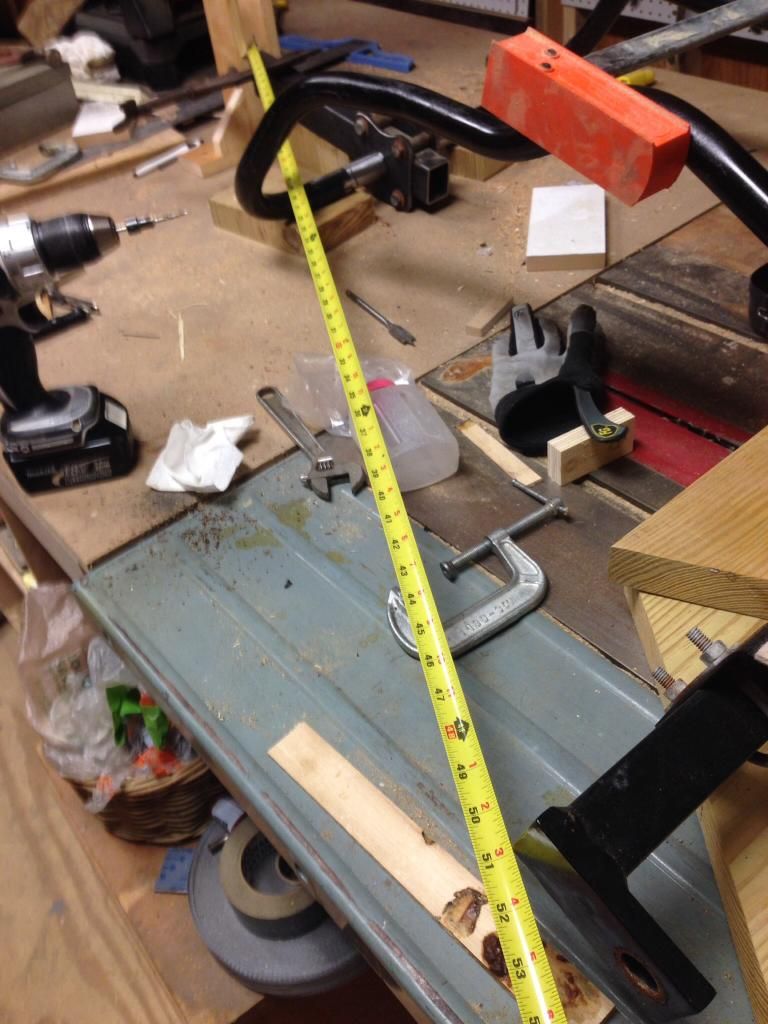
Once I was certain I had it all good, I did my best to clamp it down.
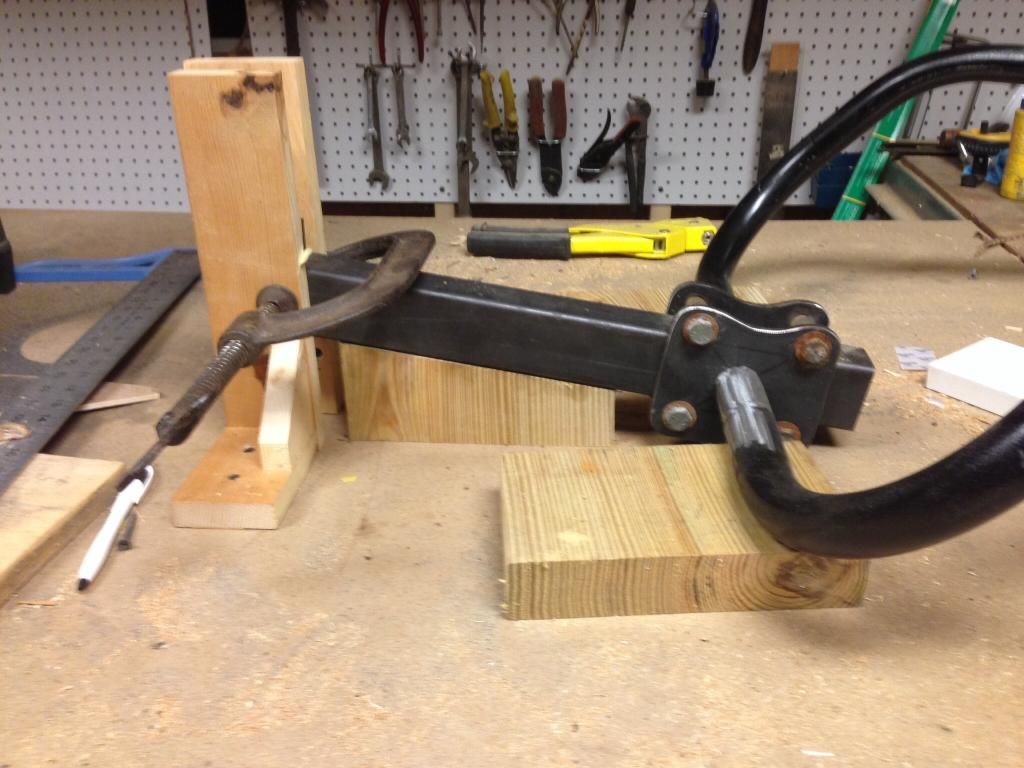
I have to admit it's been too long since I've done any welding, and I'm quite ashamed of the poor quality of welds I created,... So much so that I'm
not going to show you any pictures of them. I did a bit of work with the angle grinder and cleaned one of them up.
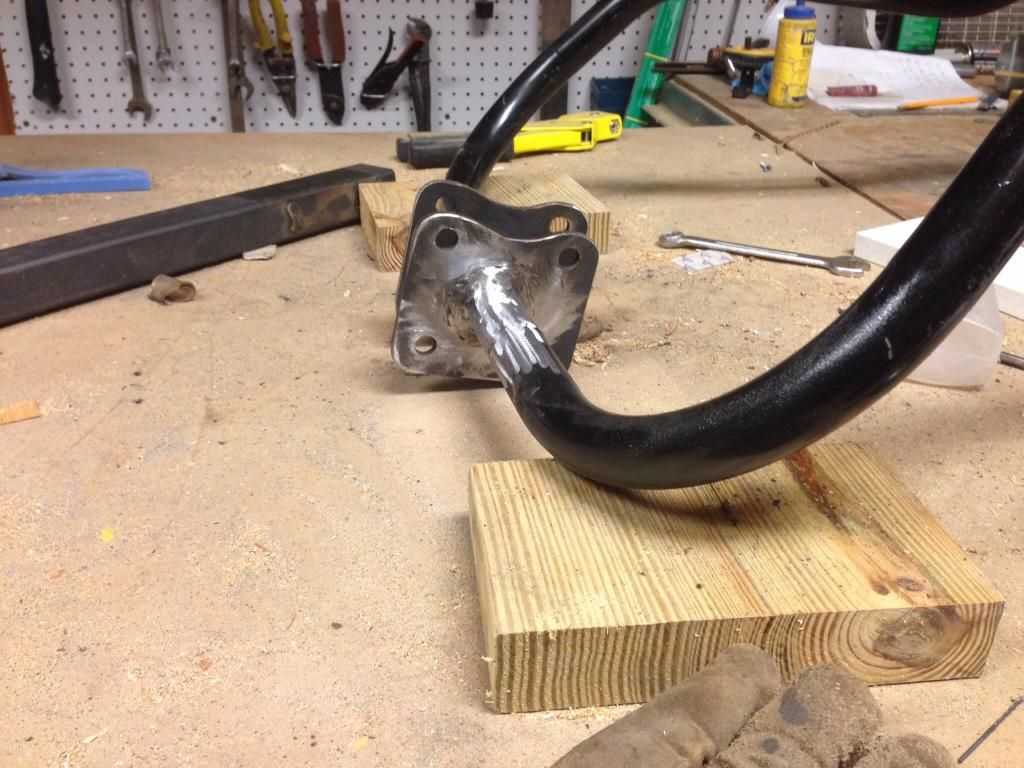
Tomorrow, I'm planning to finish grinding the new clamp and then rework the downtube.
I'm going to take a nap now
|
|
|
soliver
Posting Freak
    
Posts: 3913
Registered: 15-12-2011
Location: somewhere, far, far away
Member Is Offline
Mood: sleepy
|
|
Back out to the shop last night to finish up the fabrication. I finished up grinding the other clamp and then cut and altered the existing downtube,
in order for it to specifically fit the new clamp.
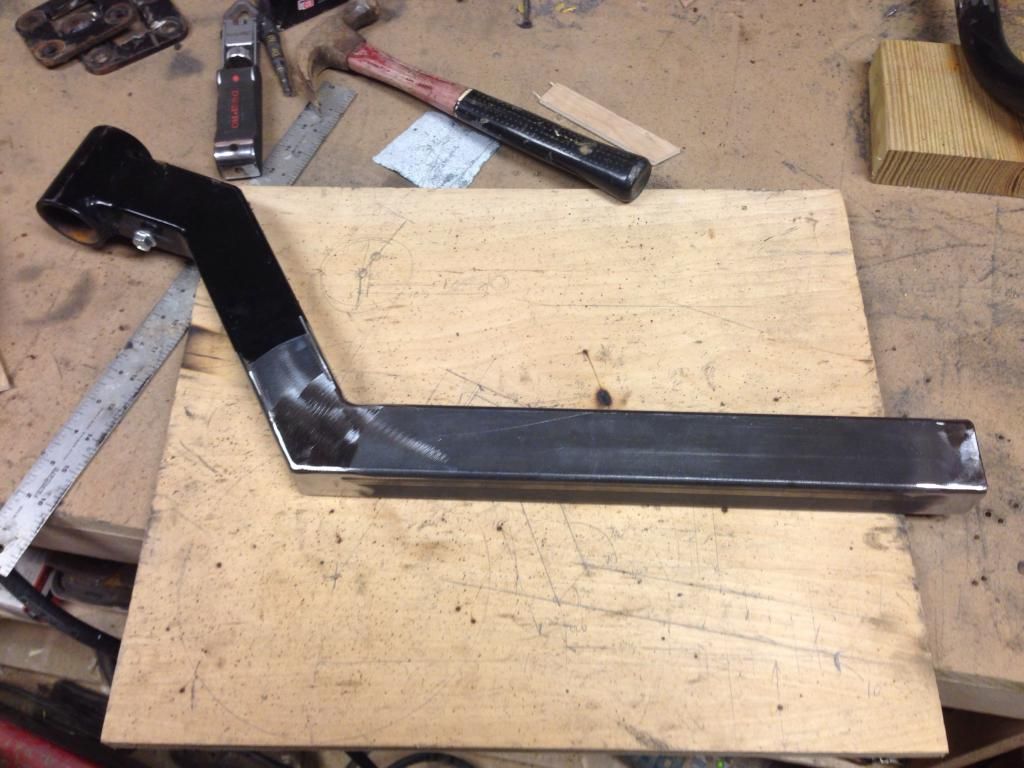
So I put it together to have a look-see and by measuring, I've added 5-6 inches of length.
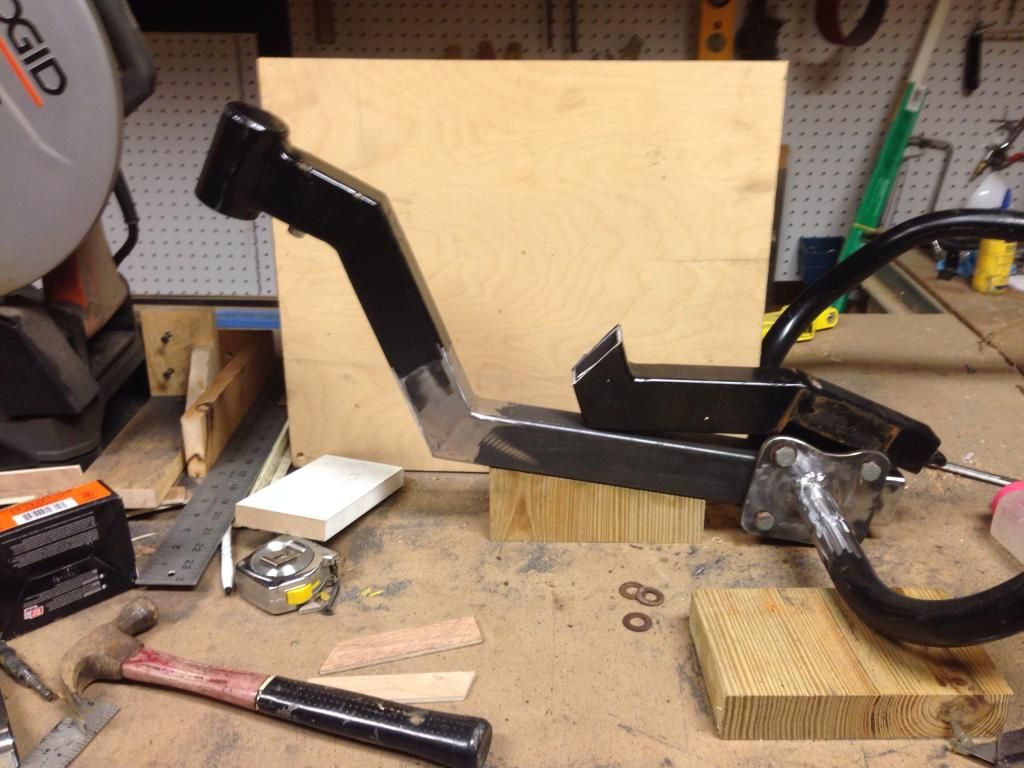
Can't wait to see it all painted and put together! 
I'm going to take a nap now
|
|
|
3shot
Posting Freak
    
Posts: 2631
Registered: 14-2-2013
Location: Virginia
Member Is Offline
Mood: JIBE Talkin'
|
|
Looking good bro! That 5 or 6" of adjustment will make all the difference in the world! 
Cross Kites Sonic 3, 5m
Ozone Flow 2, 3, 4, 5m
Ace II 4, 5m
NAPKA-US24
4, 5, 6m ATB landsurfer. Custom longboard deck
Buggy: VTT Black Widow v2.0
  http://hint.fm/wind/
|
|
|
soliver
Posting Freak
    
Posts: 3913
Registered: 15-12-2011
Location: somewhere, far, far away
Member Is Offline
Mood: sleepy
|
|
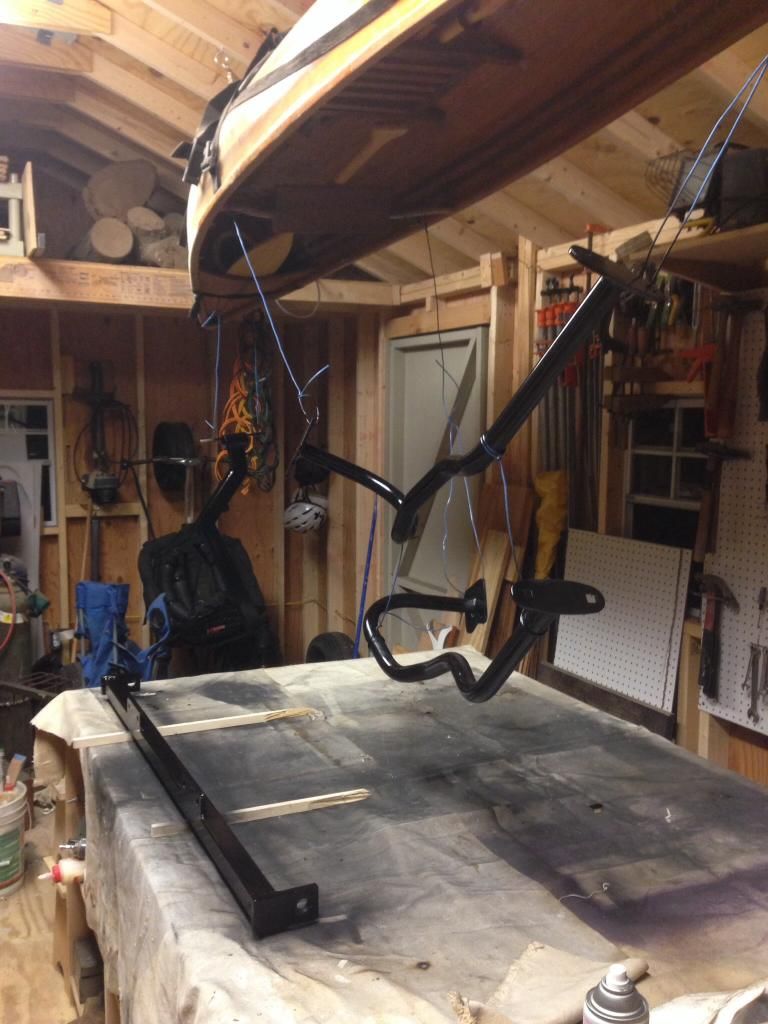
Looks like a kite buggy bone yard hanging from a canoe.
I'm going to take a nap now
|
|
|
ssayre
Posting Freak
    
Posts: 3588
Registered: 15-8-2013
Location: Indiana
Member Is Offline
|
|
Do you have it back together? Hopefully you get to try it out soon. Or go canoeing, either one would be fun.
|
|
|
soliver
Posting Freak
    
Posts: 3913
Registered: 15-12-2011
Location: somewhere, far, far away
Member Is Offline
Mood: sleepy
|
|
I've been letting the paint cure for a few days, and today I picked up new hardware for the clamp since the old stuff was all rusted. After the girls
were all in bed, I was out to the shop to reassemble the bug. Last night I reattached the padding and covers over the rails so tonight it was just a
matter of nuts and bolts.
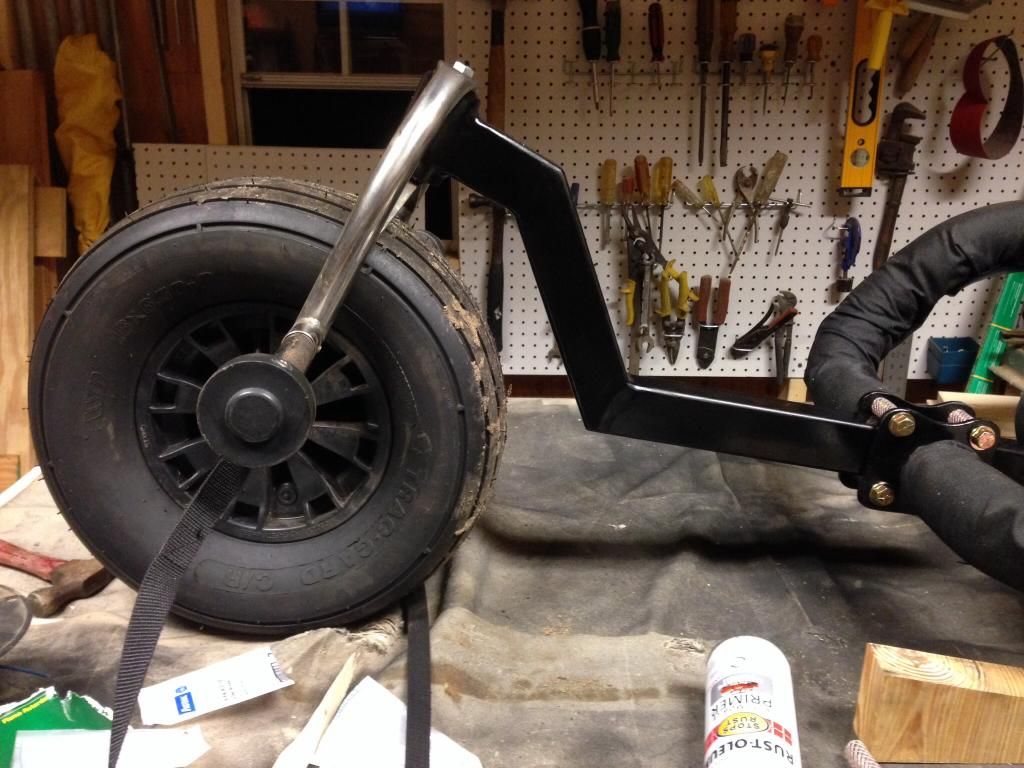
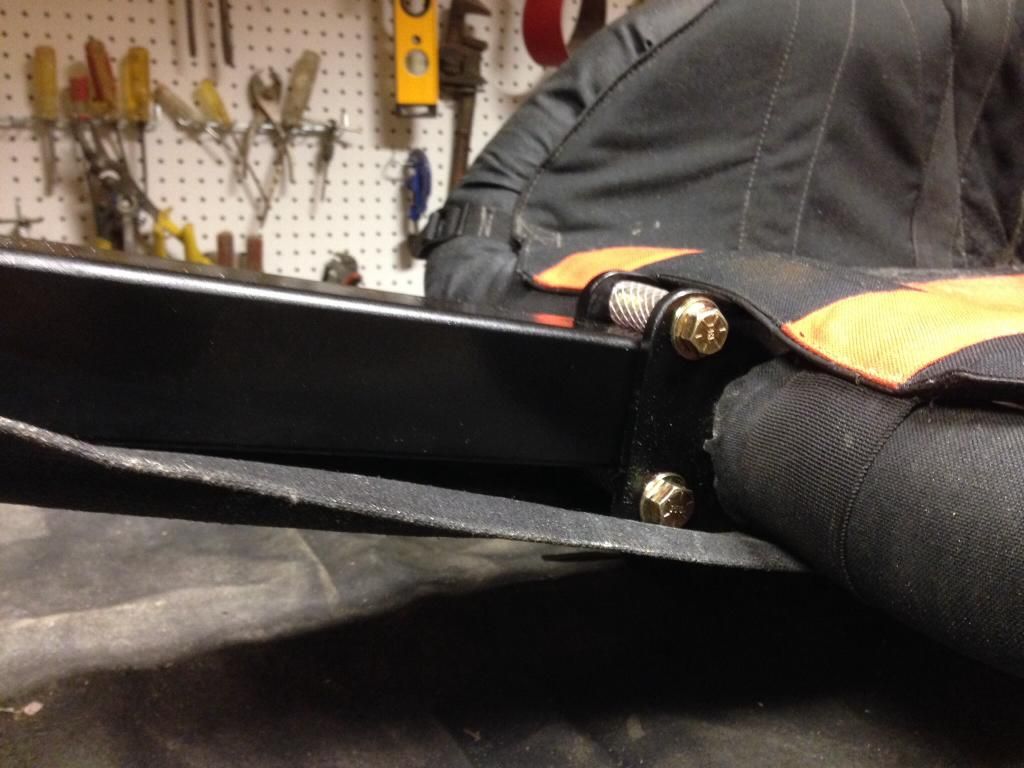
Here is a close-up of the clamp lookin' pretty and new with fancy grade-8 hardware.

And the clamp all together with the new downtube. I've definitely added a good 5" of length.
Add the seat, clean off the table and shoot some pics and he's all done. I could tell it's been a while because the seat still had sand in it from
JIBE...
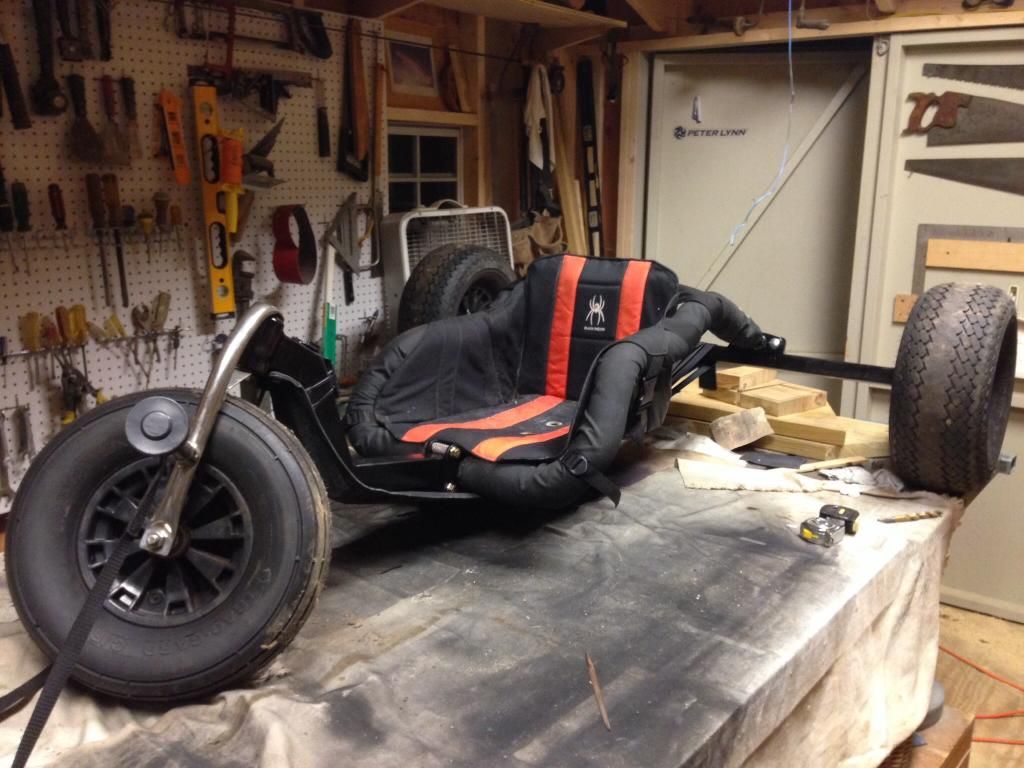
IMHO, it looks totally bad@55
Those 5" make the whole thing look bigger. I am really pleased with the results. As you can see there is a good proper amount of knee bend (yes I took
off the broken-toe-boot for the pic.)
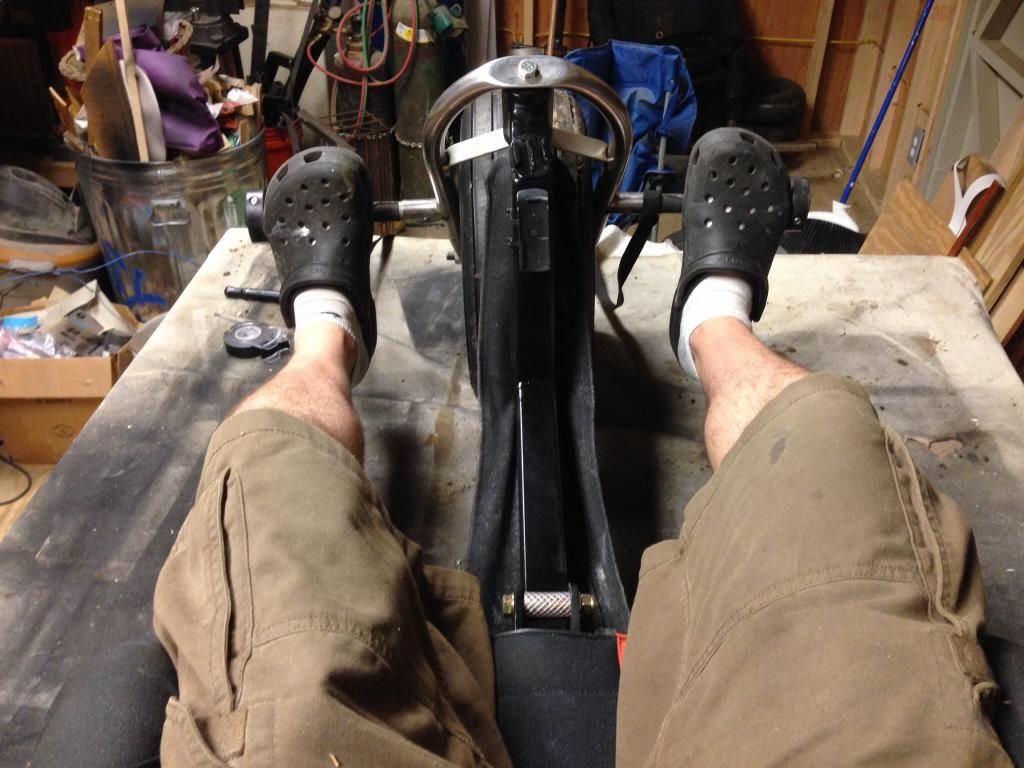
I've got another week in this blasted boot, then I'm off to ride!!!
Tomorrow afternoon, I'll take him out and get some proper pics after work.
I'm going to take a nap now
|
|
|
hywelmartin
Junior Member
 
Posts: 20
Registered: 2-8-2014
Location: Sweden, Halmstad
Member Is Offline
|
|
Looks nice, tinkering is half the pleasure...

Flexifoil Sting 3.3
PL Reactor 2013 4.4
Home made Buggy (316L) http://eth0.se/gHTP
PB at least 51,09 km/h (31,7 mph) |
|
|
soliver
Posting Freak
    
Posts: 3913
Registered: 15-12-2011
Location: somewhere, far, far away
Member Is Offline
Mood: sleepy
|
|
Befores and afters
Ok, so for fun, I thought I'd post some before and after pics so you can see the difference. It may not come across in photo, but it is a big
difference.
So I'll start with all 3 iterations of the VTT Stinger-XR Hybrid buggy:
First, the original version had a VTT Cricket Back axle and a strange attempt at a swan neck downtube on Barrows...
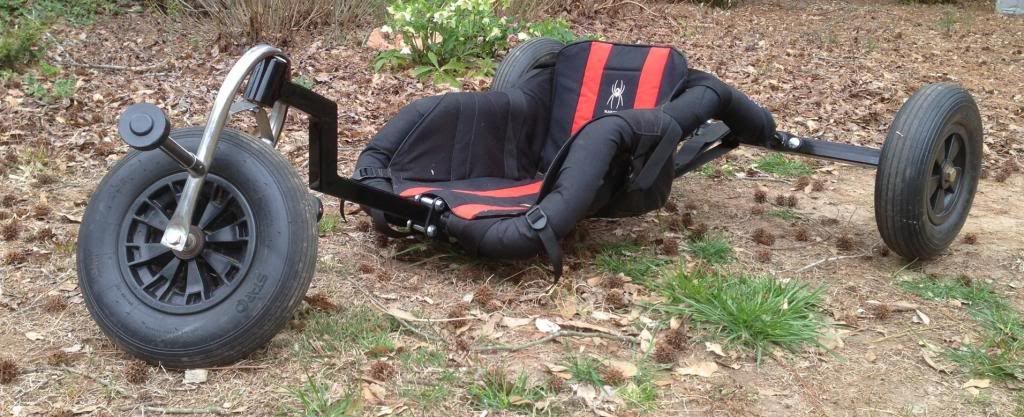
Over time I realized it was too low... cuz my backside kept bumping the ground as I went on rough surfaces, so there was the big upgrade in the
"Raising my ride height" thread. And later I added bigger tires as well...
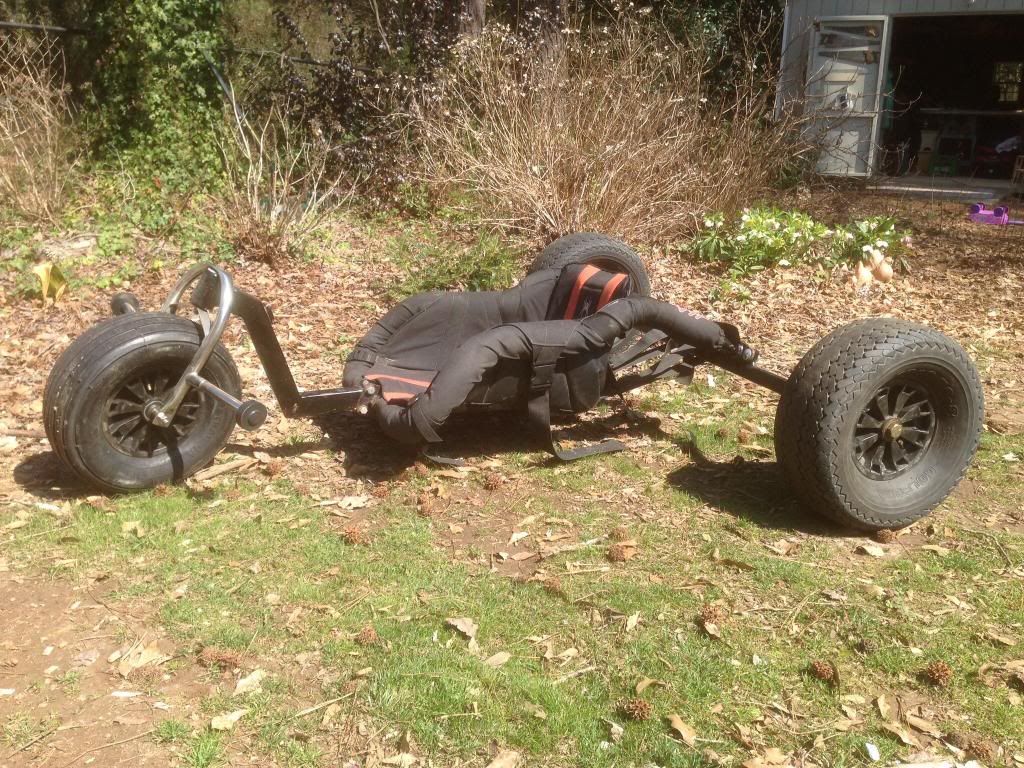
And the newest edition with the revamped clamp and downtube to suite, I've also since made my own splash guard ...
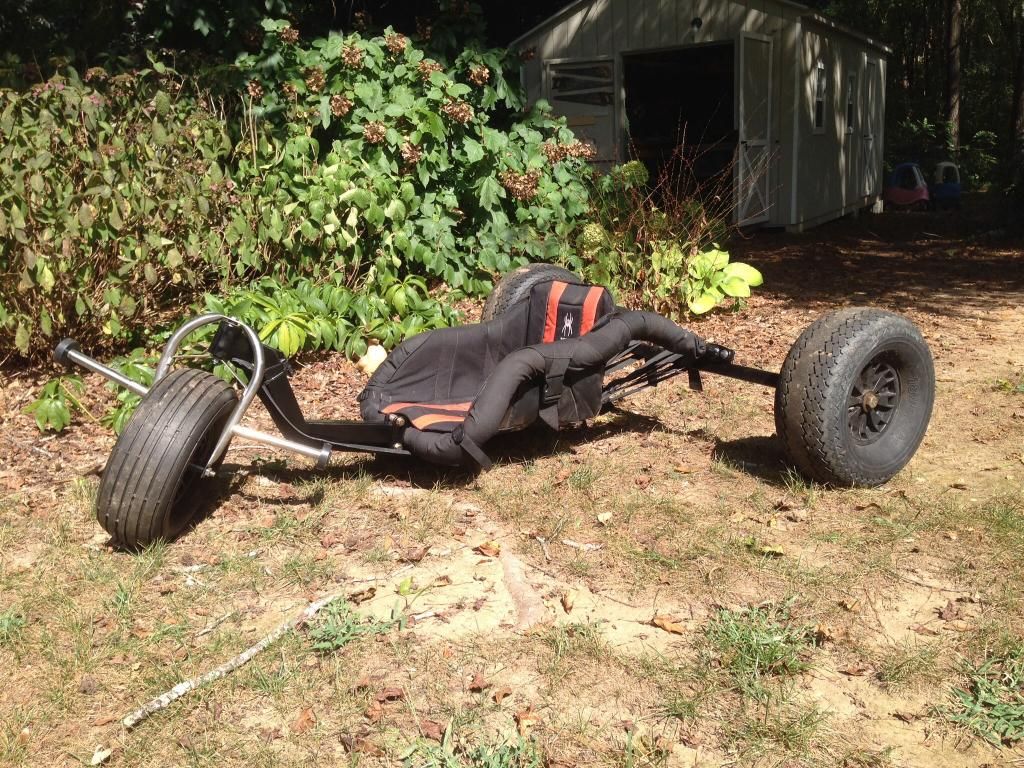
Not sure how visible the difference is, but I know I can feel it. If you look at these awesome pics that Scott took (flyguy0101... thanks buddy), you
can see how much my knees are bent... and I felt it at the end of the day... I'm now realizing how much my butt effects what I do to my buggy.
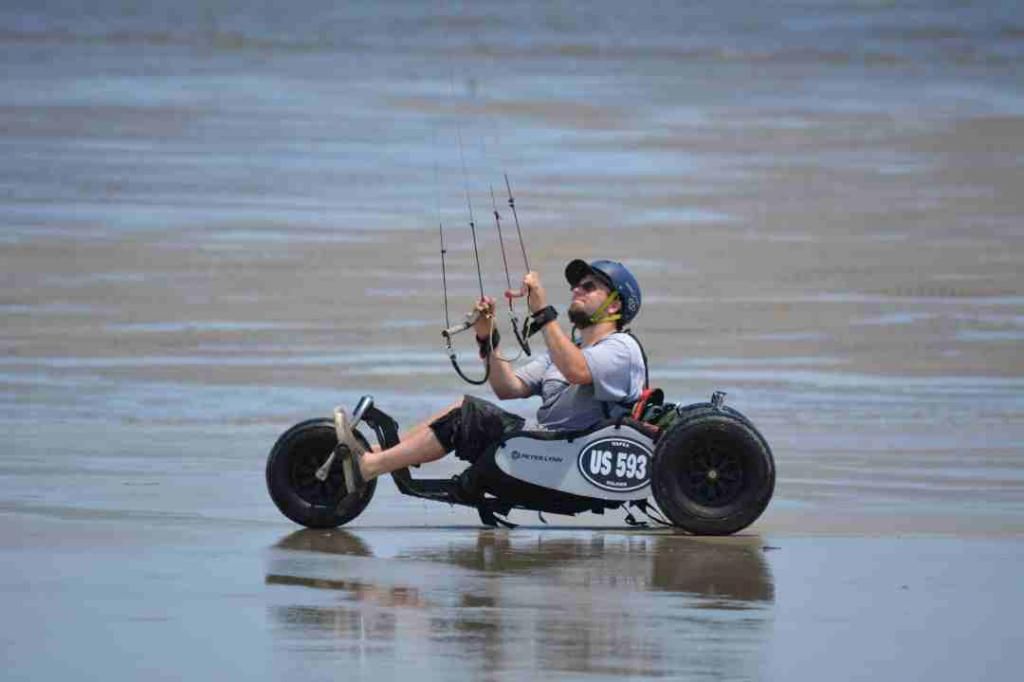
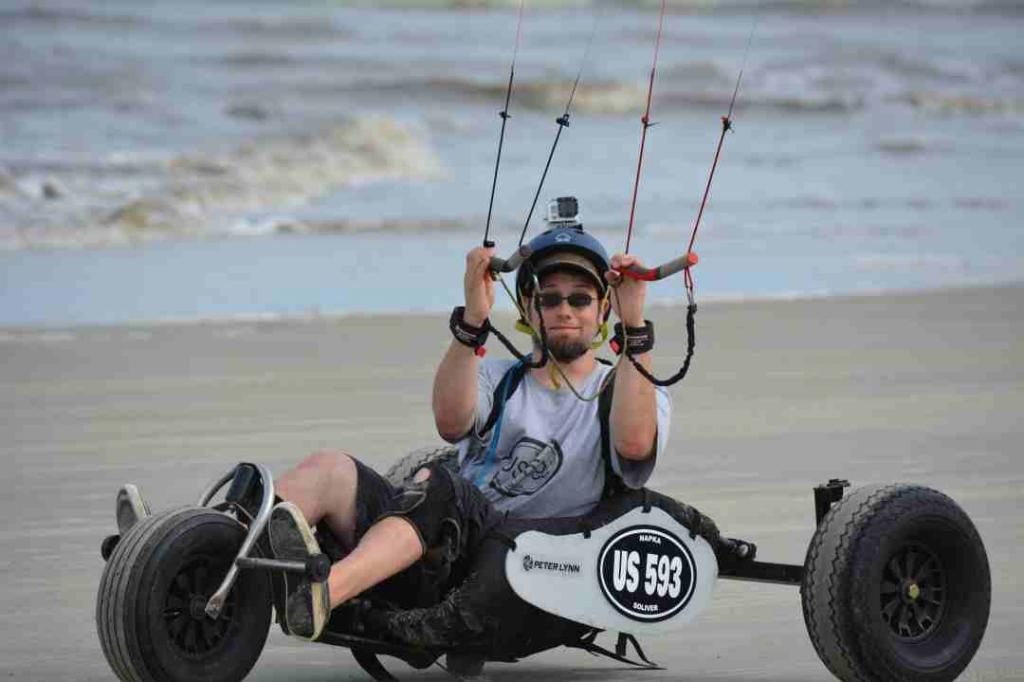
compared with a shot attempted from the same angle...
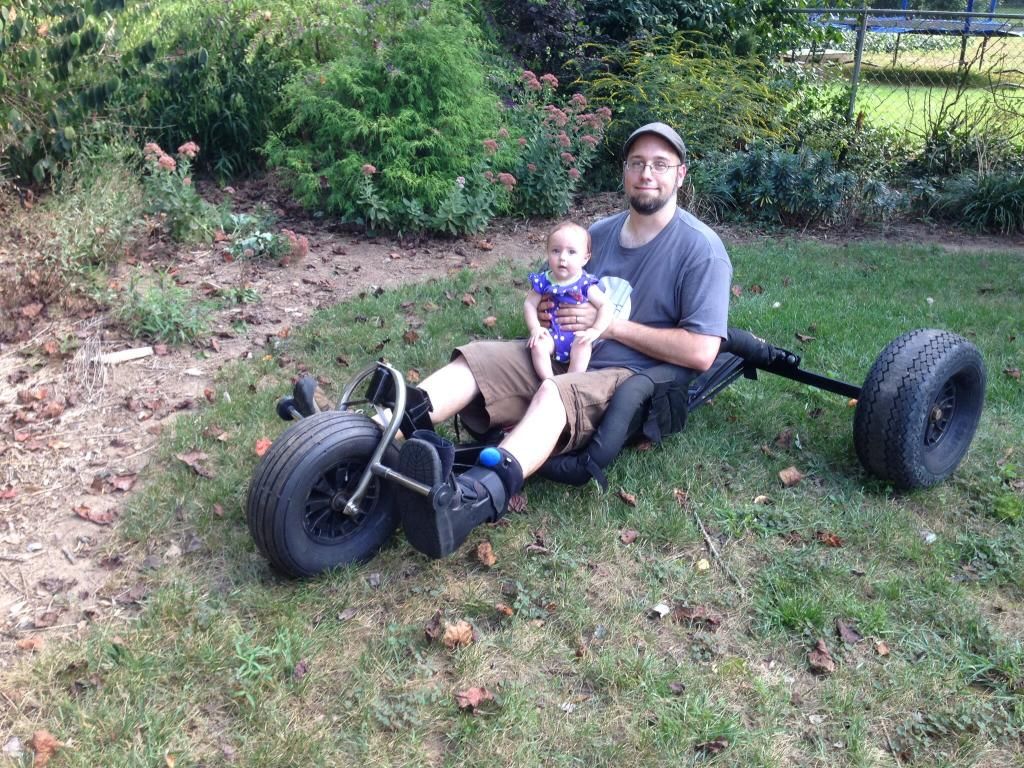
The broken-toe-boot has some effect on the bending of the left knee, but i think you can see the difference in the right leg, what's more I'm noticing
with the downtube stretched like this is that I'm resting the ball of my foot on the pegs rather than the arch ... forgive me showing off the baby too

Thanks for joining me in as I ramble about my doings in the shop ... in another week, I'll be out of this boot and riding.
I'm going to take a nap now
|
|
|
IMK
Junior Member
 
Posts: 68
Registered: 12-3-2013
Location: Australia
Member Is Offline
|
|
Looks really good 
Another upgrade worth doing is to add heel straps. They have a number of benefits:
- you can relax your legs more (important if your out for a long ride)
- less chance of you feet falling off the pegs when going over pot holes etc
- you can ride with straighter legs and still turn tightly because whilst one foot is pushing the other can pull against the heel strap.
You can make some up quickly and for little cost. Let me know if you want some pictures of my set up.
Zebra Z1: 2.5, 3.4, 4, 5m
Nasa Star 2: 1.5, 2.5, 4, 5.5, 7m
HQ Apex III 5m
Zebra Buggy - wide axle
|
|
|
soliver
Posting Freak
    
Posts: 3913
Registered: 15-12-2011
Location: somewhere, far, far away
Member Is Offline
Mood: sleepy
|
|
Yea, IMK, post some pics, I'd love to see.
I'm going to take a nap now
|
|
|
ssayre
Posting Freak
    
Posts: 3588
Registered: 15-8-2013
Location: Indiana
Member Is Offline
|
|
Nice work on both buggy and baby :D
I like IMS-P-A-M-L-I-N-K-s suggestion of adding heel straps. I don't have any but can certainly imagine them making it even more comfortable and easy
to use.
|
|
|
IMK
Junior Member
 
Posts: 68
Registered: 12-3-2013
Location: Australia
Member Is Offline
|
|
Home made heel straps
I clamped some mountain bike head stems onto my foot pegs so that I could fix the straps at the ends. For straps I used 50mm (2 inch) wide snatch
straps / recovery straps available from most auto shops.
 
The metal buckles make it easy to adjust. The buckles were left over from my daughter's baby car seat. You can buy spares from most places that sell
baby car seats (they are used to cinch the seat belts together). My heel straps have held up to some serious abuse whilst buggying through pot holes
the size of pumkins and are still going strong.
I believe John Holgate uses seat belt material for his heel straps.

With your style of foot pegs I've see people clamp on bicycle handle bar ends. These can be bought as either straight or bent. I've mostly seen
people use the bent variety.

If you go this route all you need to do is loop one end of the strap around the handle bar ends and the other through the top of your fork. You'd
need buckles at the ends of each the strap to make the loops (i.e. 4 buckles and 4 loops in total). This would then be similar to John's set up
(although his buggy comes with the foot peg ends installed).
You could always create a fixed loop at one end the heel strap (e.g. sew or install eyelets) and just use buckles at the other ends.
Zebra Z1: 2.5, 3.4, 4, 5m
Nasa Star 2: 1.5, 2.5, 4, 5.5, 7m
HQ Apex III 5m
Zebra Buggy - wide axle
|
|
|
soliver
Posting Freak
    
Posts: 3913
Registered: 15-12-2011
Location: somewhere, far, far away
Member Is Offline
Mood: sleepy
|
|
Very cool... I may eventually do that ... its been SO long since I've ridden that for now I just wanna get rolling. Its been unseasonably windy this
summer and I've been so busy with school and work that I had to just watch the trees sway ... but now (in a week when I'm "healed") I'm ready to get
out there!!!
Thanks for sharing IMK!
I'm going to take a nap now
|
|
|
3shot
Posting Freak
    
Posts: 2631
Registered: 14-2-2013
Location: Virginia
Member Is Offline
Mood: JIBE Talkin'
|
|
Good work bud. Looks great. Agree with IMK. Stirrups are nice for straight leg ridin'.
Cross Kites Sonic 3, 5m
Ozone Flow 2, 3, 4, 5m
Ace II 4, 5m
NAPKA-US24
4, 5, 6m ATB landsurfer. Custom longboard deck
Buggy: VTT Black Widow v2.0
  http://hint.fm/wind/
|
|
|