soliver
Posting Freak
    
Posts: 3913
Registered: 15-12-2011
Location: somewhere, far, far away
Member Is Offline
Mood: sleepy
|
|
Fixing up the XR+
You guys may remember this thread http://www.powerkiteforum.com/viewthread.php?tid=30884#pid29... where I repaired the damaged caused by Galvanic Corrosion.
Well, I took the XR out for a session about a month ago and found that all of my work had been for naught, because my welds essential just crumbled in
the jarring of the ride... it was an awesome session, but it had unforeseen consequences.
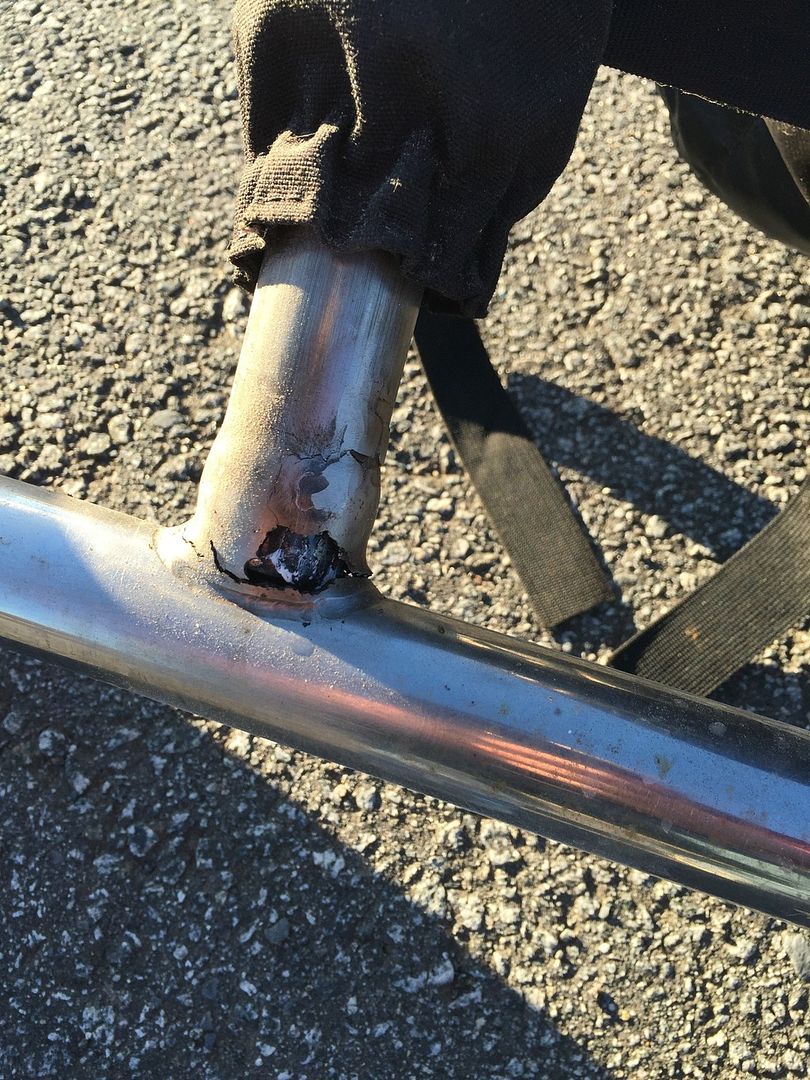
I knew I had to get it up and running for JIBE so I wanted to figure out a way to reattach the back axle without having to try to weld anything to the
stainless again and I didn't want to completely rebuild the axle out of mild steel because I like the light weight of the XR... it is my light wind
buggy. So I came up with this:
First using my angle grinder, I just cut the lugs off of the back axle and ground down the welds. (forgot to take a picture of that)... 
Then I went to the Metal Supermarket and bought 2x 1.5 inch lengths of 2 inch OD diameter pipe with ,25 inch wall thickness and cut it inn half down
the 1.5 inch length like so:
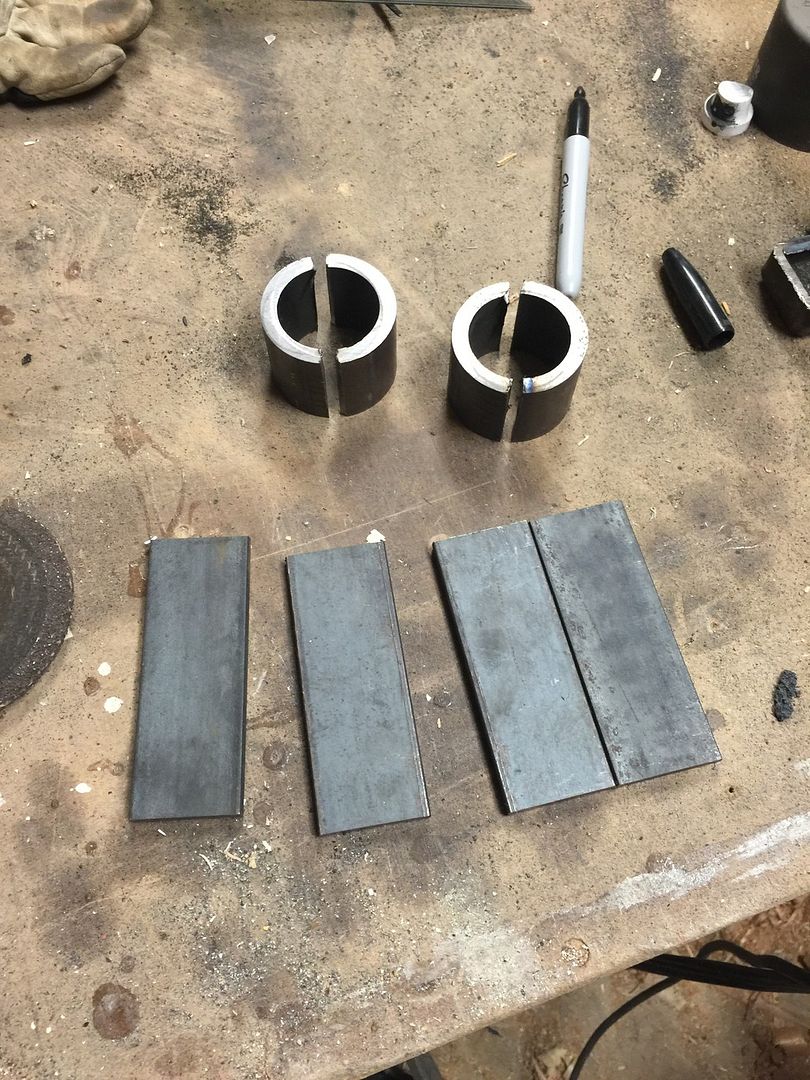
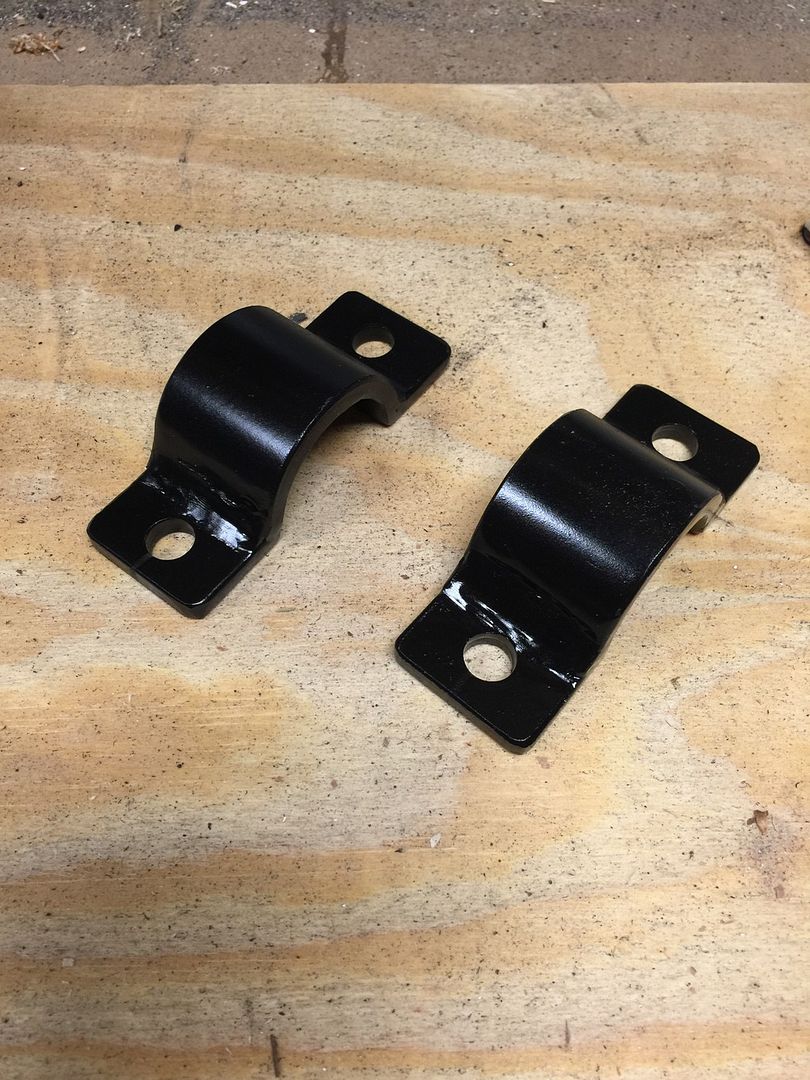
I also bought 4x 4 inch lengths of 1.5x.25 inch flat bar and welded the half moon shaped pipe pieces to 2 of the pieces of flat bar, then cut the
center out of the flat bar:
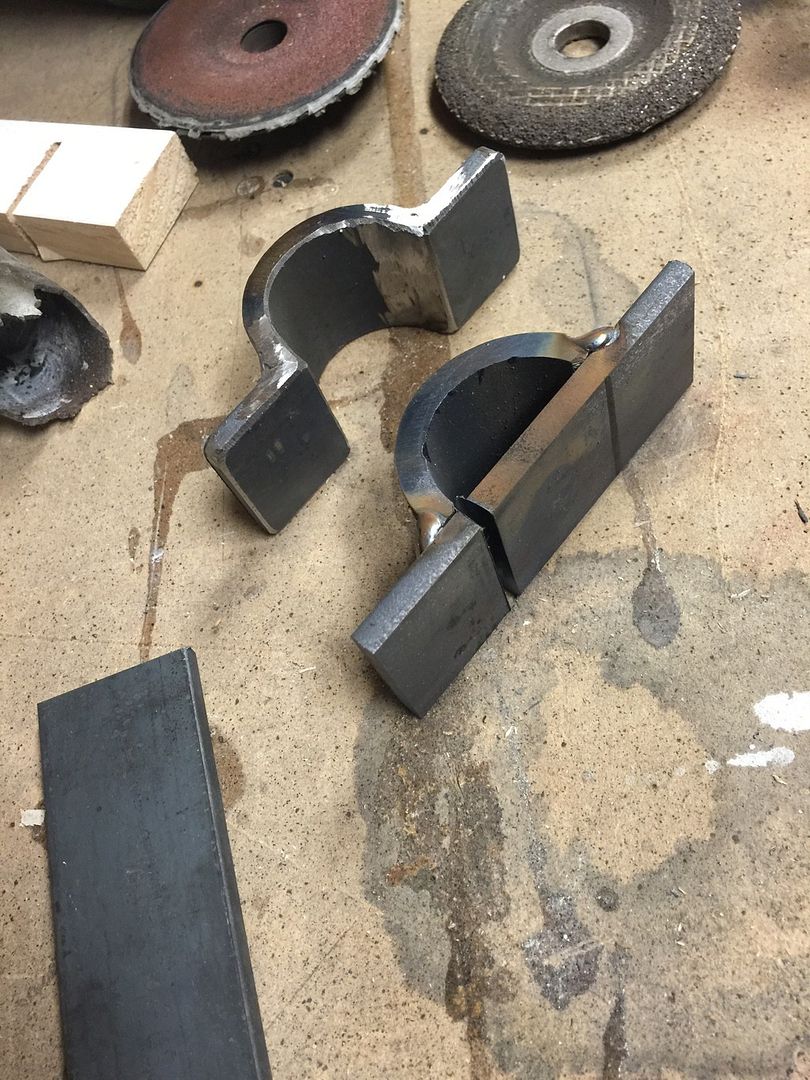
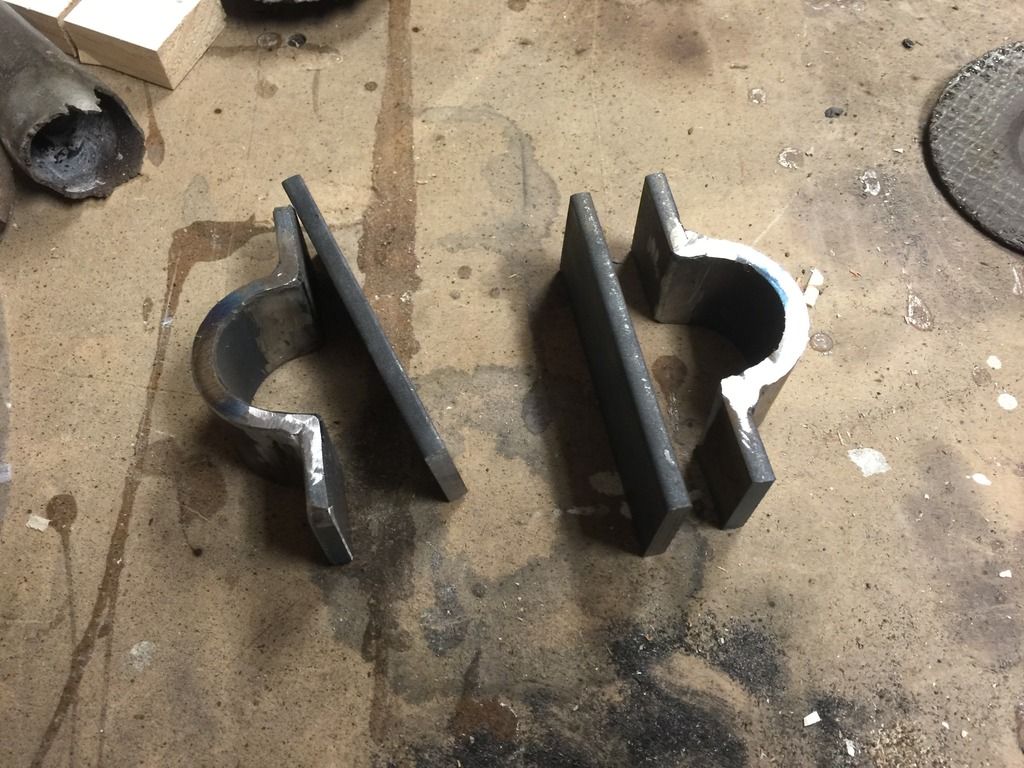
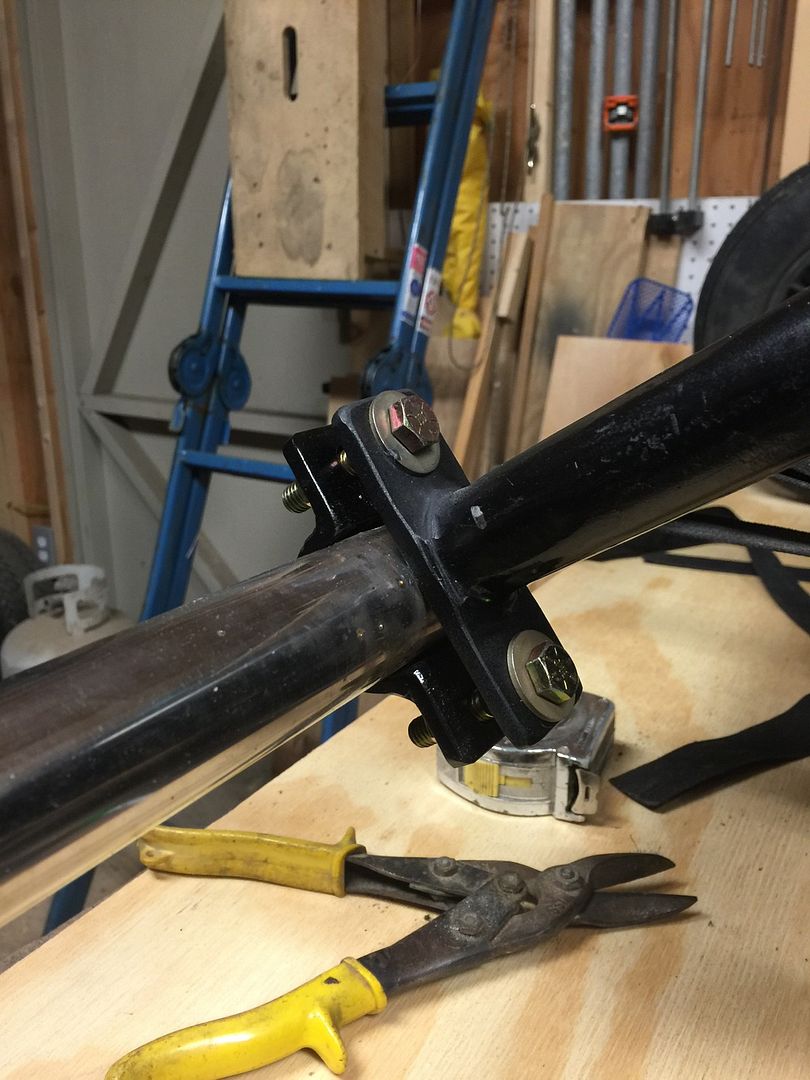
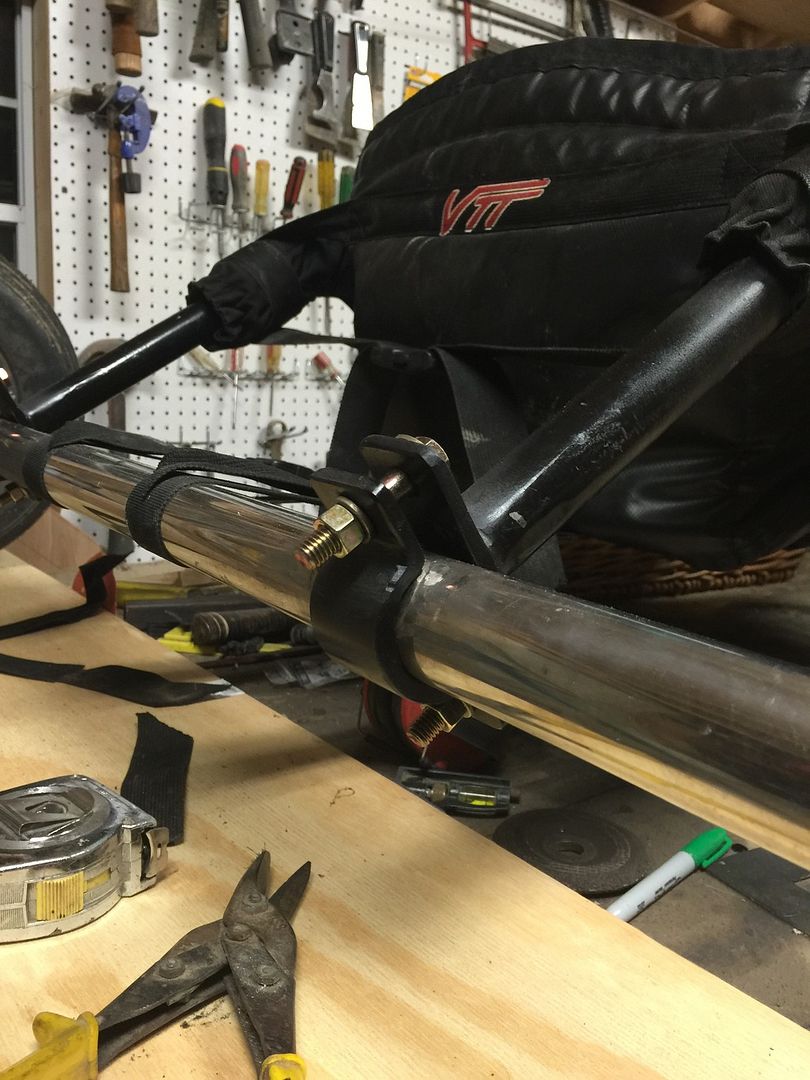
And paired with the other pieces of flat bar they will act as clamps to clamp the back axle to the rails. With that in mind the other 2 pieces of flat
bar are welded to the back ends of the rails and I sprayed some fresh paint to both rails to protect the new and old metal. Quite a bit of rust had
accumulated so I did some sanding and grinding before painting.
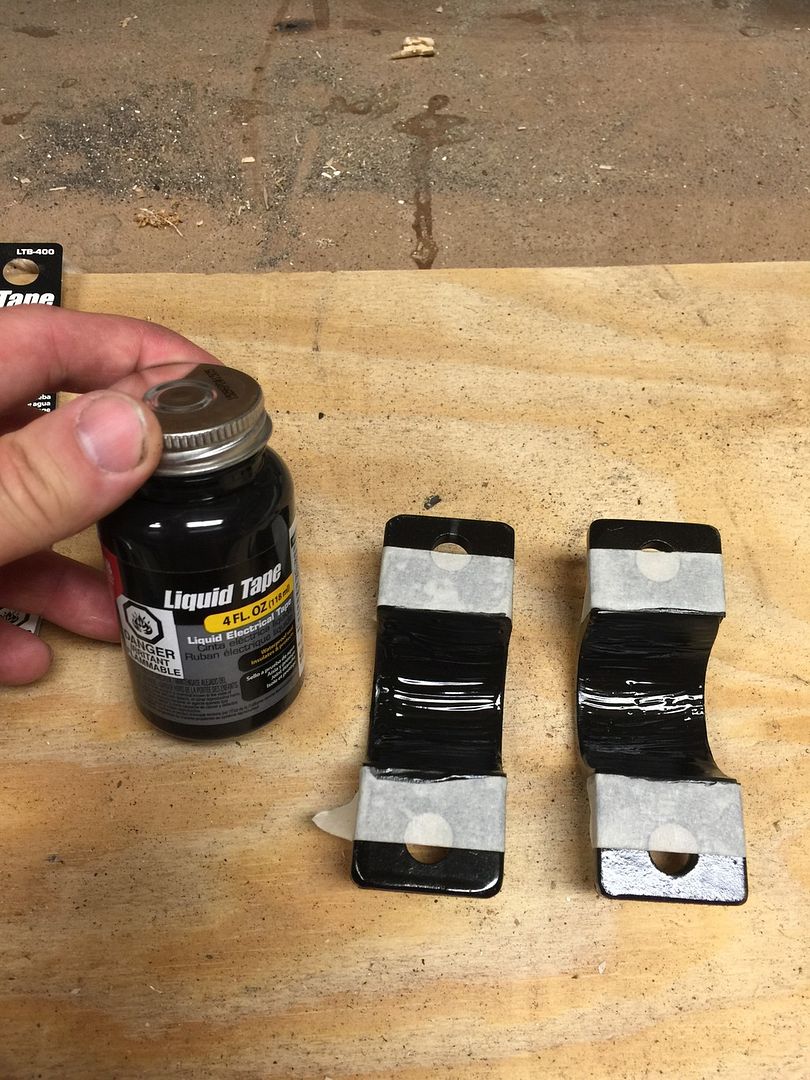
I also added a layer of paint on liquid electrical tape to act as a little sticky layer to help hold the axle in place
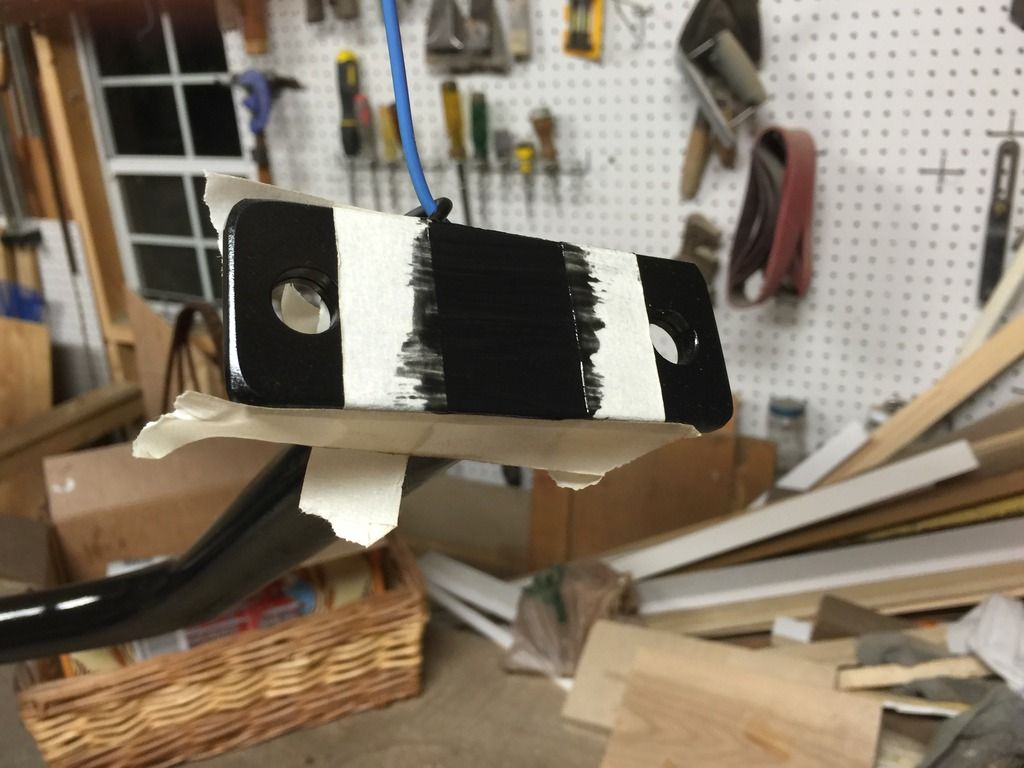
I also got all new hardware for this bug because the old stuff had gotten quite corroded. Once all the parts are assembled:
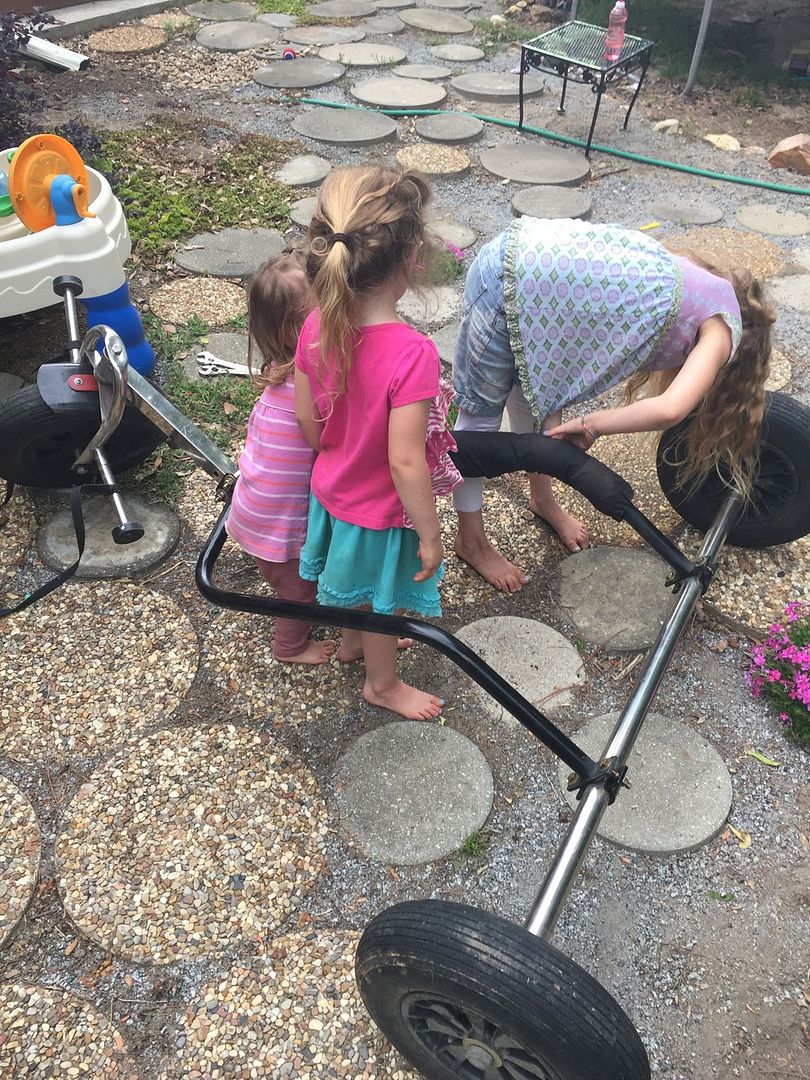
And I got my little helpers to help me put "their" buggy back together:
The only thing I have left I need to do is to add a little grip tape to the foot pegs. I found while riding this buggy last month that my sneakers
kept slipping off the pegs unlike they do on my Stinger XR Hybrid on which I have grip tape. I am very please at how it turned out.
I also added about 12 inches of length to my tandem rig for this buggy because wifey told me she was always afraid her knees were going to hit the
back wheels of the Stinger (buggy towing the XR).
See y'all a JIBE!!
I'm going to take a nap now
|
|
|
ssayre
Posting Freak
    
Posts: 3588
Registered: 15-8-2013
Location: Indiana
Member Is Offline
|
|
That's sweet spencer. When you get the time, you should build yourself a complete buggy since you can weld. or at least a kitebike to try at jibe
|
|
|
soliver
Posting Freak
    
Posts: 3913
Registered: 15-12-2011
Location: somewhere, far, far away
Member Is Offline
Mood: sleepy
|
|
Quote: Originally posted by ssayre  | | That's sweet spencer. When you get the time, you should build yourself a complete buggy since you can weld. or at least a kitebike to try at jibe
|
The Only part of my Stinger XR Hybrid that I haven't done any work to is the front fork and I have contemplated building one to fit another Golf cart
8.5x8.5 sized tire. But am really pretty happy with it as is... Plus I don't have much more time to devote to it.
The rails are Van's first iteration of the stinger and he modified them in order to fit the down tube of an XR and I remodded them so the clamp would
fit a 1.5x2" rectangle tube more like a race buggy's downtube.... I'm not sure I could handle the tube bending honestly.
Money and time are both things that I lack an excess of!
I'm going to take a nap now
|
|
|
bigkid
Posting Freak
    
Posts: 4178
Registered: 12-4-2009
Location: Somewhere over there -->
Member Is Offline
Mood: :-)
|
|
I see the 3 inspectors were doing their job. 
Appex buggy, Libre hardcore buggies.
Flexboardz. Blokarts.
PKD Century Soulflys. NPW's. Nasa Stars.
A few other less flown oddballs,
Line sets from 10" to 328" or 2m to 100m.
worlds only AQR that works.
North American distributor for PKD.
"Kite Bugging is not an addiction until you try to quit".
|
|
|
Windstruck
Posting Freak
    
Posts: 3341
Registered: 16-5-2015
Location: St George, UT, USA
Member Is Offline
Mood: Get in my buggy!
|
|
Great work Spencer! Those are some fine helpers you have yourself there. Pimped ride... check. JIBE here you come!!!
Born-Kites:
RaceStar+ (3.0m, 5.0m, 7.0m, 9.0m)
NasaStar-5 (2.5m, 4.0m)
NasaStar-4 (2.5m)
NasaStar-3 (3.2m)
Ozone kites:
Access (6.0m)
Flysurfer Kites:
Peak-5 (2.5m)
Buggy:
Peter Lynn BigFoot+ nose & tail; midsection VTT rail & seat kit; home-brewed AQR
NAPKA Member US2815
SWATK Member UT0003
|
|
|
3shot
Posting Freak
    
Posts: 2631
Registered: 14-2-2013
Location: Virginia
Member Is Offline
Mood: JIBE Talkin'
|
|
Looking good my man! See you in a week.
Cross Kites Sonic 3, 5m
Ozone Flow 2, 3, 4, 5m
Ace II 4, 5m
NAPKA-US24
4, 5, 6m ATB landsurfer. Custom longboard deck
Buggy: VTT Black Widow v2.0
  http://hint.fm/wind/
|
|
|
soliver
Posting Freak
    
Posts: 3913
Registered: 15-12-2011
Location: somewhere, far, far away
Member Is Offline
Mood: sleepy
|
|
Quote: Originally posted by Windstruck  | | Great work Spencer! Those are some fine helpers you have yourself there. Pimped ride... check. JIBE here you come!!! |
HA!... That's only 3/4 of the team!... I didn't get a good shot with all 4  ... They
all helped though. I actually had them each (1 at a time) hold one adjustable wrench on a clamp nut while I turned the bold with a second wrench...
Good times. 1 bolt to hold for each girl!
They are all excited to hit the beach!
Indeedy!!!
I'm going to take a nap now
|
|
|
Randy
Posting Freak
    
Posts: 1904
Registered: 20-5-2014
Member Is Offline
|
|
Impressive work Spencer.
NPW Test Pilot -US99
|
|
|
WELDNGOD
Posting Freak
    
Posts: 5143
Registered: 11-10-2006
Member Is Offline
Mood: Dyin' to go flyin'
|
|
My only concern is the flat half of your clamp....If you kink or ovalize that axle tubing,it's going to collapse under load. Any dent or kink is going
to become a stress riser and is the point of failure.When we make hanger clamps ,each half is not quite half round, and you should not be able to make
the two halves touch when tightened. What did you weld the stainless with??
WELDNGOD on VIMEO
https://vimeo.com/user2580342
NAPKA US187
PKD
Combat 2.4 / 4.2
Century 1.8 / 5.5
Century II 2.2/2.8/3.5/4.5 /10.0
Brooza IV 3.0 prototype
Buster Soulfly 1.5 / 2.2 (KIA)/ 3.3 (lost at sea)
Buster Soulfly PRO 3.3 / 4.4
Buster (gen 1) 5.5
FLEXIFOIL
Sting 1.7 Punk
Rage 2.5 / 3.5/ 4.7
Revolution 1.5 SLE
17 ply Custom TRAMPA w/ verTIGo trucks
2 homebrew buggies,2 homebrew KYTBYKS,1 homebrew tandem trailer
GOPRO 3 WHITE, 3+ BLACK, HERO5 BLACK
CONTOUR HD
LET YOUR SOULFLY!
RIDER for KOKOPELLI KITER
|
|
|
awindofchange
Posting Freak
    
Posts: 1945
Registered: 14-3-2006
Location: Salt Lake City, Utah
Member Is Offline
Mood: Awesome - totally awesome
|
|
Weldingod, the VTT frame rails are steel (as far as I know), so the steel clamps are welded to the steel frame rails, the stainless axle just had the
risers that the rails use to sleeve into cut off smooth. This way there wasn't any stainless welded this time. (Hope that is what you were asking).
|
|
|
WELDNGOD
Posting Freak
    
Posts: 5143
Registered: 11-10-2006
Member Is Offline
Mood: Dyin' to go flyin'
|
|
Yeah Kent,I got that. But half of his clamp is straight not half round. In order to get a good bite on the axle, I would be concerned about crushing
or deforming the axel. We are talking "PeterThin " here.
WELDNGOD on VIMEO
https://vimeo.com/user2580342
NAPKA US187
PKD
Combat 2.4 / 4.2
Century 1.8 / 5.5
Century II 2.2/2.8/3.5/4.5 /10.0
Brooza IV 3.0 prototype
Buster Soulfly 1.5 / 2.2 (KIA)/ 3.3 (lost at sea)
Buster Soulfly PRO 3.3 / 4.4
Buster (gen 1) 5.5
FLEXIFOIL
Sting 1.7 Punk
Rage 2.5 / 3.5/ 4.7
Revolution 1.5 SLE
17 ply Custom TRAMPA w/ verTIGo trucks
2 homebrew buggies,2 homebrew KYTBYKS,1 homebrew tandem trailer
GOPRO 3 WHITE, 3+ BLACK, HERO5 BLACK
CONTOUR HD
LET YOUR SOULFLY!
RIDER for KOKOPELLI KITER
|
|
|
soliver
Posting Freak
    
Posts: 3913
Registered: 15-12-2011
Location: somewhere, far, far away
Member Is Offline
Mood: sleepy
|
|
Thanks for the concern WG, I didn't do any welding on the stainless for this repair. I avoided it because of the Peter thin concerns. I'm not sure
what I may have done wrong on my previous repair (I did use stainless wire in my mig), but it all just crumbled. I have virtually no experience
welding stainless, and much more welding mild steel so I went with a repair strategy that would be easiest for me. I can say that it seemed more
likely to me that the mild steel would bend before the stainless of the axle.
I'm going to take a nap now
|
|
|