riffclown
Posting Freak
    
Posts: 1101
Registered: 8-7-2013
Location: Virginia
Member Is Offline
Mood: rain rain go away...leave some wind so I can play.
|
|
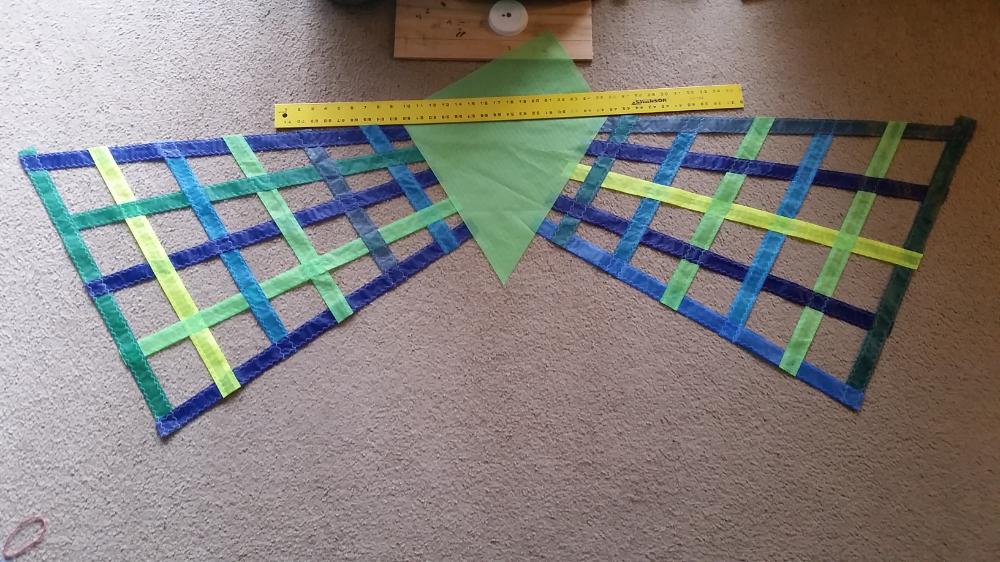
Started another one today
Calling it "Hope of Spring"..
|
|
|
Randy
Posting Freak
    
Posts: 1893
Registered: 20-5-2014
Member Is Offline
|
|
Looks like you are off to a good start!
NPW Test Pilot -US99
|
|
|
riffclown
Posting Freak
    
Posts: 1101
Registered: 8-7-2013
Location: Virginia
Member Is Offline
Mood: rain rain go away...leave some wind so I can play.
|
|
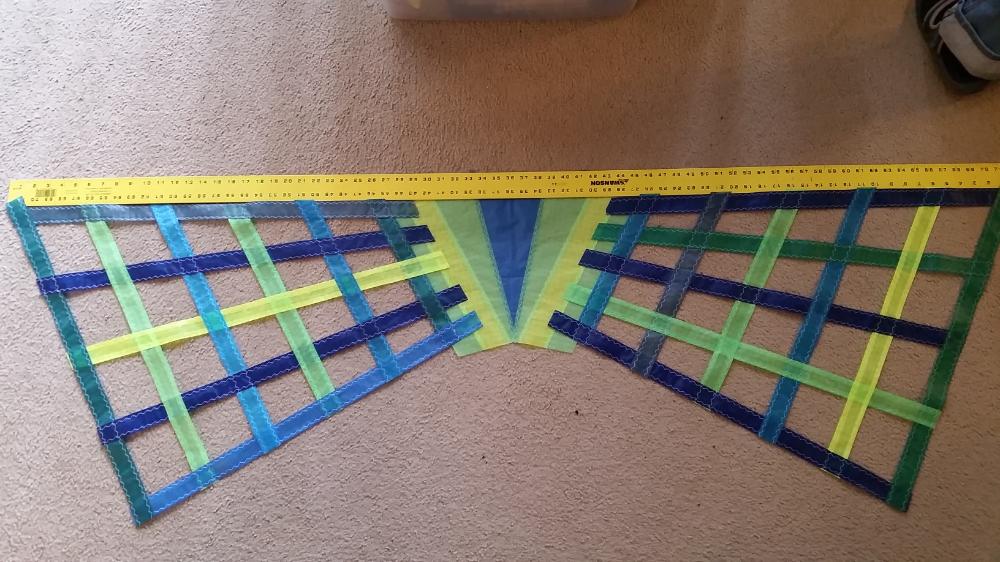
Trying to design the center section today..
|
|
|
riffclown
Posting Freak
    
Posts: 1101
Registered: 8-7-2013
Location: Virginia
Member Is Offline
Mood: rain rain go away...leave some wind so I can play.
|
|
Center Design is complete. Now to start assembly.
|
|
|
riffclown
Posting Freak
    
Posts: 1101
Registered: 8-7-2013
Location: Virginia
Member Is Offline
Mood: rain rain go away...leave some wind so I can play.
|
|
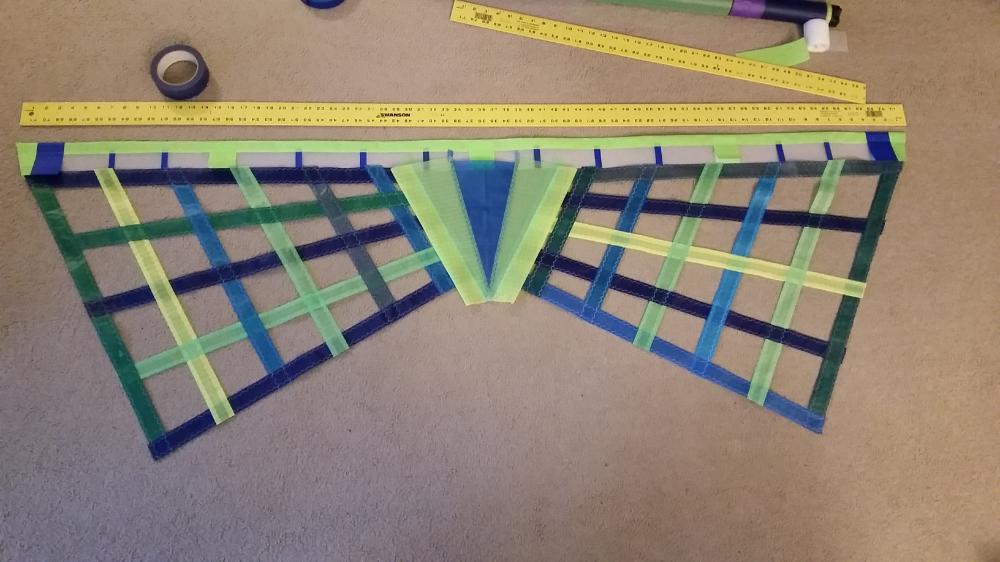
Decided to go ahead and make the LE to compliment the same Spring Colors.
. 
|
|
|
riffclown
Posting Freak
    
Posts: 1101
Registered: 8-7-2013
Location: Virginia
Member Is Offline
Mood: rain rain go away...leave some wind so I can play.
|
|
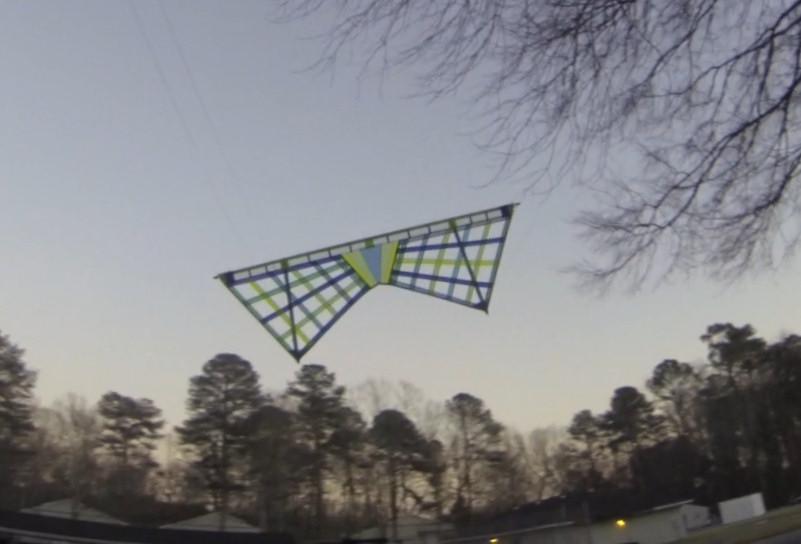
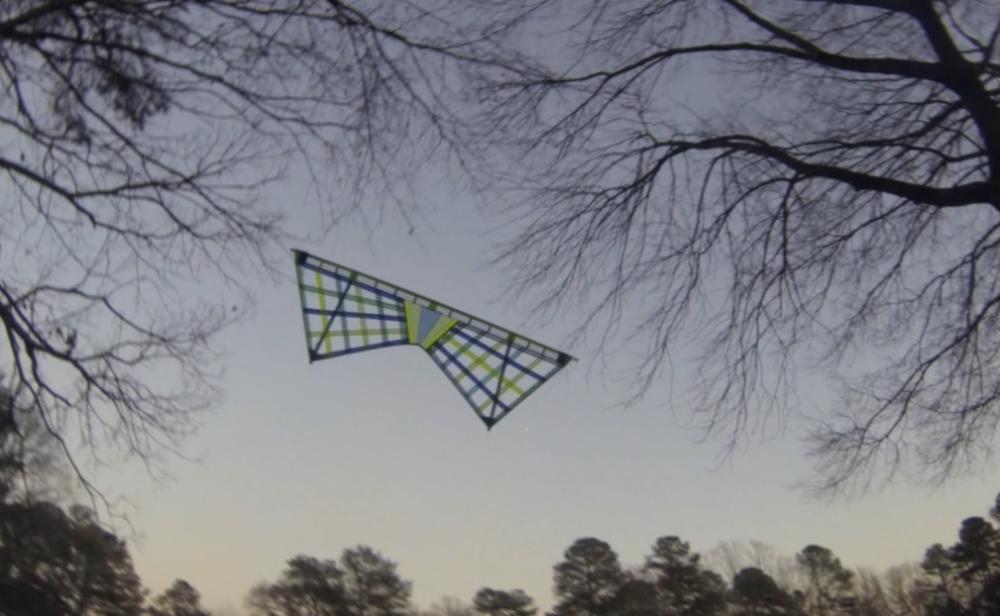
Bridle test went well. Waiting for Wind!!!
|
|
|
Randy
Posting Freak
    
Posts: 1893
Registered: 20-5-2014
Member Is Offline
|
|
That was quick. Like 3 days......And that is a complicated mesh job.
NPW Test Pilot -US99
|
|
|
riffclown
Posting Freak
    
Posts: 1101
Registered: 8-7-2013
Location: Virginia
Member Is Offline
Mood: rain rain go away...leave some wind so I can play.
|
|
It's a smaller kite (72") and the vertical-ish strips are parallel..
Another thing that sped this up a lot was I had the strips already creased and pressed from the last 3 builds so it was almost all pre-folded scraps.
Still learning ways to make this a quicker process though..
|
|
|
tomdiving
Member
  
Posts: 410
Registered: 4-3-2017
Member Is Offline
Mood: thankful for this site
|
|
ok, here's me knowing absolutely zero about making kites or prepping material to make kites...
how do you set the crease in the strips before rolling them in the paper? would a clothes iron help with that? if i wanted a 1" strip, what if i put
a 2" width of material down on top of a length of stainless steel, aluminum, etc. (a metal yardstick, perhaps? then fold the edges of the cloth from
underneath, over the top of the metal, and then just iron that?
what about clamping multiple strips on a piece of plywood or something and then putting that in one of these - https://duckduckgo.com/?t=ffnt&q=pants+steam+press&a...
if that sets and holds a crease, you'd save the day or two of leaving strips in a roll of paper.
i do not have any idea of how the material you're working with may react to the heat of the iron. maybe it does nothing, maybe it does help set an
edge.
how about an old double-roller setup like an (really) old clothes wringer? start the crease, and just roll it through with the handle. - https://duckduckgo.com/?q=clothes+wringer+&t=ffnt&at...
perhaps running the clothes iron over the material while it's in your paper roll?
if you're using a spray glue, then i guess none of this would matter.
just thinking.
tom
|
|
|
riffclown
Posting Freak
    
Posts: 1101
Registered: 8-7-2013
Location: Virginia
Member Is Offline
Mood: rain rain go away...leave some wind so I can play.
|
|
FWIW I don't use glue, tape or heat to make or set the folds. Heat contracts the fabric a bit and then with only a small increase in heat will melt
it quickly after so that is a non-starter for me. The two temps between "help" and "disaster" are too close for my comfort.
I use a straight edge to help make the crease.. I then set the crease by sliding it over the edge of a board or table and finally use the pressure
from the roll of paper to set and flatten the crease. Getting it straight on the longer folds and being consistent is the more difficult parts of the
process.
Incidentally, +/- 1/16" is generally ok but +/- 1/8" starts to get pretty noticeable.
|
|
|